
Introduction
Notes to Proof Readers
Notes to Proof Readers
This IHPA Operations Manual is substantially the same as the BHPA Technical Manual. Where it deviates from the BHPA Technical Manual is in how the various systems are overseen and administered. The UK has a large number of pilots (several thousand) from which the BHPA is able to draw willing volunteers with the necessary expertise and experience to populate the numerous Panels and sub-committees within the BHPA. We don't have that luxury here in Ireland, and all the work of running and overseeing the various systems must be carried out by the Committee and a much smaller number of appointments.
The current BHPA Technical Manual can be downloaded >>here.<< Please download a copy and refer to it when reviewing the IHPA Operations Manual.
Your job as a Proof Reader
As you read through this Ops Manual (making note of any grammatical or spelling errors!) please consider whether the requirements and systems described are appropriate and/or sufficient to the task in hand or whether you think they are too restrictive. Think about how the various systems are to be administered and overseen (and by whom.)
In the BHPA Technical Manual the Flying and Safety Committee is multi-layered and comprises many sub-panels specialising in specific areas of expertise and inquiry. In an effort to simplify matters and to make them more practical to our circumstances (vastly fewer members) I have moved the work and responsibility of all of these sub-panels onto the main Flying and Safety Committee.
Remember that any alternative proposals must be practical, workable and appropriate for the number of pilots in this country. I have omitted some sections of the BHPA Tech Manual (largely the details of Administration) which I felt were not entirely appropriate to such a small organisation as the IHPA - if I have gone too far... say so!
The IHPA Operations Manual is intended to be a living document that will develop with the sport and as circumstances and pilot numbers change with time. It is not intended to be a static document written in stone that cannot be changed.
Operator Endorsements - re: valuable consideration - the current requirements comply with UK law. The IAA have yet to specify what the requirements will be here.
Operator Endorsements - re: coaches - the BHPA coaching system is multi-layered, with Senior Coaches, Club Coaches and various other degrees of coaches. I think this is overkill for our needs and circumstances at the moment, and I propose to reduce this simply to:
- Club Coach - to assist and progress new hill-launch pilots
- Power Coach - to assist existing IPPI-3 pilots to gain a PPG and PHG skill endorsement (subject to IAA approval of this system.)
- Tow Coach - to assist existing IPPI-3 pilots to gain a tow (winch launch) skill endorsement.
Sections of this Ops Manual that require specific review / approval by the IAA
- Introduction - legislation
- Introduction - regulation
- Operator endorsing - tandem (for valuable consideration) / passenger membership conditions
- Operator endorsing - aerotow
- Safety requirements and practices - alcohol / drugs (specific wording from Irish Air Navigation Order required)
- Accident-reporting-and-investigation - investigating and reporting / reportable accidents
- FLPA (flying with a motor / power unit.)
Legislation
Legislation
[Purpose: to show a clear chain of authority for the regulation of HG/PG in Ireland.]
Summary of Legislation
- The European Aviation Safety Agency (EASA) is responsible for aviation safety within the European Union (EU).
- EASA Basic Regulation Annex II states: "Article 4(1), (2) and (3) [of the Basic Regulation] do not apply to"... "(g) gliders with a maximum empty mass, of no more than 80 kg when singleseater or 100 kg when two-seater, including those which are foot launched". This includes single and tandem hang gliders and paragliders as well as powered hang gliders and paramotors.
- Quote the EASA Annex delegating regulatory for HG/PG to individual member states - I can't find this!
- The Irish Aviation Authority (IAA) is responsible for overseeing the regulation of hang gliding and paragliding within the Republic of Ireland (the State.)
- IAA Air Navigation Order (ANO) #1234 has recognised the Irish Hang Gliding & Paragliding Association Ltd. (IHPA) as a Qualified Entity and has delegated regulatory authority for the sport to the Association.
- Scope: The regulation applies to the operation of, and the training to operate all classes of unpowered hang gliders and paragliders as defined by the Federation Aeronautique Internationale (FAI) Sporting Code Section 7A - 1.5, and powered hang gliders and paramotors when the pilot acquires the appropriate Skill Endorsement to an existing Pilot Rating. The regulation is applicable both to residents within the State and to pilots visiting from outside the State.
- The IAA has reviewed and approved the IHPA Operations Manual.
- [BHPA] Under European Union legislation (Directive 94/56 EC) the BHPA is authorised and empowered, under delegated powers afforded by the Department of Transport (Air Accident Investigation Branch) to record, investigate and report all hang gliding and paragliding incidents.
- The Gardai should be advised that the IHPA is the national governing body of the sport and should be encouraged to make contact with the Association regarding any accidents or incidents.
- The IHPA is recognised by the IAA, the National Aero Club of Ireland (NACI), the Irish Sports Council (ISC) and the Federation Aeronautique International (FAI) Commission International de Vol Libre (CIVL) as the National Governing Body for the sports of Hang Gliding (HG) and Paragliding (PG) within the State.
- The IHPA is a member of NACI, through which it gains both membership and recognition by the Federation Aeronautique Internationale (FAI), the FAI's Commission Internationale de Vol Libre (CIVL), the European Hang Gliding and Paragliding Union (EHPU) and Europe Airsports.
- The IHPA is a founding member of the General Aviation Safety Council of Ireland (GASCI).
[NB: The following is for contextual purposes only and will be removed from the final Ops Manual.]
The IAA state: “Currently, the IAA still retains responsibility for hang gliders and paragliders and they are allowed to operate under a General Exemption. We have not delegated this oversight to any outside organisation. This situation is under review as part of the implementation of EASA regulations, however, any body or organisation applying to take over such responsibility may have to meet the requirements for ‘Qualified Entity’ status as set out by EASA in EC Basic Regulation 216/2008." [AAIU Report 2013-005 - State File No.IRL00912028]
EASA (EC) Basic Regulation 216/2008 - Annex V - Criteria for qualified entity referred to in Article 13 states:
1. The entity, its Director and the staff responsible for carrying out the checks, may not become involved, either directly or as authorised representatives, in the design, manufacture, marketing or maintenance of the products, parts, appliances, constituents or systems or in their operations, service provision or use. This does not exclude the possibility of an exchange of technical information between the involved organisations and the qualified entity.
- The Officers, Directors and Trustees of the IHPA already fully comply with this requirement.
2. The entity and the staff responsible for the certification tasks must carry out their duties with the greatest possible professional integrity and the greatest possible technical competence and must be free of any pressure and incentive, in particular of a financial type, which could affect their judgment or the results of their investigations, in particular from persons or groups of persons affected by the results of the certification tasks.
- Officers, Directors and Trustees of the IHPA are all unpaid volunteers, elected to their posts by the membership.
- The IHPA requires verifyable documentary evidence (from a training school or foreign licencing authority) before it will issue or confer pilot ratings or skill endorsements.
- The Training & Flight Safety Officer (tasked with the verification and issuing of Pilot Ratings) is required to keep a physical paper trail of all rating applications from newly trained and foreign trained pilots.
3. The entity must employ staff and possess the means required to perform adequately the technical and administrative tasks linked with the certification process; it should also have access to the equipment needed for exceptional checks.
- The IHPA, in common with the majority of HG/PG NGBs worldwide, does not certify paragliding or hang gliding equipment directly, but requires pilots to fly with equipment that has been certified by one of the international certification bodies (DHV, EN, BHPA, others?)
- Annual equipment checks are normally carried out by externally licenced businesses in the UK or Europe.
4. The staff responsible for investigation must have:
· sound technical and vocational training,
· satisfactory knowledge of the requirements of the certification tasks they carry out and adequate experience of such processes,
· the ability required to draw up the declarations, records and reports to demonstrate that the investigations have been carried out.
- The IHPA Training & Flight Safety Officer is required to investigate and report on all accidents and potentially serious incidents.
- In the event of a serious accident the Training and Flight Safety Officer will convene a panel of senior pilots with the appropriate expertise to investigate, report and make appropriate safety recommendations.
- All accident investigation reports are already published on the IHPA website so that all pilots can learn and hopefully avoid making the same mistakes.
5. The impartiality of the investigation staff must be guaranteed. Their remuneration must not depend on the number of investigations carried out or on the results of such investigations.
- IHPA Officers, Directors and Trustees are all unpaid volunteers and have nothing to gain personally (or for the Association) by not acting impartially.
- The sole purpose of IHPA accident investigations is to help its members understand the circumstances of an accident and to learn from it.
6. The entity must take out liability insurance unless its liability is assumed by one Member State in accordance with its national law.
- The IHPA is a Registered Company, Limited by Guarantee. All members and officers of the Association are required to hold Personal Liability Insurance to a minimum value of €2,500,000.
7. The staff of the entity must observe professional secrecy with regard to all information acquired in carrying out their tasks under this Regulation.
- As part of the Membership Registration process the IHPA gives the assurance that it will never share or impart the personal records of its members with any outside entity or organisation without the written permission of the member. It is a policy of the IHPA to anonymise all accident reports unless released by the parties concerned.
Regulation
Regulation
Details of the Regulation (and ANO)
- The National Pilot Rating System in Ireland is the FAI / CIVL's Safe Pro (hang gliding) and Para Pro (paragliding) pilot rating system.
- All pilots are required to complete or have completed a structured course of theoretical and practical tuition at a school endorsed by the IHPA or, if training is undertaken outside the State, at a school regulated or licenced by the appropriate National Governing Body of that country.
- All HG and PG pilots are required to hold and maintain a validated FAI International Pilot Proficiency Identiry (IPPI) card with a minimum Pilot Rating of IPPI 3 before they may free-fly without the supervision of an instructor or coach within the State (see Pilot Rating System.)
- All pilots and operators are required to provide the IHPA with verifyable evidence of their current pilot rating or licence.
- All Operators (any activity involving a third party) are required to hold a annual Operator Endorsement appropriate to the activity (see Operator Endorsements.)
- The IHPA may award a 'Grandfather' Pilot Rating in certain special cases.
- Scope: Classes of glider to be covered by the regulation - glider definitions as per the FAI / CIVL Sporting Code Section 7A - 1.5
- The proposed regulation to be based on the regulatory model used in the UK by the BHPA / CAA.
- The CAA have delegated full regulatory authority for the sport to the BHPA.
- The CAA maintain general oversight of BHPA activities through an annual safety review, though alternatively this could be done through GASCI.
- The IHPA to become a Registered Training Facility (RTF) with authority to endorse Operators (see below.)
- The IHPA be required to maintain an accurate record of all National Pilot Ratings issued and Foreign Pilot Ratings verified with the issuing Authority.
- The IHPA be required to maintain an accurate record of all annual Operator Endorsements issued.
- All pilots be required to hold a validated IPPI card issued either by the IHPA or another FAI accredited National Governing Body before they may fly within the State.
- IPPI = FAI / CIVL International Pilot Proficiency Identity Card
- http://www.fai.org/civl-our-sport/ippi-card
- All pilots be required to maintain a logbook of all flights.
- All pilots be required to hold a suitable level of 3rd party insurance cover.
- New / Student pilots be required to complete a structured course of theory and practical instruction at an IHPA endorsed school to a level equivalent to IPPI 3
- Requirement for new student pilots to be members of the Association before practical training commences.
- Requirement for new student pilots to maintain an accurate record of their training progress - log all flights and exercises.
- All training (practical exercises and initial flights) must be under the direction and direct supervision of an endorsed instructor.
- Student pilots, having completed their initial training to a level equivalent to IPPI 2 may, at the discretion of the instructor, be signed over to an IHPA endorsed Coach to continue their training (logging air time) before completing a final assessment and examination by their instructor.
- Any pilots not in possession of a valid IPPI 3 card be required to pass a practical assessment and examination of knowledge to IPPI 3 level or a full course of instruction as appropriate.
- All activities involving a third party require the Operator to hold a skill specific Operator Endorsement, renewed annually. (see Operator Endorsements.)
- Instructors
- Requirement to hold an appropriate qualification from an FAI accredited NGB
- Requirement to use a structured training programme
- Requirement to use suitable equipment
- Requirement to keep appropriate records of training
- Requirement to cooperate in periodic school inspection and review
- Requirement to file accident and incident reports with the IHPA Training & Flight Safety Officer.
- Coaches
- Requirement to hold an appropriate qualification from an FAI accredited NGB
- Requirement to use a structured coaching method
- Requirement to keep appropriate records of coaching
- Requirement to cooperate in periodic reviews
- Prohibited from giving basic (pre-IPPI 2) instruction
- Requirement to file accident and incident reports with the IHPA Training & Flight Safety Officer.
- Air Experience Instructors
- Requirement to hold an appropriate qualification from an FAI accredited NGB
- Defined limits to scope of instruction
- Requirement to use suitable equipment
- Requirement to keep appropriate records of training
- Requirement to cooperate in periodic reviews
- Requirement for passengers to be 'Day Members' of the Association
- Requirement to file accident and incident reports with the IHPA Training & Flight Safety Officer.
- Tandem Pilots
- Requirement to hold an appropriate qualification from an FAI accredited NGB
- Requirement to use suitable equipment
- Requirement to cooperate in periodic reviews
- Requirement for passengers to be 'Day Members' of the Association
- Requirement to file accident and incident reports with the IHPA Training & Flight Safety Officer.
- Winch Operators
- Requirement to hold an appropriate qualification from an FAI accredited NGB
-
- Requirement to use suitable equipment
- Requirement to cooperate in periodic reviews
- Requirement to file accident and incident reports with the IHPA Training & Flight Safety Officer.
- Tow Pilots
- Requirement to hold an appropriate qualification from an FAI accredited NGB
-
- Requirement to use suitable equipment
- Requirement to cooperate in periodic reviews
- Requirement to file accident and incident reports with the IHPA Training & Flight Safety Officer.
- Instructors
-
It should be understood that the IHPA Operations Manual will not be a static document but is intended to be a 'living document' that will evolve with the sport so that the latest changes and innovations can be covered. Evolution of the IHPA Operations Manual will take its primary lead from the BHPA, which continuously revise and update their operating procedures to ensure the highest level of safety and the development of a safety culture within the sport.
- [COMPLETED] Outline Regulatory Proposal and Roadmap.
- [COMPLETED] IHPA Training & Flight Safety Officer to draft full Operations Manual - by the end of 2013.
- [IN PROGRESS] IHPA convenes a working group (comprising the Executive Committee, Instructors and senior pilots from both hang gliding and paragliding) to review and finalise the details of the regulatory method and Operations Manual.
- IHPA submits Operations Manual and other documents to the IAA for approval.
- [Further IHPA/IAA discussion of the regulatory plan if necessary.]
- Publication and Implementation of the regulation.
- Alert all pilots to their obligations
- [NB - a period of grace should be agreed to allow all pilots to comply with the requirements of the regulation before any further action should be taken for non-compliance. A clear path of action should be discussed and agreed with the IAA as to how to deal with non-compliance - suggest: Letter/Email Reminder - followed by Formal Letter of Warning - followed by Referral to IAA.]
Organisation
Organisation
Organisational Outline
The Irish Hang Gliding and Paragliding Association (IHPA) is recognised by the appropriate government bodies as the Irish National Governing Body of the sports of hang gliding (HG), paragliding (PG), powered hang gliding (PHG) and powered paragliding (PPG). The objectives of the IHPA include promoting high standards of safety within the Sport through pilot and Instructor training and qualification schemes, airworthiness standards, the dissemination of safety information and the promotion of a safety culture amongst all pilots.
The Flying and Safety Committee (FSC)
The Executive Committee of the IHPA delegate these tasks to the Flying and Safety Committee (FSC). Safety and training at school and club level are normally the responsibility of the Chief Flying Instructor or Coaches respectively: at the National level the IHPA’s Flying and Safety Committee (FSC) set the standards, monitor activities and ensure that the Association’s aims are being met.
Purpose of the FSC
- To monitor safety and to provide advice, assistance and training.
- To re–assess, improve and update the IHPA Operations Manual and relevant publications.
- To consider incident reports with the objective of learning from the occurrences and avoiding further injury or damage through similar causes.
- To stimulate and guide the development of equipment, training and operating techniques for use in the sport.
- To approve or classify operational equipment according to its suitability for purpose.
- To approve the syllabi and course instructors for all ‘IHPA Approved’ potential Instructor and Coach courses.
- To liaise with specialists on various subjects to keep abreast of modern developments and seek advice on particular problems.
- To liaise with safety and training organisations of related sports to the benefit of hang gliding and paragliding.
- To maintain an Examiners’ Panel for the independent examination of candidates for Endorsements.
- To carry out regular periodic inspections of registered training establishments and operators.
- To monitor the annual renewal of Endorsements.
Structure and membership of the FSC
The FSC is led by a Chairman who is appointed by the IHPA Executive Committee. The other members of the FSC are selected from amongst the hang gliding and paragliding members of the Association based on the depth of their knowledge, experience and their good sense as instructors, operators and pilots. While FSC members remain active in the sport and can contribute to the work of the FSC their appointments are open–ended. At the discretion of the FSC Chairman the Committee reviews and adjusts its own membership, although appointments are subject to Executive Committee approval. The names of those members currently serving on the FSC are to be published on the IHPA website.
Release of FSC minutes
The minutes of the FSC are confidential. They are normally circulated only to members of the FSC and members of the Executive Committee. The reason for confidentiality is that sometimes sensitive issues concerning individuals are discussed and it may not be in the best interests of the people concerned to have these made public. A summary of the FSC’s discussions is reported to the Executive and included in their minutes, and conclusions and decisions reached are published in the IHPA Forum, including those relating to disciplinary cases.
Dissemination of Safety Information
Safety notices, reports and other documents released by the FSC are published on the IHPA website and Free Flight Magazine, and also copied to the IHPA Forum so as to reach as wide an audience as possible.
Conventions
As members progress their flying expertise they gain awards through the Pilot Rating Scheme; instructors progress in a similar manner. All such awards are 'qualifications', but to differentiate between the schemes the FSC has decided that any member who 'does something to another' (eg trains directly) needs to hold a skill specific OPERATOR ENDORSEMENT accordingly; whereas those who wish to progress on a personal basis do so by achieving RATINGS. Hence all Instructors, Coaches, Operators and Dual Pilots must have their operator endorsements renewed annually, and it is to those members that this Manual is directed.
In becoming an Operator Endorsed Member one must be aware of the legal obligation of 'duty of care' towards their students, passengers, pilots-under-supervision and the public.
The School
Schools concentrate on providing instruction for the ab-initio enthusiast and also provide continuation training for qualified pilots. Such instruction or training is for remuneration or other consideration. Under the close supervision of qualified Instructors the student is provided with the necessary tuition to become a competent, responsible and safe pilot of a flying craft.
The Club
Clubs, being non-profit entities, cater for the needs of qualified pilots by securing flying sites, producing site guides and regular newsletters, organising social and informative evenings and events, etc. Clubs are encouraged to offer a level of continuation training for qualified pilots through the medium of Coaches. With so few active pilots around the country the IHPA acts as a nation wide 'club' to provide these services to all its members.
Instructors
The Chief Flying Instructor and his team of Senior Instructors and Instructors provide tuition within registered schools for ab-initio and qualified members. Instructors may also hold any coaching endorsement but all training activities carried out in an activity (Hang gliding, Paragliding, Powered Hang Gliding or Powered Paragliding) in which he is an endorsed Instructor are subject to the Instructor level of Indemnity cover.
Coaches
Coaches provide continuation training within the Association and within local Clubs for qualified pilots on a voluntary basis without remuneration or other consideration. Coaches may also hold any Instructors Endorsement but all training activities carried out in an activity (Hang gliding, Paragliding, Powered Hang Gliding or Powered Paragliding) in which he is an endorsed Instructor are subject to the Instructor level of Indemnity cover.
Pilot Rating System
Pilot Rating System & Endorsements
Pilot Rating System & Endorsements
Introduction
Introduction
The IHPA has adopted the FAI / CIVL Safe Pro and Para Pro Standards as the national Pilot Rating System. Safe Pro and Para Pro pilot ratings are accepted and recognised internationally when used in conjunction with an FAI / CIVL International Pilot Proficiency Identification (IPPI) card, available from the IHPA Training & Flight Safety Officer.
- The IHPA is the sole organisation authorised to issue pilot ratings in the Republic of Ireland.
- Schools and instructors are not authorised to issue pilot ratings, which must be applied for to the IHPA Training & Flight Safety Officer.
- More information on the IPPI card scheme can be found on the FAI / CIVL website.
Pilot Ratings
Overview
|
Hang Gliding Pilot Ratings
|
Paragliding Pilot Ratings
|
Safe Pro / Para Pro 1 & 2
Safe Pro / Para Pro 1 & 2 (Elementary)
These first two elementary grades indicate a student pilot who must conduct all their training and flight activities under the direct supervision of a licensed instructor in a school environment. Training beyond this point requires the full commitment, and the demonstrated ability of the student who will be introduced by their instructor to larger, more demanding flying sites, and intermediate gliders. The student pilot must remain under the direct supervision of an endorsed instructor until they have successfully completed and been awarded the Safe Pro / Para Pro 3 (Novice) pilot rating. This pilot rating requires the signature of a licensed Chief Flying Instructor on the Pilot Rating Application, which is to be found in the Student's Training Record book.
This grade approximately equates to the following foreign pilot ratings:
(NB: IHPA pilot ratings require a greater number of flights and airtime to be logged under supervision than many other national pilot ratings.)
- BHPA Elementary Pilot rating.
- USHGA Hang 3 Pilot Rating (Hang 1 = Safe Pro 1 - Hang 2 & 3 = Safe Pro 2)
- HGFA Student Rating
Safe Pro / Para Pro 3
Safe Pro / Para Pro 3 (Novice)
The Safe Pro / Para Pro 3 (Novice) pilot rating marks the end of a pilot's ab initio training, and the pilot (no longer a student pilot) is considered to have the necessary minimum knowledge and proficiency to begin flying with other qualified pilots outside the school environment, having built up more flying experience and been trained to handle intermediate gliders. Novice pilots are strongly urged to fly only under the supervision of a Club Coach or a nominated senior pilot, and should continue to seek a full site and weather briefing before each day's flying to help protect them from their limited knowledge and experience. This pilot rating requires the signature of a licensed Chief Flying Instructor on the Pilot Rating Application, which is to be found in the Student's Training Record book.
This grade equates closely to:
- BHPA Club Pilot rating.
- USHGA Hang 4 Pilot Rating
- HGFA Restricted Pilot Rating
Safe Pro / Para Pro 4
Safe Pro / Para Pro 4 (Intermediate)
The Safe Pro / Para Pro 4 (Intermediate) pilot rating is awarded once the pilot has gained the required airtime, knowledge and experience; successfully completed the required Pilot Rating Tasks and passed the written examination for this pilot rating. Pilots will need to apply directly to the IHPA Training & Flight Safety Officer to sit the exam for this pilot rating having first had all the Pilot Rating Tasks signed off by a Club Coach or Instructor.
This grade equates closely to:
- BHPA Pilot rating.
- USHGA Hang 4 Pilot Rating (Requires special Turbulence sign-off)
- HGFA Intermediate Pilot Rating
Safe Pro / Para Pro 5
Safe Pro / Para Pro 5 (Advanced)
Safe Pro / Para Pro 5 (Advanced) is the highest level pilot rating issued by the IHPA and requires the pilot to demonstrate a high level of airmanship and cross country flying skills, and a thorough knowledge of air law. The Safe Pro / Para Pro 5 (Advanced) pilot rating is awarded once the pilot has gained the required airtime, knowledge and experience; successfully completed the required Pilot Rating Tasks and passed the written examination for this pilot rating. Pilots will need to apply directly to the IHPA Training & Flight Safety Officer to sit the exam for this pilot rating having first had all the Pilot Rating Tasks signed off by a Club Coach or Instructor. If a pilot wishes to continue to achieve awards then they should turn their attention to the FAI Delta and Eagle Badge Schemes, which are administered by the IHPA on behalf of the FAI. Application details are available from the IHPA Training & Flight Safety Officer.
This grade equates closely to:
- BHPA Advanced Pilot rating.
- USHGA Hang 4 Pilot Rating (Requires special Turbulence and XC sign-off)
- HGFA Advanced Pilot Rating
Skill Endorsements
Skill Endorsements
Pilot rating endorsements are available to those pilots who gain additional skills by attending relevant conversion courses in their particular flight discipline. Pilot rating endorsements are available for the following disciplines:
- Hill: All pilots are required to be able to hill-launch in Ireland. Pilots who trained using a winch or aerotow system are required to complete a Hill Conversion Course before they may fly in Ireland.
- Winch: This endorsement is available to all pilots.
- Tow: This endorsement is available to Hill and Aerotow pilots.
- Aerotow: This endorsement is available to Hill and Tow pilots.
- Tandem: This endorsement is available to all pilots.
- Power (PHG or PPG): This endorsement is available to all pilots.
- PHG: Powered Hang Gliding
- PPG: Powered Paragliding (NB: as with PHG, PPG is a skill endorsement to a pre-existing pilot rating. Paramotoring is a unique sport that requires specific training and licensing.]
For details of Conversion Courses see the 'Training & Endorsements' section of the IHPA Operations Manual.
International Equivalencies
The British Hang Gliding & Paragliding Association (BHPA) provided the following equivalences table:
Hang Gliding:
- Elementary = Safe Pro Stage 1
- Club (Novice) Pilot = Safe Pro Stage 2
- Pilot = Safe Pro Stage 4
- Pilot = Safe Pro Stage 5
- Pilots wishing to obtain an IPPI rating on this basis must submit a statement from a Club Chairman/Club Chief Coach/CFI confirming that they have checked the applicant’s logbooks and are satisfied that he has a total of at least 50 flying hours on hang gliders and has completed at least 5 cross-country flights in various types of lift (flights conducted solely in ridge lift or along the same ridge do not count).
- Advanced Pilot = Safe Pro Stage 5
Paragliding:
- Elementary = Para Pro Stage 2
- Club (Novice) Pilot = Para Pro Stage 3
- Pilot = Para Pro Stage 4
- Advanced Pilot = Para Pro Stage 4
- Advanced Pilot (Para Pro Stage 5): Pilots wishing to obtain this IPPI rating must hold a Pilot or Advanced Pilot rating, and must submit a statement from a Club Chairman/Club Chief Coach/CFI confirming that they have checked the applicant’s logbooks and are satisfied that he has a total of at least 100 flying hours on paragliders and has completed at least 5 cross-country flights using various types of lift (flights conducted solely in ridge lift or along the same ridge do not count).
The United States Hang Gliding & Paragliding Association (USHPA) provided the following equivalences table:
USHPA IPPI
TUR = Turbulence special skill sign-off
Hang/Para1 Safe Pro / Para Pro 1
Hang/Para2 Safe Pro / Para Pro 2
Hang/Para3 Safe Pro / Para Pro 2
Hang/Para4 Safe Pro / Para Pro 3
Hang/Para4 + TUR Safe Pro / Para Pro 4
Hang/Para4 + TUR + XC Safe Pro / Para Pro 5
XC = Cross Country sign-off
The Hang Gliding Federation of Australia (HGFA) provided the following equivalences table:
HG – Restricted Certificate = IPPI – HG-3
HG – Intermediate Certificate = IPPI – HG-4
HG – Advanced Certificate = IPPI – HG-5
PG – Restricted Certificate = IPPI – PG-3
PG – Intermediate Certificate = IPPI – PG-4
PG – Advanced Certificate = IPPI – PG-5
Note: There are 17 regional federations in Spain, each with their own regulations on paragliding.
The Andalusian Federation of Air Sports (FEADA) provided the following information and equivalences table:
Designation degree (Level Spanish) = Level IPPI:
Student Pilot (D0) = Para Pro Stage 1 and 2
Pilot Club (D1) = Para Pro Stage 3
Pilot (D2) = Para Pro Stage 4
Expert Pilot (D3) = Para Pro Stage 5
FAI / CIVL Proficiency Badge Scheme
FAI Proficiency Badge Scheme
Federation Aeronautique International (FAI) / Commission Internationale de Vol Libre (CIVL) proficiency badges have been in place for many years. They are standards of achievement intended to provide a graduated scale of difficulty to measure and encourage the development of a pilot’s flying skill, particularly in cross-country flying.
The Bronze badge should be achievable by most pilots within the first year of active flying, with the Silver following in the next year or two. The Gold badge should be achievable for most pilots within the first five years of cross country flying. The Diamond badge should be achievable by perhaps half of all pilots within ten years of flying.
Badges are ONLY issued to the IHPA by the National Aero Club of Ireland (NACI), which validate the flights and order the badges.
Badges cannot be ordered by individual pilots as long as CIVL / FAI has no contractual agreement with an online flight verification provider. Pilots should contact the IHPA Training & Flight Safety Officer if they wish to apply for an FAI proficiency badge.
Hang Gliders (Flex-wing)
Hang Glider (Flexwing - Class 1)
- Bronze: 15km, or 1 hour duration, or 500m gain of height
- Silver: 50km, and 3 hours duration, and 1000m gain of height
- Gold: 100km, and 5 hours duration, and 2000m gain of height
- Diamond: 150km open course, or 150km closed course, or 3000m gain of height (for 3 separate Diamond Badges)
Hang Gliders (Rigid)
Hang Glider (Rigid - Class 2 and 5)
- Bronze: 15km, or 1 hour duration, or 500m gain of height
- Silver: 60km, and 3 hours duration, and 1000m gain of height
- Gold: 125km, and 5 hours duration, and 2000m gain of height
- Diamond: 200km open course, or 200km closed course, or 3000m gain of height (for 3 separate Diamond Badges)
Paragliders
Paraglider: (Class 3)
- Bronze: 15km, or 1 hour duration, or 500m gain of height
- Silver: 30km, and 3 hours duration, and 1000m gain of height
- Gold: 75km, and 5 hours duration, and 2000m gain of height
- Diamond: 125km open course, or 125km closed course, or 3000m gain of height (for 3 separate Diamond Badges)
Foot-Launchable Sailplanes
Foot-Launchable Sailplane (Class 4)
- Bronze: 30km, or 1 hour duration, or 500m gain of height
- Silver: 60km, and 3 hours duration, and 1000m gain of height
- Gold: 150km, and 5 hours duration, and 2000m gain of height
- Diamond: 300km open course, or 300km closed course, or 3000m gain of height (for 3 separate Diamond Badges
Operator Endorsements
Introduction
Operator Endorsements
Introduction
Operator Endorsements are issued to IHPA members who have been authorised by the Training & Flight Safety Officer to carry out activities that involve taking on some responsibility for another member. Instructing, Coaching, Operating a tow device and Tandem Piloting are all activities where the person concerned has a greater or lesser degree of responsibility for a second person, so these are all activities that must only be undertaken by those holding the particular Operator Endorsement.
The relationship between the Instructor and the Coach can be set out in simple terms as follows:
- Instructors teach ab-initio members (below Safe Pro / Para Pro 3 (Novice) level.) In other words Instructors are the ab-initio specialists. However, it is perfectly normal for Instructors (operating in registered schools and subject to the approval of the CFI) to also conduct post-ab-initio pilot development training.
- Coaches coach existing, qualified pilots (i.e. from Safe Pro / Para Pro 3 (Novice) upwards.) i.e. coaches assist the qualified pilot with improving, developing or fixing skills. (In the case of the Senior Coach this remit is expanded in specific instances to include teaching, coaching and training specific new skills.) It is not permitted for Coaches to become involved in pre-Safe Pro / Para Pro 3 (Novice) training. (The only exception to this is in HG hill where coaches may teach Phase 9: See Student Training Record HG for details.)
Trainee Instructor Registration
Potential Instructors must be duly registered with the IHPA before the relevant training can commence. Applications for registration should be made by the CFI on the correct form (See the Documents section.) Registration will be signified by a replacement membership card duly endorsed - "Trainee Instructor HG [or] PG".
Progression
An Instructor or Coach should be encouraged to progress to the next higher level providing the pre-requisites are held, and the Procedures for Examination and Assessment given below are followed.
Procedures for Examination and Assessment
One of the final stages in a candidate’s progression to becoming an endorsement holder is a thorough evaluation of his abilities. There are two forms of evaluation. For some endorsements this evaluation stage is termed an ‘Assessment’, which means that it is conducted within the home club, by a club member who has been appointed as an Assessor, under the auspices of the CFI/Chief Coach. For other endorsements the evaluation required is an ‘Examination’, which means that an independent outside examiner is appointed to put the candidate through his paces.
Examination
On completion of training and following a successful pre-examination by the CFI, an Application for Examination (see the Documents section) is submitted by the CFI to the IHPA Training & Flight Safety Officer (the form for which is available in the Documents Download section of this Operations Manual.) Arrangements will then be made by the IHPA Training & Flight Safety Officer to provide a qualified Examiner at the earliest opportunity. Candidates can only be examined in one discipline at a time. Successful candidates will be issued with a temporary endorsement on the day of the examination, and a replacement membership card showing the new qualifications will be issued as soon as possible thereafter.
Assessment
Assessments are conducted internally under the authority of the CFI or Chief Coach. Assessors are appointed by the CFI or Chief Coach and must be duly qualified in the relevant discipline. When appointed as an Assessor this must be recorded in their Instructor/ Flight Log Book (as appropriate) by the CFI.
In the case of assessments for the Tandem Pilot endorsement, besides being duly qualified in the relevant discipline and appointed, the Assessor must hold an Instructor (or Senior Coach) Endorsement.
On completion of an assessment, if the candidate is successful the assessor must enter the details in the candidate’s Flight Log Book and return the completed Assessment proforma for processing by the IHPA Training & Flight Safety Officer.
Endorsement Validity and Annual Renewal
All Coach, Operator and Instructor Endorsements must be renewed / revalidated annually, at the time of IHPA membership renewal. The annual revalidation of endorsements pays a key role in ensuring that standards are maintained. Chief Coaches and CFIs must take this responsibility very seriously. Endorsements are only valid if the pilot is also a current member of the IHPA. A lapsed IHPA membership automatically invalidates any endorsements held by the pilot, who must reapply for the endorsements at the same time as renewing their IHPA membership.
Club Coaches and Senior Coaches (non discipline specific)
Each year, at IHPA membership renewal time (March 31st), every club Chief Coach is sent a list of Club Coaches and Senior Coaches who have identified that club as being their main club. He amends this list as necessary to indicate exactly those Coaches who's endorsement renewal he supports on the basis of them being active, valued members of the club's coaching team. Those supported Club Coaches will have their Club Coach endorsement renewed automatically when they next renew their membership.
Club Coaches who are not on the list of supported coaches supplied by their main club will be sent a note with their membership renewal notice (6 weeks before expiry) explaining this and a Declaration of Support form: they will then be able to get the Chief Coach of whichever club they are actively coaching at to sign this off for them to get their Coach endorsement renewed. If this Declaration of Support is not completed and returned with the completed renewal notice the Coach endorsement will lapse.
Every Club Coach and Senior Coach has to attend a Club Coach course at least once every five years. This is to ensure that nothing gets forgotten and that they are fully up to date with current thinking.
Instructors and all discipline specific Coaches / Senior Coaches
Renewal / revalidation requires the submission of a Declaration of Support, completed and signed by the endorsement holder's CFI (in the case of Instructor's) or Chief Coach (in the case of Coaches).
The following details must be checked before completing the Declaration of Support:
- The endorsement holder's Flight Log Book entries to prove flying currency.
- The endorsement holder's Instructor Log Book (where relevant) to prove instructional / operational currency.
- The endorsement holder's relevant First Aid Certificate.
In the case of Instructors, the CFI must also ensure that a formal 'Instructor Competence Assessment' has been carried out within the last twelve months. The 'Instructor Competence Report' form details the areas to be assessed, and the accompanying 'Instructor Objective Skills Levels' form gives details of the scoring method to be used. A copy of the completed 'Instructor Competence Report' must accompany the Membership Renewal form and Declaration of Support. The CFI should keep a file copy of the 'Instructor Competence Report'.
First Aid Certificates
The following is a summary of minimum First Aid Certificate requirements:
- Operator: recommended to have completed a basic First Aid Course.
- All Coaches other than Club Coach: must have completed a one day First Aid Course.
- Air Experience Instructor: must have completed a one day First Aid Course.
- Instructor: There is such a profusion of suitable certificates that it is not possible to list all those that are considered appropriate. Any Certificate will be considered as suitable providing the course provider is approved by the Health & Safety Authority (HSA) and the course:
- Was of at least 16 hours duration.
- Was of a Pass/Fail nature.
- Included the standard Elementary First Aid elements.
- Contained the diagnosis and management of spinal injuries - ideally this will involve 'Remote Location' issues.
- Contained an Incident Management element - ideally this will involve 'Remote Location' issues.
- Contained a Casualty Management element.
Obtaining an Endorsement in All Disciplines
A summary explaining how any IHPA Endorsement can be obtained - and who can do what during the process.
Assessments
| What needs an Assessment | Who can train* | Who assesses |
| Operator Endorsement | Senior Instructor (Tow) or Senior Tow Coach / Senior Aerotow Coach | Senior Instructor (Tow) or Senior Tow Coach or Senior Aerotow Coach |
| Tandem Pilot Endorsement | Tandem Pilot | Tandem Pilot + Instructor or Tandem Pilot + Senior Coach / Senior Aerotow Coach / Senior Tow Coach |
| Coach Endorsement | Chief Coach | Chief Coach / Club Chairman |
| Tow Endorsement | Senior Tow Coach | Senior Tow Coach |
| Aerotow Endorsement | Senior Aerotow Coach | Senior Aerotow Coach |
| FLPA Coach Endorsement | Senior FLPA Coach | Senior FLPA Coach |
| Extension to existing Endorsement | Senior Instructor | Senior Instructor |
| Air Experience Instructor (Tandem) | Senior Instructor + Tandem Pilot | Instructor |
Assessors must be endorsed in the appropriate discipline, appointed by the CFI or CTC and have it entered in their Log Book.
* = Initial training must be done by a Senior XX where shown, but subsequent supervision may be at discretion of CFI/CTC
Examinations
|
What needs an Examination
|
Who can train
|
Who examines
|
Examiners are appointed by the IHPA Flying and Safety Committee
Coach
Coach Endorsements
[NB - The BHPA Coach system is over complicated with Chief Coaches supervising Senior Coaches supervising Club Coaches. I propose to simplify the system by removing the positions of Chief Coach and Senior Coach, and simply have Club Coaches in specific disciplines. If the need arises some time in the future, we can always add these layers back.]
Club Coach
The Club Coach
- Provide information, guidance and help in a safe, proven manner to club pilots qualified for the activity undertaken.
- Support and assist the Senior Coach(es) by sharing coaching duties.
- Improve their own flying and coaching skills and knowledge in various ways, including studying the BHPA Pilot Handbook, articles in Skywings (especially the Safety Matters Page) and Incident Summaries and Safety Notices.
- Operate safely within their known skills and personal endorsements in accordance with the recognised procedures and regulations.
- Promote the use of the Incident Reporting scheme within the club.
- Maintain and promote a positive attitude to the sport, the IHPA Training & Flight Safety Officer and the IHPA.
- Uphold their duty of care to other members and members of the public.
- Be an IHPA Member.
- Hold a Safe Pro / Para Pro 3 (Novice) rating with 10 hours (hill) or 50 flights (tow) logged since achieving Safe Pro / Para Pro 3 (Novice).
- Successfully attend a Club Coach course.
- Be recommended by their club.
After the candidate has attended the Club Coach course, and has met the other pre-requisites, they should sign the form issued to the candidate on the course and return it to the IHPA Training & Flight Safety Officer for issue of the endorsement.
Tow (Winch) Coach
- Tow Coach PG
- Tow Coach HG
- Authorise the flying of qualified tow pilots.
- Authorise qualified Operators to man the tow unit.
- Hold a Safe Pro / Para Pro 4 (Intermediate) pilot rating with an appropriate Tow Endorsement. (If a Tow Coach endorsement in another discipline is already held, then Safe Pro / Para Pro 3 (Novice) with the appropriate Tow Endorsement is acceptable).
- Be aged 18 years minimum.
- Have logged 50 + tow launched flights since achieving Safe Pro / Para Pro 3 (Novice).
- Have attended a Club Coach course.
- Possess a current 1st Aid Certificate.
- Possess, and be familiar with the relevant sections of this manual.
- Be recommended by their club.
Aerotow Coach
- Authorise the flying of qualified aerotow pilots.
- Authorise qualified Operators to man the tug aircraft.
- Hold a Safe Pro / Para Pro 4 (Intermediate) pilot rating with an Aerotow Endorsement.
- Be aged 18 years minimum.
- Have logged 50 + aerotow launched flights.
- Have a total of over 200 hrs logged on hang gliders.
- Have attended a Club Coach course.
- Possess a current 1st Aid Certificate.
- Possess, and be familiar with the relevant sections of this manual.
- Be recommended by their club.
FLPA Coach
- FLPA Coach PHG (Powered Hang Gliding)
- FLPA Coach PPG (Powered Paragliding)
Role and responsibilities
In addition to the responsibilities of the Club Coach the FLPA Coach may:
- Authorise pilots to fly within 8kms of the take-off field (unless performing a declared cross-country task under the FLPA Coach’s supervision).
- Train and qualify such pilots in accordance with ‘The PHG Endorsement’: flight training: Additional tasks for full Endorsement.
Becoming a FLPA Coach
Pre-requisites: Before commencing training to become a FLPA Coach, the potential FLPA Coach must first
- Hold Pilot rating with a FLPA Endorsement or hold a FLPA rating.
- Be aged 18 years minimum.
- Have logged 50 + Power launched flights.
- Have attended a Club Coach course.
- Possess a current 1st Aid Certificate.
- Possess, and be familiar with the relevant Sections and Chapters of this Manual.
- Be recommended by their club.
The Training Programme for FLPA Coaches
The Potential FLPA Coach must be briefed on his role and responsibilities and the trainer must be satisfied that he is capable of carrying them out satisfactorily.
Assessment / Examination
After completing training the potential FLPA Coach must pass an Assessment.
Original BHPA Coach Documentation
- The Club Coach
- Discipline Specific Coaches
- The Tow Coach PG
- The Tow Coach HG
- The Aerotow Coach
- The SPHG Coach
- The Senior Coach
- The Senior Tow Coach
- The Senior Aerotow Coach
- The Senior SPHG Coach
- The Chief Coach
- The Chief Tow Coach
- The Chief Aerotow Coach
- The Chief SPHG Coach
The Club Coach
- Provide information, guidance and help in a safe, proven manner to club pilots qualified for the activity undertaken.
- Support and assist the Senior Coach(es) by sharing coaching duties.
- Improve their own flying and coaching skills and knowledge in various ways, including studying the BHPA Pilot Handbook, articles in Skywings (especially the Safety Matters Page) and Incident Summaries and Safety Notices.
- Operate safely within their known skills and personal endorsements in accordance with the recognised procedures and regulations.
- Promote the use of the Incident Reporting scheme within the club.
- Maintain and promote a positive attitude to the sport, the IHPA Training & Flight Safety Officer and the IHPA.
- Uphold their duty of care to other members and members of the public.
- Be an IHPA Member.
- Hold a Safe Pro / Para Pro 3 (Novice) rating with 10 hours (hill) or 50 flights (tow) logged since achieving Safe Pro / Para Pro 3 (Novice).
- Successfully attend a Club Coach course.
- Be recommended by their club.
After the candidate has attended the Club Coach course, and has met the other pre-requisites, the club’s Chief Coach should, if supporting the appointment, countersign the form issued to the candidate on the course and return it to the IHPA Training & Flight Safety Officer for issue of the endorsement.
- Tow Coach PG
- Tow Coach HG
- Authorise the flying of qualified tow pilots.
- Authorise qualified Operators to man the tow unit.
- Hold a Safe Pro / Para Pro 4 (Intermediate) pilot rating with an appropriate Tow Endorsement. (If a Tow Coach endorsemenr in another discipline is already held, then Safe Pro / Para Pro 3 (Novice) with the appropriate Tow Endorsement is acceptable).
- Be aged 18 years minimum.
- Have logged 50 + tow launched flights since achieving Safe Pro / Para Pro 3 (Novice).
- Have attended a Club Coach course.
- Possess a current 1st Aid Certificate.
- Possess, and be familiar with the relevant sections of this manual.
- Be recommended by their club.
- Authorise the flying of qualified aerotow pilots.
- Authorise qualified Operators to man the tug aircraft.
- Hold a Safe Pro / Para Pro 4 (Intermediate) pilot rating with an Aerotow Endorsement.
- Be aged 18 years minimum.
- Have logged 50 + aerotow launched flights.
- Have a total of over 200 hrs logged on hang gliders.
- Have attended a Club Coach course.
- Possess a current 1st Aid Certificate.
- Possess, and be familiar with the relevant sections of this manual.
- Be recommended by their club.
- SPHG Coach PHG
In addition to the responsibilities of the Club Coach the SPHG Coach may, for pilots holding an SPHG Restricted Endorsement PHG:
- Authorise such pilots to fly within 8kms of the take-off field (unless performing a declared cross-country task under the PC’s supervision).
- Train and qualify such pilots in accordance with ‘The PHG Endorsement’: flight training: Additional tasks for full Endorsement.
Pre-requisites: Before commencing training to become a SPHG Coach, the potential SPHG Coach must first:
- Hold Pilot rating with a SPHG Endorsement or hold a SPHG rating.
- Be aged 18 years minimum.
- Have logged 50 + Power launched flights.
- Have attended a Club Coach course.
- Possess a current 1st Aid Certificate.
- Possess, and be familiar with the relevant Sections and Chapters of this Manual.
- Be recommended by their club.
The Potential SPHG Coach must be briefed on his role and responsibilities and the trainer must be satisfied that he is capable of carrying them out satisfactorily.
After completing training the potential SPHG Coach must pass an Assessment.
In addition to the responsibilities of the Club Coach the Senior Coach must support and assist the Chief Coach in:
- Organising and co-ordinating coaching within the club.
- Encouraging pilots to use the club coaching facility through effective promotion and education.
- Establishing and maintaining an effective coaching team within the club.
- Maintaining an effective liaison with the IHPA Training & Flight Safety Officer.
- Supervising and monitoring the development of potential coaches, and assisting in the selection and appointment of Club Coaches.
Pre-requisites: A potential Senior Coach must first:
- Hold a Club Coach appointment.
- Possess a Safe Pro / Para Pro 4 (Intermediate) pilot rating with good active experience.
- Attend the Instructor course.
- Be recommended by their club.
After completing training the potential Senior Coach must pass an Assessment.
- Senior Tow Coach PG
- Senior Tow Coach HG
In addition to the responsibilities of the Tow Coach and Senior Coach, the Senior Tow Coach will additionally, when directed by the Chief Tow Coach:
- Train and assess potential Tow Coaches and Operators.
- Train and qualify pilots as Tow endorsed.
Pre-requisites: A potential STC must first:
- Complete the requirements for the Senior Coach.
- Hold a Tow Coach Endorsement in the discipline.
- Hold an Operator Endorsement in the discipline.
- Attend the Instructor Course.
- In this discipline have logged 300 launches minimum as an Operator (150 if converting HG<->PG and if STC is held in the other discipline)
- In this discipline have logged a minimum of 100 flights as pilot.
- Be recommended by their club.
- Gain a recognised valid First Aid Certificate.
The Potential Senior Tow Coach must be trained as necessary such that he becomes capable of fulfilling the role and responsibilities.
After completing training the potential Senior Tow Coach must pass an Examination.
- Train and assess potential Aerotow Coaches.
- Train and qualify pilots as Aerotow endorsed.
- If Operator (tug pilot) qualified with a minimum of 100 launches logged in that capacity, train and assess potential Operators (tug pilots)
Pre-requisites: A potential SAC must first:
- Complete the requirements for the Senior Coach.
- Hold a Aerotow Coach Endorsement in the discipline..
- Attend the Instructor Course.
- In this discipline have logged a minimum of 100 flights as pilot.
- Have logged 200 flying hours minimum.
- Be recommended by their club.
- Gain a recognised valid First Aid Certificate.
The Potential Senior Aerotow Coach must be trained as necessary such that he becomes capable of fulfilling the role and responsibilities.
After completing training the potential Senior Aerotow Coach must pass an Examination.
The term Senior SPHG Coach denotes those who are endorsed to convert existing Safe Pro / Para Pro 4 (Intermediate) pilot rated members to SPHG.
The Senior SPHG Coach endorsement is available in the following categories:
- Senior SPHG Coach PHG.
In addition to the responsibilities of the Senior Coach, the Senior SPHG Coach will additionally, with the authority of the club’s Chief SPHG Coach:
- Train and qualify pilots as SPHG endorsed. NB: The Senior SPHG Coach may teach the whole course to any student holding a Safe Pro / Para Pro 4 (Intermediate) pilot rating or above. The Senior SPHG Coach may teach ‘Additional tasks for full Endorsement’ to any pilot holding an SPHG restricted endorsement.
- Ensure that safety standards are maintained throughout operations.
- Adhere to student group size limitations: The maximum size group of SPHG students that a Senior SPHG Coach can train is four.
- Maintain a log of all training.
- Provide potential Senior SPHG Coaches with a high standard of training.
- PHG: Teach prone PHG or supine PHG as long as he has a minimum of five hours and ten take-offs logged flying powered in that position.
Pre-requisites: Before commencing the ‘Training Programme for Senior SPHG Coaches’ the potential Senior SPHG Coach must first:
- Complete the requirements for the Senior Coach
- Hold an IHPA SPHG rating in the relevant discipline (PHG / PPG).
- Possess a personal copy of and be familiar with the IHPA Technical Manual.
- Possess a personal copy of and be familiar with the SPHG endorsement syllabus, syllabus, Instructor Notes and PUT pack.
- Have logged at least 200 flying hours total (HG/PHG or PG/PPG).
- Have logged at least 75 hours PHG/PPG as appropriate.
- Hold a recognised valid First Aid Certificate.
- Minimum age 18 years.
- Be recommended by their club.
These training requirements may be carried out in any order subject to experience.
- Be thoroughly trained in and practice the relevant theory and practical skills and techniques listed in the relevant SPHG endorsement syllabus.
- Maintain a log of all training completed.
- Complete a minimum of 4 days instructional experience in the relevant discipline (PHG/PPG) either working at an SPHG school as an SPHG TI or assisting a Senior SPHG Coach within a club. This should concentrate on:
- Ensuring sufficient understanding of power related theory to be able to teach it.
- Best practice regarding setting kit up (stability cords etc.).
- Common faults that conversion pilots make.
- Best practice regarding teaching the exercises.
- Best ways of teaching effects of power, propeller dangers, fuel mixing etc..
- Be signed off by the CFI/CPC as competent to instruct in all training exercises in the relevant discipline.
- Record 1 day (minimum) acting as a Duty Instructor (under supervision).
After completing training the potential Senior SPHG Coach must pass an Examination.
Any extension between powered hang gliding and powered paragliding is treated as a new endorsement.
- Organise and co-ordinate coaching within their club.
- Provide information, guidance and help in a safe, proven manner to club pilots qualified for the activity undertaken.
- Encourage pilots to use the club coaching facility through promotion and education.
- Establish and maintain an effective coaching team within the club.
- Establish and maintain an effective liaison with the IHPA Training & Flight Safety Officer.
- Supervise and monitor the development of potential coaches, and select and appoint Club Coaches and Senior Coaches.
- Operate safely within their known skills and personal endorsements in accordance with the recognised procedures and regulations contained in the IHPA Technical Manual.
- Improving their own flying and coaching skills and knowledge in various ways, including studying the IHPA Technical Manual, the BHPA Pilot handbook, articles in Skywings (especially the Safety Matters Page) and Incident Summaries and Safety Notices.
- Promote the use of the Incident Reporting scheme within the club.
- Maintain and promote a positive attitude to the sport, the IHPA Training & Flight Safety Officer and the IHPA.
- Uphold his duty of care to the student and members of the public.
- Maintain an effective liaison with the IHPA Training & Flight Safety Officer. Chief Coaches should have regular contact with the IHPA Training & Flight Safety Officer, and in particular they should keep the IHPA Training & Flight Safety Officer fully informed of new ideas or any difficulties occurring in their clubs.
- Arrange the training and assessment of potential Tow Coaches and Operators.
- Arrange, as necessary, Conversion Courses for pilots seeking Tow Endorsements.
- Support, or not, the annual renewal of endorsement holders within the club.
- Arrange the training and assessment of potential Aerotow Coaches and tug pilots.
- Arrange, as necessary, Conversion Courses for pilots seeking Aerotow Endorsements.
- Support, or not, the annual renewal of endorsement holders within the club.
- Arrange the training and assessment of potential Senior SPHG Coaches.
- Arrange, as necessary, Conversion Courses for pilots seeking SPHG Endorsements.
- Support, or not, the annual renewal of endorsement holders within the club.
A Chief Coach will normally be selected from the ranks of Senior Coaches in a club. This is a club appointment that must be recorded by the IHPA Training & Flight Safety Officer. A Chief Coach requires a certain amount of administrative and leadership skill. The appointment of a Chief Coach must be based primarily on his or her ability to carry out the responsibilities listed above.
Pre-requisites: A potential Chief Coach must first:
- Hold a Senior Coach or Club Coach Endorsement.
- Possess a Safe Pro / Para Pro 4 (Intermediate) pilot rating with good active experience.
- Be recommended by their club.
Pre-requisites: A potential Chief Tow Coach must first:
- Complete the requirements for the Chief Coach.
- Hold a Senior Tow Coach.
Pre-requisites: A potential Chief Aerotow Coach must first:
- Complete the requirements for the Chief Coach.
- Hold a Senior Aerotow Coach.
Becoming a Chief SPHG Coach
Pre-requisites: A potential Chief SPHG Coach must first:
- Complete the requirements for the Chief Coach.
- Hold a Senior SPHG Coach or SPHG Coach Endorsement.

Winch & Aerotow
Winch & Aerotow Operator Endorsement
The term 'Operator' means any IHPA member who is endorsed to operate a tow unit. Tow units may only by operated by a trained and qualified Endorsed Operator, as authorised by a Tow Coach, Aerotow Coach or Instructor (Tow) in charge of the operation.
- Operator Winch (static / pay-out) HG
- Operator Winch (static / pay-out) PG
- Operator Vehicle fixed line PG
- Operator Aerotow Tug (flexwing) HG
- Operator Aerotow Tug (3 axis) HG
- Operate safely in accordance with the IHPA Operations Manual and as authorised by the Instructor or Tow Coach present and in charge of the operation, subject to the qualifications shown on his Membership Card and Endorsement, and the extension(s) shown in his log.
- Comply with Air Law where relevant and take the necessary precautions with regard to other air users.
- Improve their own skills and knowledge in various ways, including studying the relevant sections of the IHPA Operations Manual, the BHPA Pilot Handbook, articles in Skywings (especially the Safety Matters Page) and Incident Summaries and Safety Notices.
- Maintain a log of all towing completed.
- An Operator may only tow a student (i.e. below Safe Pro / Para Pro 3 (Novice)) aloft when there is a suitably endorsed Senior Instructor or Instructor present and supervising the operation.
- An Operator may only tow a qualified Tow pilot (Tow qualified member rated Safe Pro / Para Pro 3 (Novice) or above)
- Must regularly practice the relevant emergency procedures.
- Tug pilot:
- Responsible for checking fuel, oil and general serviceability of tug and tow rope.
- Must satisfy himself that the proposed tow launch can be safely accomplished with the prevailing factors (wind, weather, glider, glider pilot, operating strip etc.)
- Must maintain a valid Endorsement.
Pre-requisites: Before commencing the ‘Training Programme for Operators’ the potential Operator must first:
- Be a member of the IHPA.
- Be aged 18 years or over
- Hold as appropriate:
- For vehicle tow operations a full Driving Licence for the vehicle type
- For Aerotow:
- [PPL (A) Group D]
- [50hrs on weight-shift microlights (or at least 150hrs on weight shift, of which at least 25hrs must be P1 on microlights) OR 50hrs on 3-axis microlights (or at least 150hrs on 3-axis aircraft, of which at least 25hrs must be P1 on microlights).]
These training requirements may be carried out in any order subject to experience.
- Be familiar with the relevant sections of the current edition of the IHPA Operations Manual.
- Maintain a log of all training completed.
- Complete the training detailed below as appropriate to the tow unit type and aircraft type under the supervision of a Senior Tow Instructor or Senior Tow Coach or Senior Aerotow Coach who is qualified in the relevant discipline and is present on site throughout. Until authorised by the CFI/CTC/CAC the Operator under training must not drive or operate the tow unit unaccompanied by an endorsed Operator in the tow unit (except for aerotow tugs - these may only tow when flown solo).
- Theory
- Weather - local wind effects
- Flight theory - how a glider flies and is controlled
- Safety - the relevant Regulations, Requirements, Bans, Recommended Practices and purpose of weak links.
- Practical
- Equipment - operation and maintenance of tow unit; repair and maintenance of tow lines; knots and splices; use of weak links; inspection routines
- Signals - all methods
- Tow control - tow unit handling; tow line management; take-off, tow and landing control as appropriate; reactions to glider attitude; control in varying wind conditions.
- Emergencies - discipline specific e.g. rotations; lockouts; tow line breaks; release failures etc. (Emergency actions and procedures should be taught through a mixture of role play and theoretical discussion. The Operator under training should have actually experienced firing the guillotine or its equivalent on other tow systems.)
- Complete the following minimum:
- Vehicle (Fixed line) 4 days minimum 45 tows minimum
- Winch 2 days minimum 30 tows minimum
- Notes - During training it is important that only one new factor is introduced at a time.
- Theory
- Ground crew: duties of Launch Marshall, Primary signaller, Second signaller and Log keeper.
- Full briefing on Aerotow procedures, responsibilities and emergency actions.
- Safety - the relevant Regulations, Requirements and Recommended Practices, purpose of weak links.
- Practical
- Equipment - operation and maintenance of tug; repair and maintenance of tow lines; knots and splices; use of weak links; inspection routines.
- Signals
- Tug familiarisation:
- If dual seat available -15 mins minimum
- Solo free flying tug to include at least 5 take-offs (60 mins minimum).
- Solo free flying tug with line attached, to include at least 2 landings (20 mins minimum).
- Aerotows:
- NB: The Senior Aerotow Coach running the course must carefully select experienced pilots to be towed as part of all practical exercises. The first five tows must be in smooth conditions.
- 6 satisfactory launches flying normal aerotow pattern to minimum of 1500ft a.t.o.
- 4 satisfactory launches involving horizontal 8's to minimum of 1500ft a.t.o.
- Simulate emergency actions.
- NB: The Senior Aerotow Coach running the course must carefully select experienced pilots to be towed as part of all practical exercises. The first five tows must be in smooth conditions.
After completing training the potential Operator must pass an Assessment.
Extending the Operator Endorsement
For any Operator endorsement extension the pre-requisites must be met, and the supervising Senior Tow Instructor or Senior Tow Coach must ensure that the appropriate new or altered elements of the Training Programme are completed. The operator must then pass an Assessment.
Tandem
Tandem Pilot Endorsements
The term ‘Tandem Pilot’ means any pilot duly qualified and endorsed to carry another person on a tandem paraglider or hang glider designed and duly certified for the purpose.
- Tandem Pilot Paraglider (Tow)
- Tandem Pilot Paraglider (Hill)
- Tandem Pilot Hang Glider (Tow)
- Tandem Pilot Hang Glider (Hill)
- Tandem Pilot Hang Glider (Aerotow)
- Operate safely in accordance with the Tandem Pilot Operational Requirements (below) and the tandem flying advice given in the IHPA Operating Procedures for Tandem Pilots.
- Improve their own skills and knowledge in various ways, including studying the IHPA Operations Manual, the BHPA Pilot Handbook, articles in Skywings (especially the Safety Matters Page) and Incident Summaries and Safety Notices.
Pre-requisites: Before commencing the ‘Tandem Pilot Training Programme’ the potential Tandem Pilot must first:
- Be a member of the IHPA
- Be aged 18 years or over
- Hold Safe Pro 4 / Para Pro 4 (Intermediate) pilot rating (or endorsement) minimum in the relevant discipline
- Have logged (solo) 100 flying hours (Hill) or 250 flights (Tow).
- Have completed 20 launches in the preceding 12 months, using the launch method and in the discipline for which the Tandem Endorsement is being sought
- Produce a letter of support or recommendation from his Club Chairman or CFI.
These training requirements may be carried out in any order subject to experience. Under training a potential Tandem Pilot must complete the appropriate training detailed below flying only with an endorsed Tandem Pilot:
- Care and briefing of the passenger
- Complete a minimum of two launches in the passenger role and position
- Complete a minimum of ten launches as Pilot in Charge
- Demonstrate a high standard of ground handling and inflation ability
- Care and briefing of the passenger
- Complete a minimum of one launch in the passenger role and position
- Wheeled / stand up landings
- Complete a minimum of four launches as Pilot in Charge
Plus for Tow or Aerotow launch - Setting up and checking bridles and equipment
- Trolley/wheeled launches
- Be familiar with the Operating Procedures for Tandem Pilots.
After completing training the potential Tandem Pilot must pass an Assessment.
Where a Tandem Pilot endorsement is held in one discipline (e.g. PG Tow), if a tandem pilot endorsement extension is sought for an alternative launch method (e.g. PG Hill) then pre-requisite requiring 100 hours / 250 flights / 50 flights may be reduced by 50% at the discretion of the CFI supervising the conversion. All other requirements must be met in full, the Training Programme must be completed in full in each case, and the candidate must pass an Assessment. There is no reduction for tandem pilots extending from paragliding to hang gliding or vice versa.
A Tandem Pilot must comply with the following requirements:
To carry another person for ‘valuable consideration’ the endorsed Tandem Pilot must also be a qualified Instructor or Air Experience Instructor (Tandem), must operate within a registered IHPA School, and the tandem flight must have a clear training content. Tandem Pilots who are not endorsed Instructors/AEI’s are not permitted to accept ‘valuable consideration’. (These rules are framed carefully to comply with the BHPA’s interpretation of UK Air law.)
All persons flown within a school must be registered as members of the IHPA. For reasons of practicality a dispensation exists whereby persons flown outside a school are encouraged to take out IHPA membership, but this is not mandatory. - IAA may require ALL passengers to be 'Day Members' of the IHPA, requiring them to fill in the membership form and sign the waiver BEFORE flying. No fee need be paid but the AEI will need to return the completed forms to the Training & Flight Safety Officer for permanent record.
Outside a school AEI’s and Instructor’s may not teach. However, if the AEI or Instructor is also an Endorsed Tandem Pilot then, when outside the school they may tandem fly solely in accordance with the role and responsibilities of an Endorsed Tandem Pilot. Persons flown by them outside a school are encouraged to take out IHPA membership, but this is not mandatory. [must be an Annual Member or a Day Member?] However, in the event of a claim for injury being brought against the tandem pilot by a non-member passenger, it will be the burden of the tandem pilot to prove that the flight in question was in no way connected to the school. Use of school equipment, sites and participation of a student at the school would amount to such a connection. As above, valuable consideration cannot be accepted for dual flights outside school.
Passenger Age Limits
There is no upper age limit but the general health and fitness of the person must be taken into consideration.
Tandem Pilots have a legal responsibility to give their passenger a pre-flight safety briefing. This should be part of the normal passenger briefing – see the Operating Procedures for Tandem Pilots.
Instructor
Instructor Endorsements
- The Air Experience Instructor
- The Senior Air Experience Instructor
- The Instructor (& Trainee Instructor)
- The Senior Instructor
- The Chief Flying Instructor
- Maximum Supervision Ratios
The Air Experience Instructor
The term Air Experience Instructor (AEI) denotes those who are endorsed to fly novices whilst providing a strictly limited training element.
- AEI HG Tow
- AEI HG Hill
- AEI HG Aerotow
- AEI PG Tow
- AEI PG Hill
- Operate only under the direct authority of a properly qualified Senior Instructor or Senior Air Experience Instructor within a registered school.
- Carry students on tandem Air Experience flights where the aircraft is piloted by the AEI, using only the craft type and launch method in which AEI qualified.
- Introduce members of the public to the sport, the IHPA Pilot Rating Scheme and the IHPA.
- Provide novices with necessary ground training and briefings.
- Ensure that all students are made fully aware of the inherent risks attached to the sport.
- Maintain currency in their flying skills.
- Understand the membership requirements and ensure that all clients become IHPA members before any Air Experience activity takes place.
- Operate safely and in accordance with the IHPA Operations Manual.
- Improve their own skills and knowledge in various ways, including studying the Operations Manual, BHPA Pilot Handbook, articles in Skywings (especially the Safety Matters page) and Incident Summaries and Safety Notices.
- Maintain and promote a positive attitude to the sport, the IHPA Training & Flight Safety Officer and the IHPA.
- Uphold their duty of care to the student and members of the public.
- Report all accidents and serious incidents to the IHPA Training & Flight Safety Officer immediately.
The potential Air Experience Instructor must first:
- Be an IHPA Member
- Be aged 18 or over
- Be supported by the Chief Flying Instructor
- Hold a current Tandem Pilot Endorsement in the relevant discipline.
These training requirements may be carried out in any order subject to experience.
Under training the potential AEI must:
- Have read and be thoroughly familiar with the IHPA Operations Manual (on-line edition.)
- Be thoroughly trained in and practice the relevant theory and practical skills and techniques listed in Operating Procedures section of this manual
- Maintain a log of all training completed, including a towing record
- Gain a recognised valid First Aid Certificate (minimum is the 1st Response Certificate)
- Attend a Coaching Course
After completing training the potential AEI must successfully pass an Assessment.
AEI endorsement may be extended between launch types and craft types using the endorsement extension and assessment system, if all prerequisites are met and training completed.
The term Senior Air Experience Instructor denotes an Endorsed Air Experience Instructor further endorsed as a result of gaining substantial practical experience in the discipline and additional managerial and administrative skills - necessary to prepare him for, if necessary, appointment as a Chief Flying Instructor within an Air Experience School.
In addition to the responsibilities of the Air Experience Instructor the Senior Air Experience Instructor must:
- Under the authority of the CFI, provide potential Air Experience Instructors and potential Operators with a high standard of training.
A potential Senior Air Experience Instructor must:
- Hold an AEI Endorsement
- Attend a BHPA Senior Instructor Course (admin and TI training modules only)
- Maintain an Instructor Log Book
- Since gaining the AEI Endorsement have logged a minimum of:
- 100 tows for solo operations
- 50 tows for dual operations
SAEI Endorsements are gained through Examination.
The SAEI endorsement cannot be extended to any other type of Instructor endorsement.
The term Instructor denotes those who are endorsed to train novices to Safe Pro / Para Pro 3 (Novice) level and beyond.
The Instructor endorsement is available in the following categories:
- Instructor HG Hill
- Instructor HG Tow
- Instructor PG Hill
- Instructor PG Tow
- Operate safely within a registered school in accordance with the Operations Manual and the instructions of the CFI and Senior Instructors. Any and all contraventions of rules and regulations should be reported, in confidence, to the IHPA Training & Flight Safety Officer.
- Operate under the direct authority of a properly qualified Senior Instructor.
- Ensure that safety standards are maintained throughout the appropriate operations.
- Provide students and pilots with a high standard of training to enable them to achieve their potential.
- Ensure that all students are made fully aware of the inherent risks attached to the sport.
- Confirm the ability of, and authorise visiting students and pilots to operate with the school.
- Improve their own flying and instructional skills and knowledge in various ways, including studying the Operations Manual, the BHPA Pilot Handbook, articles in Skywings (especially the Safety Matters page) and Incident Summaries and Safety Notices.
- Assist with any IHPA investigation or inspection in the school.
- Under the authority of the CFI, train his own group of students in a specific discipline without the need for supervision.
- Adhere to student group size limitations: The maximum size group of students that an Instructor can train is six.
- An Instructor may not train TIs.
- An instructor may, with his CFI’s authorisation (entered in his Instructor Log Book), be assisted by a TI who has, in turn, been authorised by the CFI (signed off) to teach the exercise in question. In this case the maximum student group size can be increased to eight. (See below - Maximum Supervision Ratios) N.B. The TI cannot have a separate group of students.
- Maintain and promote a positive attitude to the sport, the IHPA Training & Flight Safety Officer and the IHPA.
- Uphold his duty of care to the student and members of the public.
- Instructors may train only in those disciplines for which they are endorsed, but once endorsed they are regarded as being registered as Trainee Instructors in all other disciplines without the need for formal registration as TIs, subject to all other pre-requisites being satisfied - including the CFI's approval.
The potential Instructor must first:
- Be an IHPA Member
- Be aged 18 or over
- Be supported by the CFI
- Have recorded the following minimum experience in the relevant discipline:
- Hill - Safe Pro / Para Pro 4 rated
- Tow - Safe Pro / Para Pro 4 rated
These training requirements may be carried out in any order subject to experience.
The Trainee Instructor must:
- Obtain a personal copy of the current edition of the IHPA Operations Manual.
- Be thoroughly trained in and practice the relevant theory and practical skills and techniques listed in Operating Procedures section of this manual.
- Maintain a log of all training completed, including a towing record.
- Gain a recognised valid First Aid Certificate.
- Attend a BHPA Coaching Course.
- Attend a BHPA Instructor Course.
- Achieve Safe Pro / Para Pro 4 (Intermediate) rating (minimum) in the relevant discipline.
- In tow launching - qualify as an Operator (as relevant), and be trained and signed off by the CFI as competent to tow ab-initio.
- Complete a minimum of 10 days instructional experience.
- Must have worked for at least two days at each of two schools minimum.
- Be signed off by the CFI as competent to instruct in all training exercises up to Safe Pro / Para Pro 3 (Novice) level in the relevant discipline.
- Record 3 days (minimum) acting as a Duty Instructor (under supervision).
- For each Training Exercise the TI should first spend time observing the SI teach the students - the SI should back this up with explanations to the TI.
- The TI may then be used to assist the SI but without taking sole charge of students.
- Gradually the TI may (under close SI supervision) increase his input to the student.
- Eventually the SI may sign off the TI for a specific Training Exercise - only when he considers the TI is capable of teaching the exercise without close supervision.
- The TI may now, under the supervision of an SI, teach and supervise students attempting that specific Exercise.
A ‘signed off’ TI, supervised by an SI, may teach a maximum of four students. (See Maximum Supervision Ratios diagram below.)
- ‘Assist’ means helping the Instructor/SI teach the Instructors/SI’s group of students.
- ‘Close Supervision’ means that the SI is in direct audio/visual contact with the TI – within a few metres and paying close attention to the TI’s training.
- ‘Supervise’ means generally overseeing the activity of the TI. The supervising SI would need to be in easy visual contact (few hundred metres maximum) and would periodically during a training day make direct audio/visual contact (within a few metres and paying close attention). The supervising SI would know what the TI intends, would have assessed it as reasonable, and would keep fully aware of the general progress of the day.
Instructor Endorsements are granted by the IHPA Training & Flight Safety Officer on the recommendation of the CFI after successful independent Examination.
Any extension between hang gliding and paragliding is treated as a new endorsement. After completion of all pre-requisites and training, the CFI must apply to have the candidate examined.
Subsequent Endorsements applied for within the hang gliding main discipline:
- Additional HG launch categories may be added to an existing HG instructor endorsement by meeting all pre-requisites, completing the training, and successfully passing an assessment.
Subsequent Endorsements applied for within the paragliding main discipline:
- Additional PG launch categories may be added to an existing PG instructor endorsement by meeting all pre-requisites, completing the training, and successfully passing an assessment.
The Senior Instructor
The term Senior Instructor denotes an Endorsed Instructor further endorsed as a result of gaining substantial practical experience in one or more disciplines and additional managerial and administrative skills - necessary to prepare him for, if necessary, appointment as a Chief Flying Instructor.
In addition to the responsibilities of the Instructor the Senior Instructor must:
- Under the authority of the CFI, provide Instructors, Trainee Instructors and potential Operators, with a high standard of training.
A potential Senior Instructor must:
- Complete a minimum of 25 days logged instructional experience as an endorsed Instructor, and have instructed each and every ab-initio Training Exercise on several separate occasions.
- Have it recorded in his Instructor Log Book, by the CFI, that he may supervise and be assisted by ‘signed off’ TIs; and to record the occasions accordingly.
- Pass a BHPA Senior Instructor Course.
- Maintain an Instructor Log Book.
- Be signed off by the CFI as able and ready to take on the responsibilities of a SI.
- Pass an examination by an independent Examiner.
- Have completed at least two years as an endorsed Instructor
SI Endorsements are granted by the IHPA Training & Flight Safety Officer on the recommendation of the CFI after a successful independent examination.
Once endorsed as a SI, the SI endorsement can be extended to other disciplines where an Instructor endorsement is held and the following SI pre-requisites are met:
- Complete a minimum of 25 days logged instructional experience as an endorsed Instructor, and have instructed each and every ab-initio Training Exercise on several separate occasions.
- Have it recorded in his Instructor Log Book, by the CFI, that he may supervise and be assisted by ‘signed off’ TIs; and to record the occasions accordingly.
- Be signed off by the CFI as able and ready to take on the responsibilities of a SI.
The Chief Flying Instructor is the head of operations within a registered school.
In addition to the responsibilities of the Instructor and Senior Instructor, the CFI must:
- Be responsible for all operational and administrative activities within the school.
- Seek exemption for any proposed deviation from the published Safety Requirements by written permission from the IHPA Training & Flight Safety Officer.
- Ensure that equipment is maintained to a safe standard and consult with the IHPA Training & Flight Safety Officer when considering the use of non–standard equipment within the school.
- Ensure that the flight and instructional standards are maintained.
- Support (or not) the annual renewal of the endorsements of instructors and operators operating within the school.
- Confirm the qualifications of and, at his discretion, authorise visiting instructors to operate with the school.
- Supervise the training of Trainee Instructors including assessing and signing them off as competent to instruct specific training exercises and carrying out a mock examination prior to proposing them for examination.
- Supervise the training of Operators and their formal assessment and IHPA endorsements.
- Monitor the training standards within the school; and support applications for pilot rating awards.
- Make the school available for inspection.
- Ensure that incidents occurring within the school are submitted promptly to the IHPA Training & Flight Safety Officer.
- Carry out internal investigations, or assist with a IHPA Board of Inquiry following an accident or incident, if called upon.
- Assume the responsibilities of the Club Safety Officer.
- Disseminate Safety Notices and information within the club.
- Act as a technical reference source within the club.
- Support the coaching team in their efforts to ensure that accidents and incidents with in the club are reported to the IHPA Training & Flight Safety Officer.
- Maintain, though a programme of continuous education and encouragement, an awareness of flying and technical safety standards within the club.
- Keep up-to-date with current information.
- Maintain an effective liaison with the IHPA Training & Flight Safety Officer.
The CFI role is a school appointment: it is not an IHPAEndorsement. A CFI requires a certain amount of administrative skill but need not be the most senior school member, chairman, proprietor or officer in charge. The appointment of a CFI must be based primarily on his or her ability to carry out the responsibilities listed above. A CFI must hold a current IHPA Senior Instructor Endorsement, the appointment cannot be shared, nor can a CFI act for more than one school; and the IHPA Training & Flight Safety Officer will advise a school as to suitability following the nominee’s attendance an IHPA Committee meeting, whilst retaining the authority to reject any candidate nominated for the post.
Whilst retaining the overall responsibility for the school, a CFI may delegate, on a temporary basis, his role and responsibilities to a Senior Instructor. If the delegation period exceeds 1 month the IHPA Training & Flight Safety Officer must be informed. In exceptional circumstances the IHPA Training & Flight Safety Officer may approve the delegation to an experienced Instructor, with the exception that they may not carry out formal assessments or support pilot rating awards.
Maximum Supervision Ratios
It is the IHPA Committee's intention that students will be taught by Senior Instructors and Instructors. It is however, necessary to for future Instructors to be trained and as part of this they must practice working with students. This is permitted (under controls set out above in 'Supervision of Trainee Instructors'), but to ensure safety the following maximum supervision ratios must not be exceeded. (It is expected that these will only ever be approached during dedicated Instructor training courses.)
- When a TI has been signed off by his CFI as competent to instruct in a specific exercise (shown below in bold letters) he may directly train students in that exercise, under the supervision of a SI; until then he may only assist an Instructor or SI.
- Only a Senior Instructor can, with the authority of the CFI, train and sign off a TI.
- All figures are the maximum number permitted.

Operating Procedures
Rules of the Air
Rules of the Air
Rules of the Air
General:
- SEE and AVOID! It is the pilot’s responsibility to take all possible measures to avoid a collision with any other glider.
- A pilot shall not launch (or inflate their canopy) if there are other gliders directly in front of (or crossing) the launch area.
- A glider shall not be flown so close to another glider as to create a danger of collision.
- After taking off, pilots must fly clear of the launching area leaving it clear for other pilots wishing to launch.
- Novice and other low airtime pilots must fly with a broad red ribbon attached to their harness (PG) or kingpost (HG) to identify them to other pilots. All pilots must give these novice pilots a wide berth and not fly close to them or crowd them in the air as they have limited experience and a limited ability to manoeuvre.
Converging Gliders
When two gliders are converging at approximately the same altitude, the glider with the other on its right shall give way (i.e. the glider to the right has right of way.)
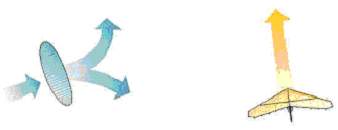
Approaching Head On
When approaching approximately head-on with a risk of collision, both gliders shall alter course to the right.
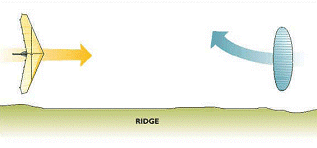
Approaching Head On, on a Ridge
When ridge-soaring, if two gliders are flying towards each other at similar height, the pilot with the ridge to his right has the right of way, and the pilot with the ridge to his left must move out so that the other has room to maintain course without having to turn into or over the ridge.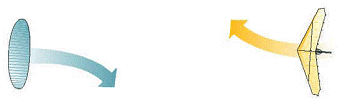
Overtaking
When overtaking another aircraft you must give it a wide berth and take care not to impede it. A glider may overtake another glider to either the left or right (hang gliders and paragliders are both considered to be gliders). When hill soaring the safest course of action is often to turn back rather than to overtake. If you do need to overtake, make sure that you pass well clear of the other glider.
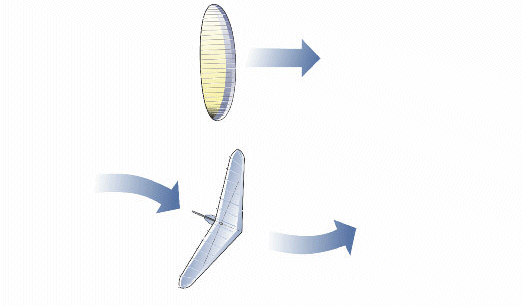
Thermaling
The first glider entering a thermal may decide which direction to turn in. Gliders joining a thermal must give way to gliders already established in it and turn in the same direction regardless of whether they join the thermal above or below other gliders already established in the thermal.
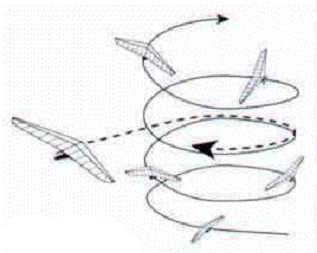
Landing
A glider landing or on final approach has the right of way over all other gliders on the ground.
When two or more gliders are landing, the lowest glider on final approach has the right of way, provided it does not cut in front of or overtakes any other glider on final approach.
After landing, you must clear the landing area as soon as possible.
Indicating the Wind Direction from the Ground
When indicating the wind direction to a pilot in the air, face the wind, lean forward, hold your arms out and back like a glider and walk or run into the wind.
The signal for zero wind is to stand up, hold your arms out horizontally from your sides (in a T shape) and turn completely around several times.
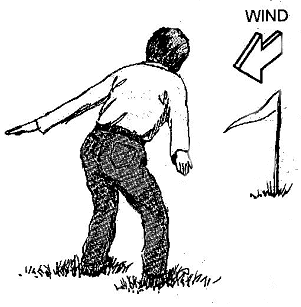
Standardised European Rules of the Air
SERA
Standardised European Rules of the Air
[IHPA NOTE: This document was prepared in 2018 by Phil Lardner (IHPA Training & Flight Safety Officer 2000 - 2023) at the request of John Murray (IAA). This document is a work in porogress. This edited version of the SERA rules (i.e. those relevant to IHPA / HG / PG pilots) has yet to be approved by the IAA]
SERA 2018 – VFR and Special VFR Rules
- https://www.easa.europa.eu/document-library/general-publications/easy-access-rules-standardised-european-rules-air-sera
- [VFR Rules: pages 52 - 57]
Phases of flight for HG/PG (not an exhaustive list!)
NOTE: we need to go through each phase of flight and decide which parts of SERA apply
- Launching / Take-off from a hill side (privately owned land or commonage.)
- Top Landing (at or near the Take-off site) on a hill side (privately owned land or commonage.)
- Launching or landing near vertical structures (power lines / transmitter masts etc.)
- Bottom Landing in a privately owned field.
- Ridge / Hill Soaring.
- Flying Cross Country.
- Landing Out after a cross country flight.
- Flying over or near built up areas, vertical structures (antennae) or water.
- Launching / Flying / Landing within a controlled airspace (Killiney / Kinsale) - Special VFR.
QUESTION: What is the altitude limit (ceiling) for Class G airspace in Ireland?
- [Page 11] IAA guide-to-air-traffic-operations.pdf [2025: document is no longer available on IAA website!]
- Surface to 7500ft amsl
- Above 7500ft is Class C airspace.
NOTE: Only Class C and Class G airspaces are physically accessible to HG/PG pilots.
QUESTION: Do we need to issue a permanent NOTAM for HG/PG activities at Killiney / Kinsale? John Murray (IAA) raised this item during the meeting 21Mar2019.
NOTE: HG/PG flights from Killiney and Kinsale are conducted under Special VFR rules, as these sites are inside Class C airspace. Local ATC will dictate the terms of the Special VFR rules. All other flights are in Class G airspace and are covered by normal VFR rules.
ACTION: Find the email from Simon Curthoys / ATC (c2013?) detailing the protocol for contacting ATC and the conditions for flying Killiney / Kinsale (and Sligo.) Do we need a formal Letter of Agreement?
ACTION: Provide a list of all our flying sites to John Murray... and the shortened list of the most popular flying sites for the AIP. This is (I think) so that the IAA can grant permission for us to operate from agreed sites and be covered by the SERA rules... possibly!
NOTE: In the following SERA.5000 headings:
- GM1 stands for Guidance Material
- AMC1 stands for Acceptable Means of Communication.
NOTE: The term 'competent authority' means the Irish Aviation Authority (IAA)
NOTE: HG/PG flights from Killiney or Kinsale, which are inside Class C airspace, are conducted under Special VFR rules as agreed with the local ATC Service Provider.
NOTE: The text below is copied directly from the 2018 SERA.5000 document on the EASA website (link at the top of this page)
- Text in red appears to be not relevant to HG/PG pilots and could/should be removed if we put this document up on the IHPA website – our pilots only need to see what is directly relevant to them.
- Text in black appears to be directly relevant to HG/PG pilots... except where noted in blue, where I'm not 100% sure if it applies to us!
SERA.5001 VMC visibility and distance from cloud minima
|
Table S5-1 (*) |
|||
|
Altitude Band |
Airspace Class |
Flight Visibility |
Distance from Cloud |
|
At and above 3050m (10,000ft) AMSL [IHPA NOTE] NOT relevant to HG/PG. This altitude band is out of reach to HG/PG. The vertical limits for Class G airspace in Ireland are Surface to 7500ft AMSL |
A (**) B C D E F G |
8km |
1500m horizontally 300m (1000ft) vertically |
|
Below 3050m (10,000ft) AMSL and above 900m (3000ft) AMSL, or above 300m (1000ft) above terrain, whichever is the higher [IHPA NOTE] Relevant to HG/PG for flights between 3000ft and 7500ft OR 1000ft above terrain, whichever is higher Not relevant to Special VFR flights at Killiney / Kinsale which are limited to 750ft AMSL |
A (**) B C D E F G |
5km |
1500m horizontally 300m (1000ft) vertically |
|
At and below 900m (3000ft) AMSL, or 300m (1000ft) above terrain, whichever is the higher [IHPA NOTE] Relevant to HG/PG for flights from Surface to 3000ft AMSL Not relevant to Special VFR flights at Killiney / Kinsale which are limited to 750ft AMSL |
A (**) B C D E
|
5km
|
1500m horizontally 300m (1000ft) vertically
|
|
F G
|
5km (***) |
Clear of cloud and with the surface in sight |
|
(*) [IHPA Note - Not relevant to HG/PG] When the height of the transition altitude is lower than 3050m (10,000ft) AMSL, FL100 shall be used in lieu of 10,000ft.
(**) [IHPA Note - Not relevant to HG/PG] The VMC minima in Class A airspace are included for guidance to pilots and do not imply acceptance of VFR flights in Class A airspace.
(***)When so prescribed by the competent authority:
(a) flight visibilities reduced to not less than 1500m may be permitted for flights operating:
(1) at speeds of 140kts IAS or less to give adequate opportunity to observe other traffic or any obstacles in time to avoid collision; or
(2) in circumstances in which the probability of encounters with other traffic would normally below, e.g. In areas of low volume traffic and for aerial work at low levels;
(b) [IHPA Note - Not relevant to HG/PG] helicopters may be permitted to operate in less than 1500m but not less than 800m flight visibility, if manoeuvred at a speed that will give adequate opportunity to observe other traffic or any obstacles in time to avoid collision.
SERA.5005 Visual Flight Rules
(a) Except when operating as a special VFR flight, VFR flights shall be conducted so that the aircraft is flown in conditions of visibility and distance from clouds equal to or greater than those specified in Table S5-1.
(b) Except when a special VFR clearance is obtained from an air traffic control unit, VFR flights shall not take off or land at an aerodrome within a control zone, or enter the aerodrome traffic zone or aerodrome traffic circuit when the reported meteorological conditions at that aerodrome are below the following minima:
(1) the ceiling is less than 450m (1500ft); or
(2) the ground visibility is less than 5 km.
(c) [IHPA Note - Not relevant to HG/PG] When so prescribed by the competent authority, VFR flights at night may be permitted under the following conditions:
(1) if leaving the vicinity of an aerodrome, a flight plan shall be submitted in accordance with SERA.4001(b)(6);
(2) flights shall establish and maintain two-way radio communication on the appropriate ATS communication channel, when available;
(3) the VMC visibility and distance from cloud minima as specified in Table S5-1 shall apply except that:
(i) the ceiling shall not be less than 450 m (1500 ft);
(ii) the reduced flight visibility provisions specified in Table S5-1(a) and (b) shall not apply;
(iii) in airspace classes B, C, D, E, F and G, at and below 900m (3000ft) AMSL or 300m (1000ft) above terrain, whichever is the higher, the pilot shall maintain continuous sight of the surface; and
(5) except when necessary for take-off or landing, or except when specifically authorised by the competent authority, a VFR flight at night shall be flown at a level which is not below the minimum flight altitude established by the State whose territory is overflown, or, where no such minimum flight altitude has been established:
(i) over high terrain or in mountainous areas, at a level which is at least 600m (2000ft) above the highest obstacle located within 8km of the estimated position of the aircraft;
(ii) elsewhere than as specified in i), at a level which is at least 300m (1000ft) above the highest obstacle located within 8km of the estimated position of the aircraft.
(d) [IHPA Note - Not relevant to HG/PG] VFR flights shall not be operated:
(1) at transonic and supersonic speeds unless authorised by the competent authority;
(2) above FL195. Exceptions to this requirement are the following:
(i) an airspace reservation has been established, where practical, by the Member States, in which VFR flights may be allowed; or
(ii) airspace up to and including FL285, when VFR traffic in that airspace has been authorised by the responsible ATS unit in accordance with the authorisation procedures established by the Member States and published in the relevant aeronautical information publication.
(e) [IHPA Note - Not relevant to HG/PG] Authorisation for VFR flights to operate above FL285 shall not be granted where a vertical separation minimum of 300m (1000ft) is applied above FL290.
(f) Except when necessary for take-off or landing, or except by permission from the competent authority, a VFR flight shall not be flown:
(1) over the congested areas of cities, towns or settlements or over an open-air assembly of persons at a height less than 300m (1000ft) above the highest obstacle within a radius of 600m from the aircraft;
(2) elsewhere than as specified in (1), at a height less than 150m (500ft) above the ground or water, or 150m (500ft) above the highest obstacle within a radius of 150m (500ft) from the aircraft.
[IHPA NOTE: Following a meeting (21/3/2019) with the Irish Aviation Authority to discuss this point, the IAA feel that there is no need for an exemption for our sport. The IAA considers unpowered gliding aircraft descending below 150m to be in a landing phase of flight ("you'd be mad not to have a landing field picked out if you're that low") and therefore covered by paragraph (f) "except when necessary for take-off or landing..." If a glider subsequently hooks a thermal (below 150m) and starts climbing then they consider us to be in a take-off phase of flight.]
(g) [IHPA Note - Not relevant to HG/PG] Except where otherwise indicated in air traffic control clearances or specified by the competent authority, VFR flights in level cruising flight when operated above 900m (3000ft) from the ground or water, or a higher datum as specified by the competent authority, shall be conducted at a cruising level appropriate to the track as specified in the table of cruising levels in Appendix 3.
(h) VFR flights shall comply with the provisions of Section 8:
[IHPA Note – I 'think' this is relevant to us... but I'm not sure! Section 8 deals with Communications and Separation Minima.]
(1) when operated within Classes B, C and D airspace;
(2) [IHPA Note - Not relevant to HG/PG] when forming part of aerodrome traffic at controlled aerodromes; or
(3) when operated as special VFR flights.
(i) [IHPA Note - Not relevant to HG/PG] A VFR flight operating within or into areas or along routes designated by the competent authority, in accordance with SERA.4001(b)(3) or (4), shall maintain continuous air-ground voice communication watch on the appropriate communication channel of, and report its position as necessary to, the air traffic services unit providing flight information service.
(j) [IHPA Note - Not relevant to HG/PG] An aircraft operated in accordance with the visual flight rules which wishes to change to compliance with the instrument flight rules shall:
(1) if a flight plan was submitted, communicate the necessary changes to be effected to its current flight plan; or
(2)as required by SERA.4001(b), submit a flight plan to the appropriate air traffic services unit as soon as practicable and obtain a clearance prior to proceeding IFR when in controlled airspace.
[IHPA Note - Not relevant to HG/PG]
GM1 SERA.5005(c)(3)(iii)Visual flight rules ED Decision 2016/023/R
NIGHT VFR ON TOP
AMC1 SERA.5005(f) Visual flight rules ED Decision 2013/013/R
VFR MINIMUM HEIGHTS - PERMISSION FROM THE COMPETENT AUTHORITY
The competent authority should specify the conditions under which the permission is or may be granted, including the minimum heights above the terrain, water or the highest obstacle within a radius of 150m (500ft) from an aircraft practising forced landings, a balloon or an aircraft executing ridge or hill soaring.
[IHPA Note – The IAA have stated that they will grant permission to hill soar any site at any altitude on condition that we provide them with a list of all our flying sites and as long as we have permission from the landowner (or any of the landowners in the case of commonly owned land.) The IAA are happy to add new flying sites to the list of agreed flying sites on request.]
GM1 SERA.5005(f) Visual flight rules ED Decision 2013/013/R
VFR MINIMUM HEIGHTS - PERMISSION FROM THE COMPETENT AUTHORITY
Subject to an appropriate safety assessment, permission from the competent authority may also be granted for cases like: [IHPA NOTE: I'm not sure how this is relevant to HG/PG... but I'm leaving it in for now!]
(a) aircraft operating in accordance with the procedure promulgated for the notified route being flown;
(b) [IHPA Note - Not relevant to HG/PG] helicopters operating at a height that will permit, in the event of an emergency arising, a landing to be made without undue hazard to persons or property on the surface;
(c) [IHPA Note - Not relevant to HG/PG] aircraft picking up or dropping tow ropes, banners or similar articles at an aerodrome;
(d) any other flights not specified above, where specific exemption is required to accomplish a specific task.
SERA.5010 Special VFR in control zones Regulation (EU) 2016/1185
Special VFR flights may be authorised to operate within a control zone, subject to an ATC clearance. [IHPA Note - Not relevant to HG/PG] Except when permitted by the competent authority for helicopters in special cases such as, but not limited to, police, medical, search and rescue operations and fire-fighting flights, the following additional conditions shall be applied:
(a) such special VFR flights may be conducted during day only, unless otherwise permitted by the competent authority;
(b) by the pilot:
(1) clear of cloud and with the surface in sight;
(2) the flight visibility is not less than 1500m [IHPA Note - Not relevant to HG/PG] or, for helicopters, not less than 800m;
(3) fly at a speed of 140kts IAS or less to give adequate opportunity to observe other traffic and any obstacles in time to avoid a collision; and
(c) an air traffic control unit shall not issue a special VFR clearance to aircraft to take off or land at an aerodrome within a control zone, or enter the aerodrome traffic zone or aerodrome traffic circuit when the reported meteorological conditions at that aerodrome are below the following minima:
(1) the ground visibility is less than 1500m [IHPA Note - Not relevant to HG/PG] or, for helicopters, less than 800m;
(2) the ceiling is less than 180m (600ft).
[IHPA Note - Not relevant to HG/PG]
GM1 SERA.5010 Special VFR in control zones ED Decision 2016/023/R
The list of type of operations subject to permit by the competent authority to deviate from the requirements for special visual flight rules (VFR) flights is not exhaustive. The competent authority may grant a permit for other kind of helicopter operations such as power line inspections, helicopter hoist operations, etc.
[IHPA Note - Not relevant to HG/PG]
AMC1 SERA.5010(a)(3) Special VFR in control zones ED Decision 2013/013/R
SPEED LIMIT TO BE APPLIED BY HELICOPTER PILOTS
The 140kt speed should not be used by helicopters operating at a visibility below 1500m. In such case, a lower speed appropriate to the actual conditions should be applied by the pilot.
[IHPA Note - Not relevant to HG/PG]
GM1 SERA.5010(a)(3) Special VFR in control zones ED Decision 2013/013/R
SPEED LIMIT TO BE APPLIED BY HELICOPTER PILOTS
The 140kt speed is to be considered as an absolute maximum acceptable speed in order to maintain an acceptable level of safety when the visibility is 1500m or more. Lower speeds should be applied according to elements such as local conditions, number and experience of pilots on board, using the guidance of the table below:Visibility (m)Advisory speed (kt)8005015001002000120
GM1 SERA.5010(b)(2) Special VFR in control zones ED Decision 2016/023/R
When assessing the prevailing flight visibility, the pilots should use their best judgement. The assessment should be based, for example, on the pilot’s overall flight experience, knowledge of local conditions and procedures, visible landmarks, etc. Furthermore, the pilot should possess the latest weather observations and forecasts.
[IHPA Note - Not relevant to HG/PG]
AMC1 SERA.5010(b)(3) Special VFR in control zones ED Decision 2016/023/R
SPEED LIMIT TO BE APPLIED BY HELICOPTER PILOTS
The 140kt-speed should not be used by helicopters operating at a visibility below 1500m. In such case, a lower speed appropriate to the actual conditions should be applied by the pilot.
GM1 SERA.5010(c) Special VFR in control zones ED Decision 2016/023/R
When the reported ground visibility at the aerodrome is less than 1500m, ATC may issue a special VFR clearance for a flight crossing the control zone and not intending to take off or land at an aerodrome within a control zone, or enter the aerodrome traffic zone or aerodrome traffic circuit when the flight visibility reported by the pilot is not less than 1500m, [IHPA Note - Not relevant to HG/PG] or, for helicopters, not less than 800m.
SERA
SERA
Standardised European Rules of the Air
[IHPA NOTE: This document was prepared in 2018 by Phil Lardner (IHPA Training & Flight Safety Officer 2000 - 2023) at the request of John Murray (IAA). This document is a work in porogress. This edited version of the SERA rules (i.e. those relevant to IHPA / HG / PG pilots) has yet to be approved by the IAA]
SERA 2018 – VFR and Special VFR Rules
- https://www.easa.europa.eu/document-library/general-publications/easy-access-rules-standardised-european-rules-air-sera
- [VFR Rules: pages 52 - 57]
Phases of flight for HG/PG (not an exhaustive list!)
NOTE: we need to go through each phase of flight and decide which parts of SERA apply
- Launching / Take-off from a hill side (privately owned land or commonage.)
- Top Landing (at or near the Take-off site) on a hill side (privately owned land or commonage.)
- Launching or landing near vertical structures (power lines / transmitter masts etc.)
- Bottom Landing in a privately owned field.
- Ridge / Hill Soaring.
- Flying Cross Country.
- Landing Out after a cross country flight.
- Flying over or near built up areas, vertical structures (antennae) or water.
- Launching / Flying / Landing within a controlled airspace (Killiney / Kinsale) - Special VFR.
QUESTION: What is the altitude limit (ceiling) for Class G airspace in Ireland?
- [Page 11] IAA guide-to-air-traffic-operations.pdf [2025: document is no longer available on IAA website!]
- Surface to 7500ft amsl
- Above 7500ft is Class C airspace.
NOTE: Only Class C and Class G airspaces are physically accessible to HG/PG pilots.
QUESTION: Do we need to issue a permanent NOTAM for HG/PG activities at Killiney / Kinsale? John Murray (IAA) raised this item during the meeting 21Mar2019.
NOTE: HG/PG flights from Killiney and Kinsale are conducted under Special VFR rules, as these sites are inside Class C airspace. Local ATC will dictate the terms of the Special VFR rules. All other flights are in Class G airspace and are covered by normal VFR rules.
ACTION: Find the email from Simon Curthoys / ATC (c2013?) detailing the protocol for contacting ATC and the conditions for flying Killiney / Kinsale (and Sligo.) Do we need a formal Letter of Agreement?
ACTION: Provide a list of all our flying sites to John Murray... and the shortened list of the most popular flying sites for the AIP. This is (I think) so that the IAA can grant permission for us to operate from agreed sites and be covered by the SERA rules... possibly!
NOTE: In the following SERA.5000 headings:
- GM1 stands for Guidance Material
- AMC1 stands for Acceptable Means of Communication.
NOTE: The term 'competent authority' means the Irish Aviation Authority (IAA)
NOTE: HG/PG flights from Killiney or Kinsale, which are inside Class C airspace, are conducted under Special VFR rules as agreed with the local ATC Service Provider.
NOTE: The text below is copied directly from the 2018 SERA.5000 document on the EASA website (link at the top of this page)
- Text in red appears to be not relevant to HG/PG pilots and could/should be removed if we put this document up on the IHPA website – our pilots only need to see what is directly relevant to them.
- Text in black appears to be directly relevant to HG/PG pilots... except where noted in blue, where I'm not 100% sure if it applies to us!
SERA.5001 VMC visibility and distance from cloud minima
|
Table S5-1 (*) |
|||
|
Altitude Band |
Airspace Class |
Flight Visibility |
Distance from Cloud |
|
At and above 3050m (10,000ft) AMSL [IHPA NOTE] NOT relevant to HG/PG. This altitude band is out of reach to HG/PG. The vertical limits for Class G airspace in Ireland are Surface to 7500ft AMSL |
A (**) B C D E F G |
8km |
1500m horizontally 300m (1000ft) vertically |
|
Below 3050m (10,000ft) AMSL and above 900m (3000ft) AMSL, or above 300m (1000ft) above terrain, whichever is the higher [IHPA NOTE] Relevant to HG/PG for flights between 3000ft and 7500ft OR 1000ft above terrain, whichever is higher Not relevant to Special VFR flights at Killiney / Kinsale which are limited to 750ft AMSL |
A (**) B C D E F G |
5km |
1500m horizontally 300m (1000ft) vertically |
|
At and below 900m (3000ft) AMSL, or 300m (1000ft) above terrain, whichever is the higher [IHPA NOTE] Relevant to HG/PG for flights from Surface to 3000ft AMSL Not relevant to Special VFR flights at Killiney / Kinsale which are limited to 750ft AMSL |
A (**) B C D E
|
5km
|
1500m horizontally 300m (1000ft) vertically
|
|
F G
|
5km (***) |
Clear of cloud and with the surface in sight |
|
(*) [IHPA Note - Not relevant to HG/PG] When the height of the transition altitude is lower than 3050m (10,000ft) AMSL, FL100 shall be used in lieu of 10,000ft.
(**) [IHPA Note - Not relevant to HG/PG] The VMC minima in Class A airspace are included for guidance to pilots and do not imply acceptance of VFR flights in Class A airspace.
(***)When so prescribed by the competent authority:
(a) flight visibilities reduced to not less than 1500m may be permitted for flights operating:
(1) at speeds of 140kts IAS or less to give adequate opportunity to observe other traffic or any obstacles in time to avoid collision; or
(2) in circumstances in which the probability of encounters with other traffic would normally below, e.g. In areas of low volume traffic and for aerial work at low levels;
(b) [IHPA Note - Not relevant to HG/PG] helicopters may be permitted to operate in less than 1500m but not less than 800m flight visibility, if manoeuvred at a speed that will give adequate opportunity to observe other traffic or any obstacles in time to avoid collision.
SERA.5005 Visual Flight Rules
(a) Except when operating as a special VFR flight, VFR flights shall be conducted so that the aircraft is flown in conditions of visibility and distance from clouds equal to or greater than those specified in Table S5-1.
(b) Except when a special VFR clearance is obtained from an air traffic control unit, VFR flights shall not take off or land at an aerodrome within a control zone, or enter the aerodrome traffic zone or aerodrome traffic circuit when the reported meteorological conditions at that aerodrome are below the following minima:
(1) the ceiling is less than 450m (1500ft); or
(2) the ground visibility is less than 5 km.
(c) [IHPA Note - Not relevant to HG/PG] When so prescribed by the competent authority, VFR flights at night may be permitted under the following conditions:
(1) if leaving the vicinity of an aerodrome, a flight plan shall be submitted in accordance with SERA.4001(b)(6);
(2) flights shall establish and maintain two-way radio communication on the appropriate ATS communication channel, when available;
(3) the VMC visibility and distance from cloud minima as specified in Table S5-1 shall apply except that:
(i) the ceiling shall not be less than 450 m (1500 ft);
(ii) the reduced flight visibility provisions specified in Table S5-1(a) and (b) shall not apply;
(iii) in airspace classes B, C, D, E, F and G, at and below 900m (3000ft) AMSL or 300m (1000ft) above terrain, whichever is the higher, the pilot shall maintain continuous sight of the surface; and
(5) except when necessary for take-off or landing, or except when specifically authorised by the competent authority, a VFR flight at night shall be flown at a level which is not below the minimum flight altitude established by the State whose territory is overflown, or, where no such minimum flight altitude has been established:
(i) over high terrain or in mountainous areas, at a level which is at least 600m (2000ft) above the highest obstacle located within 8km of the estimated position of the aircraft;
(ii) elsewhere than as specified in i), at a level which is at least 300m (1000ft) above the highest obstacle located within 8km of the estimated position of the aircraft.
(d) [IHPA Note - Not relevant to HG/PG] VFR flights shall not be operated:
(1) at transonic and supersonic speeds unless authorised by the competent authority;
(2) above FL195. Exceptions to this requirement are the following:
(i) an airspace reservation has been established, where practical, by the Member States, in which VFR flights may be allowed; or
(ii) airspace up to and including FL285, when VFR traffic in that airspace has been authorised by the responsible ATS unit in accordance with the authorisation procedures established by the Member States and published in the relevant aeronautical information publication.
(e) [IHPA Note - Not relevant to HG/PG] Authorisation for VFR flights to operate above FL285 shall not be granted where a vertical separation minimum of 300m (1000ft) is applied above FL290.
(f) Except when necessary for take-off or landing, or except by permission from the competent authority, a VFR flight shall not be flown:
(1) over the congested areas of cities, towns or settlements or over an open-air assembly of persons at a height less than 300m (1000ft) above the highest obstacle within a radius of 600m from the aircraft;
(2) elsewhere than as specified in (1), at a height less than 150m (500ft) above the ground or water, or 150m (500ft) above the highest obstacle within a radius of 150m (500ft) from the aircraft.
[IHPA NOTE: Following a meeting (21/3/2019) with the Irish Aviation Authority to discuss this point, the IAA feel that there is no need for an exemption for our sport. The IAA considers unpowered gliding aircraft descending below 150m to be in a landing phase of flight ("you'd be mad not to have a landing field picked out if you're that low") and therefore covered by paragraph (f) "except when necessary for take-off or landing..." If a glider subsequently hooks a thermal (below 150m) and starts climbing then they consider us to be in a take-off phase of flight.]
(g) [IHPA Note - Not relevant to HG/PG] Except where otherwise indicated in air traffic control clearances or specified by the competent authority, VFR flights in level cruising flight when operated above 900m (3000ft) from the ground or water, or a higher datum as specified by the competent authority, shall be conducted at a cruising level appropriate to the track as specified in the table of cruising levels in Appendix 3.
(h) VFR flights shall comply with the provisions of Section 8:
[IHPA Note – I 'think' this is relevant to us... but I'm not sure! Section 8 deals with Communications and Separation Minima.]
(1) when operated within Classes B, C and D airspace;
(2) [IHPA Note - Not relevant to HG/PG] when forming part of aerodrome traffic at controlled aerodromes; or
(3) when operated as special VFR flights.
(i) [IHPA Note - Not relevant to HG/PG] A VFR flight operating within or into areas or along routes designated by the competent authority, in accordance with SERA.4001(b)(3) or (4), shall maintain continuous air-ground voice communication watch on the appropriate communication channel of, and report its position as necessary to, the air traffic services unit providing flight information service.
(j) [IHPA Note - Not relevant to HG/PG] An aircraft operated in accordance with the visual flight rules which wishes to change to compliance with the instrument flight rules shall:
(1) if a flight plan was submitted, communicate the necessary changes to be effected to its current flight plan; or
(2)as required by SERA.4001(b), submit a flight plan to the appropriate air traffic services unit as soon as practicable and obtain a clearance prior to proceeding IFR when in controlled airspace.
[IHPA Note - Not relevant to HG/PG]
GM1 SERA.5005(c)(3)(iii)Visual flight rules ED Decision 2016/023/R
NIGHT VFR ON TOP
AMC1 SERA.5005(f) Visual flight rules ED Decision 2013/013/R
VFR MINIMUM HEIGHTS - PERMISSION FROM THE COMPETENT AUTHORITY
The competent authority should specify the conditions under which the permission is or may be granted, including the minimum heights above the terrain, water or the highest obstacle within a radius of 150m (500ft) from an aircraft practising forced landings, a balloon or an aircraft executing ridge or hill soaring.
[IHPA Note – The IAA have stated that they will grant permission to hill soar any site at any altitude on condition that we provide them with a list of all our flying sites and as long as we have permission from the landowner (or any of the landowners in the case of commonly owned land.) The IAA are happy to add new flying sites to the list of agreed flying sites on request.]
GM1 SERA.5005(f) Visual flight rules ED Decision 2013/013/R
VFR MINIMUM HEIGHTS - PERMISSION FROM THE COMPETENT AUTHORITY
Subject to an appropriate safety assessment, permission from the competent authority may also be granted for cases like: [IHPA NOTE: I'm not sure how this is relevant to HG/PG... but I'm leaving it in for now!]
(a) aircraft operating in accordance with the procedure promulgated for the notified route being flown;
(b) [IHPA Note - Not relevant to HG/PG] helicopters operating at a height that will permit, in the event of an emergency arising, a landing to be made without undue hazard to persons or property on the surface;
(c) [IHPA Note - Not relevant to HG/PG] aircraft picking up or dropping tow ropes, banners or similar articles at an aerodrome;
(d) any other flights not specified above, where specific exemption is required to accomplish a specific task.
SERA.5010 Special VFR in control zones Regulation (EU) 2016/1185
Special VFR flights may be authorised to operate within a control zone, subject to an ATC clearance. [IHPA Note - Not relevant to HG/PG] Except when permitted by the competent authority for helicopters in special cases such as, but not limited to, police, medical, search and rescue operations and fire-fighting flights, the following additional conditions shall be applied:
(a) such special VFR flights may be conducted during day only, unless otherwise permitted by the competent authority;
(b) by the pilot:
(1) clear of cloud and with the surface in sight;
(2) the flight visibility is not less than 1500m [IHPA Note - Not relevant to HG/PG] or, for helicopters, not less than 800m;
(3) fly at a speed of 140kts IAS or less to give adequate opportunity to observe other traffic and any obstacles in time to avoid a collision; and
(c) an air traffic control unit shall not issue a special VFR clearance to aircraft to take off or land at an aerodrome within a control zone, or enter the aerodrome traffic zone or aerodrome traffic circuit when the reported meteorological conditions at that aerodrome are below the following minima:
(1) the ground visibility is less than 1500m [IHPA Note - Not relevant to HG/PG] or, for helicopters, less than 800m;
(2) the ceiling is less than 180m (600ft).
[IHPA Note - Not relevant to HG/PG]
GM1 SERA.5010 Special VFR in control zones ED Decision 2016/023/R
The list of type of operations subject to permit by the competent authority to deviate from the requirements for special visual flight rules (VFR) flights is not exhaustive. The competent authority may grant a permit for other kind of helicopter operations such as power line inspections, helicopter hoist operations, etc.
[IHPA Note - Not relevant to HG/PG]
AMC1 SERA.5010(a)(3) Special VFR in control zones ED Decision 2013/013/R
SPEED LIMIT TO BE APPLIED BY HELICOPTER PILOTS
The 140kt speed should not be used by helicopters operating at a visibility below 1500m. In such case, a lower speed appropriate to the actual conditions should be applied by the pilot.
[IHPA Note - Not relevant to HG/PG]
GM1 SERA.5010(a)(3) Special VFR in control zones ED Decision 2013/013/R
SPEED LIMIT TO BE APPLIED BY HELICOPTER PILOTS
The 140kt speed is to be considered as an absolute maximum acceptable speed in order to maintain an acceptable level of safety when the visibility is 1500m or more. Lower speeds should be applied according to elements such as local conditions, number and experience of pilots on board, using the guidance of the table below:Visibility (m)Advisory speed (kt)8005015001002000120
GM1 SERA.5010(b)(2) Special VFR in control zones ED Decision 2016/023/R
When assessing the prevailing flight visibility, the pilots should use their best judgement. The assessment should be based, for example, on the pilot’s overall flight experience, knowledge of local conditions and procedures, visible landmarks, etc. Furthermore, the pilot should possess the latest weather observations and forecasts.
[IHPA Note - Not relevant to HG/PG]
AMC1 SERA.5010(b)(3) Special VFR in control zones ED Decision 2016/023/R
SPEED LIMIT TO BE APPLIED BY HELICOPTER PILOTS
The 140kt-speed should not be used by helicopters operating at a visibility below 1500m. In such case, a lower speed appropriate to the actual conditions should be applied by the pilot.
GM1 SERA.5010(c) Special VFR in control zones ED Decision 2016/023/R
When the reported ground visibility at the aerodrome is less than 1500m, ATC may issue a special VFR clearance for a flight crossing the control zone and not intending to take off or land at an aerodrome within a control zone, or enter the aerodrome traffic zone or aerodrome traffic circuit when the flight visibility reported by the pilot is not less than 1500m, [IHPA Note - Not relevant to HG/PG] or, for helicopters, not less than 800m.
General
Operating Procedures - General
Index:
- The Site
- Site Control
- Equipment
- Signals
- Instruction in Schools
- Training Facilities in Schools
The Site
The choice of site will be affected by several factors :
- If it is in regulated air space the relevant authorisation must be obtained.
- The Site Sovereignty Code guidelines must be followed prior to registering the site with the Association.
- Local Bye-laws may control certain activities (eg the use of power boats on specific waters, or anti-noise constraints).
- Site sharing requires effective and constant liaison with other users.
- Every site (including landing areas) should be surveyed for potential hazards - ground and air obstacles (eg trees, walls, rocks, significant areas of water; power lines, localised turbulence, proximity of other airborne craft).
- Where the public have access to a tow launch site a board "WARNING - TOW CABLES" should be displayed prominently.
The launch point should be chosen with the following points in mind:
- There should be sufficient clear ground in the immediate vicinity to:
- Allow the glider to get safely airborne, and
- Minimise the danger in the event of an emergency on or shortly after take-off. This includes an abort space to the front, sufficient 'blow-back' space, and clearance to either side in case of side-slip or rotation.
- Allow other pilots to make their gliders ready for flight.
- The ground surface should be soft; grass or sand is better than concrete or tarmac if anyone falls over during the launch.
- In tow operations the launch point must be visible from the tow unit so that all signals can be seen and the tow unit operator can observe the glider in the early stages especially.
- The "park" for members' and visitors' cars and equipment should be situated at a safedistance from the launch point.
- The proximity and the effect of the sport upon other users of the site and passers by (eg cars on a nearby road; horse riders) should be considered.
- The direction of launch should be as near as possible into wind.
- It should be appropriate to the level of training or competency of the student or the pilot.
The landing area should be chosen with the following points in mind:
- It should be of suitable size; both for the level of student or pilot competency and the intended exercise.
- It should be clearly defined; where an alternative landing area is available it, too, should be clearly marked.
- It should be suitable for the identified wind directions, and the approaches should be hazard free.
- It should not be prone to turbulent effects.
- Where appropriate it should be clearly visible to a tow unit driver practising controlled descents.
- To avoid congestion pilots should be able to clear the landing area quickly and easily.
Site Control
In a school situation a Duty Instructor is appointed on a daily basis by the CFI and is responsible for taking the lead, allocating duties to other Instructors, and maintaining overall control (especially of the operations and the site). This is necessary to anticipate and prevent confusion, thus minimising the possibility of unsafe procedures which might lead to incidents or accidents. The Duty Instructor should be identified to students and pilots, who will gain confidence from, and respond to the presence of this authoritative source.
Equipment
WARNING: The dangers attached to moving machinery and tow lines must be made clear to all participants at regular and frequent intervals. Hands and feet, in particular, must be kept well clear. In a commercial situation proprietors are reminded of their duties under the current Health and Safety at Work Act which requires that all moving machinery must be guarded in such a way as to effectively protect operators and bystanders.
The regular and careful inspection of equipment is essential for the continuing safety of students and pilots alike.
In addition to regular periodic checks on an annual or seasonal basis, all equipment should be given a thoroughly detailed Daily Inspection at the start of the flying day. This should not be confused with the Pre-Flight Check which is carried out by the student or pilot just prior to take-off and which is described in the Operating Procedures section of this manual.
Checking all equipment brought on to the site avoids the danger of overlooking a glider which, although not immediately required, might be brought into service later in the day. In a training situation it is the Duty Instructor's responsibility to ensure that these inspections are carried out although experienced pilots are expected to be responsible for their personal equipment and perform daily inspection and pre-flight checks themselves. Unserviceable gliders should be marked with the red tag to ensure they are not used until they have been repaired. These tags are not to be removed by any other person than a CFI or qualified rigger.
Gliders
IHPA members must fly only certificated hang gliders or paragliders.
‘Certificated’ means tested to an approved standard by a body acceptable to the IHPA - currently BHPA / DHV / CEN / AFNOR / USHGMA.
School gliders
- All hang gliders and paragliders used in schools must be certified and carry a sail badge, label or keel sticker confirming this.
- In the case of hang gliders, acceptable certification bodies are BHPA, DHV or (US)HGMA.
- For paragliders BHPA, DHV or CEN/AFNOR are recognised.
- All gliders used in schools must be clearly marked with the weight limits (‘clip-in’ for hang gliders; ‘total weight in flight’ for paragliders and parascending canopies). These limits must be complied with.
- Instructors must ensure that the glider in use is suitable for the training exercise being attempted.
- All gliders in use must be maintained in an airworthy condition. Any damage that occurs must be rectified before further use. (The practice of straightening hang glider uprights in front of students is prohibited.)
- Modifications to gliders, however slight, must have the written approval of the manufacturer or IHPA. (Temporary removal of hang glider tip struts is a modification and is not permitted, irrespective of the type of flight being undertaken or technique used.)
- A student may use his own glider within a school providing all the above criteria are met. The CFI is responsible for checking this compliance.
Wheels on Training Hang Gliders
Wheels of at least 9" diameter must be firmly attached on to the control frame of hang gliders flown by students prior to gaining the Safe Pro 3 (Novice) rating.
Protective Head and Foot Wear
The School should ensure that suitable and properly fitting protective headgear and suitable footwear is worn. As of January 1st 2004 helmets used by student must conform to CE EN966.
A simple way to check for fit (which all students should be taught) is to don and fasten the chin strap; look over the shoulder and check the helmet doesn't impede the movement. Looking forward, shake the head from side to side and make sure the helmet stays firm. Finally tilt the head forward, place a hand under the back of the helmet and push up - the helmet should remain firmly in place.
Footwear should provide firm sole and ankle protection; lacing hooks should be avoided or taped over to prevent the danger of entanglement.
When paragliding dual flying is intended, there is a possible danger that the pilot-in-charge could suffer facial injury when, after an awkward landing, the face comes into contact with the co-pilot's helmet. It is therefore strongly recommendation that the pilot-in-charge wears a suitable full face helmet to afford better protection.
Harnesses (hang glider)
- From the Accident Statistics collected over the years it is officially recognised that seated training has many draw backs, some of these only reveal themselves later in the pilot's flying career. As a result of this schools may only teach in a semi-prone position.
- Initial training must be carried out with the stirrup removed completely
- The stirrup should be introduced only if the student is ready and weather conditions are suitable.
- All harnesses must be constructed in an approved manner and made from suitable material. Harnesses in use must be in good repair and properly adjusted to suit the pilot and glider.
- Only "screw gate" or "twist lock" karabiners carrying the UIAA approved mark should be used in the pilot's main line of suspension.
Note: It is believed that aluminium 'karabiners' are far less durable and more susceptible to blows than their steel counterparts.
Harnesses (paraglider)
There are, usually, two sets of straps to secure on a paragliding harness - the chest strap and the leg straps. There have been instances of the canopy inflating in the period (however, short) between fastening each set and of injuries being sustained. The choice rests between :
- Fastening chest straps first - in which case, if the canopy then inflates the chest strap can be pulled up and under the pilot's throat, and he is pulled over on to his back with considerable force. In the worst case, that of high performance paragliders, the pilot might become airborne in a strangulated position and unable to reach the controls.
- On the other hand, if the leg straps are fastened and an inflation occurs then the force acting on the thighs will jack-knife the pilot backwards; he will however, be in a better position to reach the controls.
On balance the risk is less in the second case and so the recommendation is that the leg straps should be secured first - conversely, they should be unfastened last when taking the harness off.
Harness - Paraglider tandem type
There is a particular danger when fitting both pilots into a dual harness when 'spreader' bars are used and a reverse launch is used. As both rigging and spreaders must be crossed it is essential that both are crossed the same way, so to reduce the risk of confusion the following sequence is strongly recommended:
- Harnesses on.
- Spreaders fitted to student (if not already attached.)
- Spreaders fitted to pilot-in-charge.
- Canopy fitted to spreaders - ensuring that both pilots are facing forwards.
First Aid
The School is responsible for the provision of adequate First Aid arrangements at each site used. An Incident Book should be kept and all accidents to students recorded - in addition to submitting an IHPA Incident Report form to the IHPA Training & Flight Safety Officer.
Simulators
A good hang gliding simulator is recommended for tuition purposes. Suspended harness systems for paragliding tuition are recommended.
Wind Meter
A suitable wind speed measuring device should be introduced to students and used whenever appropriate to measure wind speed.
Wind-socks and Streamers
One or more wind socks or streamers should be available especially during early training. For hill training a wind sock must be positioned in the landing area, identified to the students, and its purpose explained.
Signals
The Duty Instructor is to ensure that all those involved in the operation are fully conversant with these signals which are to be regarded as standard.
Ground to ground signals: The Duty Instructor appoints a Launch Marshal or Signaller who is then responsible for signals made from the launch point to the tow unit. Whatever method of signalling is used (bats, radio, lights or other) there must be no possibility of mistaking the STOP signal - in fact the absence of a positive signal to proceed should be taken by the tow unit operator that there is a potential problem and the tow should be abandoned. There are four basic signals for launching a glider:
1)"Take up slack" is a positive, repeated signal meaning all is clear at the launch point and the tow unit can take up the slack in the tow line, stopping short of launching the glider.
2) "All out" signal indicates to the tow unit that he can proceed to launch the glider.
Note: The signal used at international events is ‘Drive.’
3) "Stand by" (bat held out to the side) indicates that there is a problem at the launch point which needs correcting before the launch can proceed.
4) "STOP" is a warning to the tow unit operator that there is a problem at the launch point and the launch should not proceed; the action required of the operator depends upon the stage of the launch, the tension in the tow line, and any indications which the tow unit operator may have as to the cause.
In order to avoid confusion the signals must be distinctly different - see Operating Procedures - Signals.
When using radio communications the commands may be shortened for clarity - reference should be made to the specific chapter which deals with each discipline and which defines these and other signals. Words like 'No' or 'Go' should be avoided for obvious reasons.
The tow vehicle may signal "I am ready to proceed" to the Launch Marshal by switching on its hazard warning lights, which also indicates to other airfield users that this is a moving vehicle. Alternatively, and for similar reasons, a flashing strobe light may be mounted on the tow unit to indicate that a launch is proceeding.
Air to ground signals: A pilot may signal a 'request to release' by opening wide his legs and keeping them open. The tow unit operator should normally respond to this signal by removing the tension from the tow line thus allowing the pilot to release; at this point the pilot may close his legs. However, particularly with students, the driver may decide to continue the tow until the glider is more safely positioned. Proficient paraglider pilots under tow may indicate to the driver/winchman the following requests:
-
- "Please increase the tow tension" - both arms out to the side and waved up and down (for round canopies only).
- "Please decrease the tow tension" - both legs opened and closed repeatedly.
Ground to air signals: Where parascending students, in particular, are being introduced to self release it can be useful for the tow unit driver to wave a signal bat as an indication that it is safe to release.
Radio communications: All forms of radio communications used in hang gliding and paragliding must comply with the current legal requirements. Particular attention must be paid to such regulations when using air-to-air or ground-to-air communications, with pilots trained to understand the proper procedures.
It is recommended that schools should use an approved ground to air radio for the longer solo flights. This is a requirement when only one instructor is present for the student's high solos.
Instruction in schools
Training is carried out in strict accordance with the specific Student Training Programme. Instructors should also take note of the following points:
Supervision - Students should at all times be under qualified supervision; this will range from the Day 1 situation of ‘very close supervision’ through to near-Novice (Safe / Para Pro 3) award of ‘watchful attention’. Very close supervision means that the instructor is in direct audio/visual contact with the student - they are close enough for there to be no misunderstanding as to what is intended and, in case of problems, the necessary corrective actions can be taken. Watchful attention means the instructor knows what the student intends, has assessed it as reasonable, and is observing the task so as to be able to debrief effectively and, where appropriate, sign off the task.
Explanation by the Instructor
Demonstration by the Instructor
Practice by the student
Feedback
This is the most effective tool in the Instructor's armoury
As a general guide for practical tasks the student should complete at least three consecutively satisfactory flights to demonstrate competency in a particular skill (controlled 90° turns for instance).
Dress - should be suitable for the planned exercise, bearing in mind the environment and weather; good footwear with firm soles and ankle protection; well fitting safety helmets offering effective protection; gloves may also be needed, and bare limbs should be avoided.
Fitness - Instructors have a duty of care which includes assessing the student for fitness to undertake any part of the training. They should continually assess students for fatigue, particularly in the early stages when bottom landings are likely or when weather extremes may accelerate the effects.
Duty Instructors should also bear in mind that fatigue can also affect Tandem Pilots.
Communications - students must receive a thorough briefing on the method of communications which will be used during the exercises. Whether verbal, radio or semaphore instructions or directions must be simple and not capable of being misunderstood. In the early stages, when direct briefings or instructions are usual, the student should always be asked to repeat them back to the Instructor. As students become more proficient the briefings should become increasingly discussive (eg "What do you think you should be doing next?"). The student should always be debriefed after landing, in the manner of "What did we agree you would do?" - "What did you actually do?" and, if there is an error "Why do you think you did (or did not do) that?"
Sequential checks
There are numerous instances of incidents occurring after a sequence has been interrupted, then continued but with a point missed out. Students (and instructors) should be constantly reminded that once a sequence has started it should be completed without interruption. If necessary it should be repeated from the beginning.
Balanced Instruction
Students attend schools with one view. They wish to be taught how to fly gliders. But in addition to the practical skills involved a student must have a sound theoretical knowledge if they are to achieve a full understanding.
Some schools tend to lecture new students for the first half of their first day - which can involve 2 to 3 hours of theory (classroom) work. Other schools initiate their students with basic practical training as early as possible, and then introduce them to theory on an 'as required' basis. The latter approach gives the students something to which they can relate and is by far:
- the most practical and effective (weather permitting).
- the most interesting and rewarding for the student.
- the more constructive method of teaching.
The structure of the first day depends upon the type of discipline but in any event should be flexible.
- If weather conditions are suitable, students should be introduced to the gliders and start ground handling, as quickly as possible. A short 30 minute basic theory session could be appropriate, if not too much time has been absorbed with administration and introductions. Theory thereafter should be carefully controlled to ensure that it is introduced at the most appropriate time - this could save schools having to cancel part of their courses due to inclement weather.
- If the weather on the first morning is unsuitable for practical work then an introduction to theory can be made providing it is kept within reasonable bounds and not laboured.
Bad Weather Programme
Schools are encouraged to compile a programme of attractive activities for students to take advantage of when poor weather prevents further training.
Training Programmes
Experience built up over many years has resulted in the Student Training Programmes. Student safety is paramount and depends upon following this planned and progressive series of exercises. These are the building blocks of the sport - before a student is awarded any rating the CFI must be satisfied that all aspects of the programme, including theory, have been properly and fully covered and that the student has been tested and has successfully completed all the requirements.
Part Trained Students
IHPA schools may be attended by students who have undertaken some training elsewhere. To prevent unnecessary repetition, students who have recently completed such training need not repeat exercises already carried out, providing that the experience was reasonably current and the procedure below is followed.
1. The student must provide the IHPA Instructor with satisfactory evidence of attendance at a previous school, and of the standard achieved (eg. relevant IPPI rating). If the previous school was an IHPA or BHPA school then a copy of the Student Training Record Book must be obtained.
2. The student and IHPA Instructor must clarify the extent of the student's previous training by signing the Student Training Record booklets only where an exercise was completed in full. (The 'Exercise x completed satisfactorily' line should be anotated with the previous school’s name and country.)
3. Starting from exercise one, any exercise not completed (or not fully completed) should be thoroughly reviewed and completed satisfactorily (and the Student Training Record Booklets signed) before any new exercises are introduced.
NB. Students trained in foreign schools will usually be unfamiliar with the UK flying environment (small hills, wind.) It is essential that Instructors anticipate and address these gaps in the student's knowledge / ability.
Irrespective of all the above, when practical training commences instructors should carefully gauge the student's true ability by setting and monitoring how well they perform simple basic exercises.
Invigilation of examination papers
Schools should have suitable facilities to allow students and pilots to remain undisturbed whilst an examination paper is attempted. CFIs and Senior Coaches should make every effort to maintain the integrity of the scheme by briefing invigilating officers (Instructors, Coaches and Safety Officers) accordingly.
Special Training Techniques
Certain skills and techniques have been derived over many years of experience and a standard approach or method of application agreed upon, and where this is evident Instructors should follow the standard method as indicated.
An example of this is the Parachute Landing Fall (PLF) or Landing Roll; and procedures for tree and water landings. These have been adapted to suit the sport in its various disciplines and have been found to be extremely effective (a full description of the PLF is contained inthe Operating Procedures section of this manual.
Landing emergencies
Students should be trained to make every effort to avoid the following situations, but it is accepted that emergencies will arise and all students should be made aware of the following procedures. It must be stressed to the student, however, that every scenario is different and instructors should discuss with the student the problems, the variables and the options which might be open to them.
Tree landings
Instructors should stress that falling out of the tree is the greatest danger. If a tree landing is inevitable, aim the glider squarely at a large one if possible and try to ensure firm contact. It is advisable to point the closed legs and try to crash through to the centre trunk and, having found a firm footing, hang on. Crossing the legs may help protect the groin, and placing an arm across the face will protect the eyes. DO NOT TRY TO CLIMB DOWN; make sure the glider cannot drag you off your perch - and await rescue.
Water landings - paragliders
Instructors must stress the probability, except within the most strictly controlled environment, that a water landing is not survivable and must be avoided at all costs. Pilots should, if flying near water, make sure that a safe dry landing is within easy reach at all times.
If, however, it is impossible to make a dry landing (even with the risk of injury) then, the real danger lies in the potential for entanglement with the paraglider suspension lines. It is therefore imperative to get clear of the paraglider as quickly as possible. On approach sit well back and unclip the chest strap and loosen the leg straps. On entering the water release the leg straps (or riser-to-harness connectors) and FLOAT clear with the minimum of movement. If an inflatable life jacket is worn it should be inflated.
If a modern seat harness is worn then sit well back and unfasten the chest and leg straps; continue to lean back in the seat; just before entering the water draw the elbows well in and tuck the head down. As the feet hit the water allow the body to roll forward out of the harness, which should then be dragged clear by the still-flying canopy. FLOAT clear with the minimum of movement. If an inflatable life jacket is worn it should be inflated.
Depending on the type of paraglider it should be controlled to land as far away as possible; this keeps the suspension lines taut and away from you.
It is not advisable to drop from the paraglider before impact - it is often difficult to assess height above water, especially if it is calm.
Water landings - hang gliders
Instructors must stress the probability, except within the most strictly controlled environment, that a water landing is not survivable and must be avoided at all costs. Pilots should, if flying near water, make sure that a safe dry landing is within easy reach at all times.
A dry landing, even with the risk of injury, will always be the better option.
Training Facilities in Schools
Classroom
To give proper theoretical instruction Schools should have access to and use a classroom in which full use of visual aids is made.
Wherever possible a classroom should be equipped with a range of resources:
- Black/white board and/or flip chart.
- Video/cine projection equipment.
- 35mm slide projector.
- An overhead projector.
- Current aeronautical charts
- Models, posters, drawings, photographs etc. should be used and displayed to enrich the learning environment.
Pre-Flight Checks
Hang Glider
Pre-Flight Checks (HG)
All students must learn the importance of that final check before they attempt to take off - the pre-flight check. The following easy to remember list of the vital actions that must be covered before every launch should be used by hang glider pilots. The memory aid is the phrase - ‘Will Geordie Have His Cat Aboard?’ - with the first letter of each word being the prompt.
Hang Gliding
Will Geordie Have His Cat Aboard?
- W = Wind and Weather
Check:-
Wind direction - is it shifting around?
-
Wind strength - is it varying much? is it satisfactory for your level of experience? Will it remain so?
-
Visibility - will the visibility remain satisfactory?
-
Weather - any rain approaching, any signs indicating likely turbulence?
-
- G = Glider
Give your glider a quick ‘once over’ to confirm nothing has altered since your Daily Inspection.
Check:- Quick release points (pip-pins.)
- Batten elastics.
- Tip sticks.
- Under surface zips and inspection points.
- Luff lines not caught under battens.
- NB - for tow launching: Check that the tow release has at least 5cm clearance above the base bar; that it is securely fastened to the harness and is functioning correctly.
- H = Helmet
Check:- That you are wearing one.
- That it fits snugly and will not drop over your eyes.
- That it is fastened - and won’t fall off.
- H = Harness
Carry out the hang check. This is accomplished in one of two ways:- Lying Down (preferred way) : With assistance from the nose man lie down and check:
- You are clipped in properly and your karabiners are locked.
- Swing back and forth to check that clearance above the base bar is sufficient (about a fist-width.)
- Your harness is worn properly and is comfortable.
- Your harness straps are not twisted.
- Your legs are through the leg loops.
- Stand Up Method : Stand up and, holding on to the front wires, lean forward to tighten the straps. Turn your head and check:
- You are properly clipped in and the karabiners are fastened.
- The harness is worn properly and seems to be comfortable.
- The straps are not twisted.
- Your legs are through the leg loops.
NOTE: This method does not allow you to check that you are clear of the bottom bar.
- Lying Down (preferred way) : With assistance from the nose man lie down and check:
- C = Controls
Check:- VG set for take off.
- A = All Clear
Check:- Your take off path is clear - nothing to trip you or wrench your ankles.
- No bushes, posts etc. or roving people/livestock within leading edge range.
- No gliders or people about to appear mysteriously from below the brow, on their way up.
- Airspace above, in front and below you is clear from other air users and will remain so during your take off sequence.
- No one is about to overshoot their top landing and need the airspace you are about to occupy.
You are now ready to launch.
Paraglider
Pre-Flight Checks (PG)
All students must learn the importance of that final check before they attempt to take off - the pre-flight check. The following easy to remember list of the vital actions that must be covered before every launch should be used by paraglider pilots. The memory aid is the phrase - ‘Will Geordie Have His Cat Aboard (Today)?’ - with the first letter of each word being the prompt.
Paragliding:
Will Geordie Have His Cat Aboard (Today)
- W = Wind and Weather
Check:- Wind direction - is it shifting around?
- Wind strength - is it varying much? Is it satisfactory for your level of experience? Will it remain so?
- Visibility - will the visibility remain satisfactory?
- Weather - any rain approaching, any signs indicating likely turbulence?
- G = Glider
Give your glider a quick ‘once over’ to confirm nothing has altered since your Daily Inspection.
Check:- Laid out properly
- Cells clear
- Lines untangled.
- NB - for tow launching: Check that the tow release is securely fastened to the harness and that it is functioning correctly.
- H = Helmet
Check:- That you are wearing one
- That it fits snugly and will not drop over your eyes
- That it is fastened - and won't fall off.
- H = Harness
Check:- Left leg strap
- Right leg strap
- Chest strap (fastened and correctly adjusted for semi-cross bracing)
- Left maillon / karabiner
- Right maillon / karabine
- Check any cross bracing straps, speed system etc.
- Check the Emergency Parachute is stowed correctly and the handle is within reach.
- C = Controls
Check:- Control handles in the correct hands
- Correct risers held appropriately
- Control lines free running.
- A = All Clear
Check:- Your take off path is clear - nothing to trip you or wrench your ankles
- No bushes, posts etc. or roving people/livestock within leading edge range
- No gliders or people about to appear mysteriously from below the brow, on their way up
- Airspace above, in front and below you is clear from other air users and will remain so during your take off sequence
- No one is about to overshoot their top landing and need the airspace you are about to occupy.
- (T = Turn Direction)
- If using the standard reverse launch, check which riser is on top: that shoulder must go back when you turn to face into wind.
You are now ready to launch.
Signals
Signals (Ground & Aerotow)
International Towing Signals:

Additional Signals for Aerotowing:

Landing Paragliders
Parachute Landing Fall (PLF)
The British "Landing Roll" technique was developed for parachutists at Ringway early during the second World War and has proved to be the most effective method of taking normal and severe landings without injury. The technique is not naturally acquired in other sports.
If injury occurs it can nearly always be attributed to two causes, firstly to a faulty position prior to touch down and secondly to faulty landing roll technique.
Objective:
The three main aims of the technique are :
- To spread the impact shock progressively and smoothly over a large area of the body
- To spread the impact shock over a (comparatively) long period of time.
- To avoid ground contact with the head, elbows, hands or the base of the spine.
Method:
The sequence of events is a controlled fall to one side followed by a rolling motion of the upper body.
Direction of Landing Roll:
As the pilot may be approaching the ground travelling in any direction, s/he must be trained to cope with any situation. A straight forward or backward roll should be avoided.
Preparing to land:
1. Toes and heels firmly together, feet flat and parallel to the ground, knees together and slightly bent; the back and shoulders rounded.
2. Head down, chin on chest, with eyes watching the ground; elbows tucked in.
3. Hands holding the appropriate controls. The hands must not be used to cushion the fall.
4. The whole body is relaxed but alert.
5. Assess the direction of travel over the ground and turn the feet so that the outside of the 'leading' boot will touch down first - NOT THE TOES OR THE HEELS !
6. Turn the shoulders away from the direction of travel - if the ground is approaching from the left, twist the shoulders to the right, and vice-versa.
On 'touch down':
Feet flat and firmly together; fall and roll progressively and smoothly - the side of the leg then the thigh and buttock; at this point keep the legs together but lift them off the ground and flip them up and sideways in the opposite direction to roll the back on to the opposite shoulder. Keep the elbows tucked in and the head forward with chin on chest throughout the fall and roll.
Training and Practice:
It is usual to teach students to practice 'sideways to the left and right'; followed by 'diagonally to the left and right' etc. It must, however, be stressed that impact can occur at any point within the 'circle' and they should be ready to make last minute adjustments before impact.

Towing
Towing Hang Gliders
Operating Procedures for Tow Hang Gliding
Operating Procedures for Tow Hang Gliding
- Introduction
- Personnel
- Signals and Commands
- Tow Line Tension
- General Requirements
- Equipment Requirements
- Winch Requirements and Approval
- Fixed Line Systems
Introduction
Depending upon the type of tow unit and/or the equipment used certain procedures differ in varying degrees and are mentioned where appropriate. Instructors and Tow Coaches must make themselves aware of these differences and the relevant circumstances.
Personnel
In a club registered as a school a suitably qualified Instructor must be present and take charge of the operation. In other clubs (ie where no form of ab-initio training occurs), a suitably qualified Tow Coach must be present and take charge.
A Launch Marshal, who has received relevant practical training, but is neither the pilot nor a dual flight student, must supervise at the launch point.
The tow unit must at all times be operated or driven by an appropriately licenced Operator, or a potential Operator training under supervision.
Signals and Commands
Reference should also be made to Section 2: Chapter 1: Appendix A.
Effective communication between all concerned is of the utmost importance. In addition to the standard procedures as listed in items 1 and 2 below, the launch instructor should, where appropriate, relay the following information to the winch operator who will then acknowledge it:
- the proficiency and any known faults of the pilot
- the objective(s) of the next flight
This will ensure that the winch operator knows what to expect, how high/gently to launch the pilot and where to halt proceedings if things do not conform to plan.
The following standard procedures should be adopted for every launch. They can be given using voice alone, by radio, by visual signal system, or by a combination of all. The chosen method must work properly and efficiently.
1. Pilot information via the Launch Instructor to the winch Operator.
- Name, weight and experience as appropriate - any possible pilot problem should be included.
- If using radios the winch Operator repeats the messages as necessary.
2. ‘Winch Live’ - is indicated by switching on the flashing light.
3. Safety Checks
- The signaller/Launch Instructor asks the pilot: "Is the glider checked?"
- If all is clear the Pilot replies: "Glider checked and satisfactory"
- The signaller/Launch Instructor then asks "Hang check?"
- Pilot completes a hang check.
- When the checks are complete the winch operator is told : "All checks completed".
- The winch Operator can repeat the message by radio if appropriate.
4. Tow Line Attachment
Only when items 1, 2 and 3 above have been completed can the Pilot :
- connect the tow line
- operate the release system to check its satisfactory operation.
- re-connect the tow line and check that it is properly attached.
5. Tensioning the Line
When ready the pilot shouts clearly : "Take up tension".
This is relayed via the signal man to the winch Operator by:
- Visual - by bat : clear, steady, underarm swings of the bat from 4 o'clock to 8 o'clock.
- Visual - by light : clear, steady, slow flashes.
- Radio/Audio : the command "Take up tension"
6. The Take Off
When ready pilot asks "Clear above and behind?"
The signaller checks and if all clear repeats ‘Clear above and behind’.
The pilot then shouts clearly "All out".
This is relayed via the signal man to the winch operator by:
- Visual - by bat : clear, rapid, overarm swings of bat from 10 o'clock to 2 o'clock.
- Visual - by light : clear, steady fast flashes.
- Radio/Audio : the command "All out; All out; All out"
7. Emergency Stop.
To terminate a launch once the "All Out" signal has been given :
- Visual - by bat : held stationary directly overhead (12 o'clock).
- Visual - by light : continuous beam of light.
- Radio/Audio : "STOP, STOP, STOP," repeated.
8. Other Signals
i) When the pilot wants slack in the tow line before the "All Out" signal but after the "Take Up" signal has been given:
- Visual - by bat : discontinue underarm swings.
- Visual - by light : discontinue flashing and switch off light.
- Radio/Audio : the command "GIVE SLACK". The winch operator repeats the command "Slack". At this point the pilot should release the tow line for safety reasons. When ready the launch proceeds from 3 above.
ii) If the winch operator no longer wishes to go ahead with the launch, for whatever reason, he switches off the flashing light. If appropriate he relays the reasons to the pilot/Launch Instructor. The pilot must then release the line if it has been attached. When the winch operator is ready to go ahead again, he switches the light back on. The launch can then proceed from item 3 above.
Tow Line Tension
- First flight tow line tensions should be kept to the necessary minimum.
- Tow line tension must be adjusted to allow for the differences in pilot weight, glider type and pilot experience.
Additional Requirements for Tow Training
- Maximum wind strength for any training is 30mph - at this level only full tethered training can be carried out.
- Maximum wind strength for:
- Solo flights is 15mph measured at ground level
- First solo is 10mph measured at ground level
- Maximum variation in wind strength must not exceed 5mph in 10 seconds.
- Only an instructor may take control of pitch tethers.
Equipment Requirements
Winch Systems and Towing Equipment
General
The equipment must be safe to use for pilots, launch crews and instructors and free from hazard to bystanders, under both normal and emergency conditions.
The system must permit all BHPA towing signals to be implemented.
The system must provide a smooth continuous tow at a controlled tension.
It must be safe for the winch operator to operate in normal and emergency situations.
Tow Equipment
The Weak Link
A weak link must be used. See IHPA Operations Manual - Towing - Weak Links.
The Tow line
- The release(s) must be reliable whether on or off load.
- On failure of the weak link no more than 1.5m of line, but preferably none, shall dangle below the control bar.
- A flag or parachute is required, attached to the line below the weak link, so that the winch operator can observe release on weak link failure.
- An effective means of cutting the tow line at the winch immediately in an emergency must be provided; a fixed wire cutter or guillotine is required for a wire tow line.
- When a fixed line tow launch is used, prior to launch the paid out length of tow line must be capable of stretching 6m when a 100kg load is applied to it.
- Because of the difficulty of maintaining accurate observation over long distances from a moving vehicle it is recommended that for fixed line systems the tow line does not exceed 500 metres. Longer lengths may be used with static winches as long as accurate observation can be maintained.
The Bridle or tow yoke
- The bridle must provide a safe tow with no danger of inducing any unnatural flying state for the glider.
- At least 50% of the tow line tension must be applied through the pilots harness.
- The bridle may also be connected to the airframe but only to the keel forward of the hang point and not more than 20cm from it.
- It should not be possible to continue the tow from a bridle connection to the keel after release of the bridle connection to the pilot.
- On release bridle parts must not strike the pilot.
- After release bridle lines must not hang more than 1.5m below the control bar.
- Bridles used for step-towing must self-release on backward tension.
- 3-ring releases must have a cover to shield the pin end to remove the risk of entanglement.
- 3-ring releases must only be used with a matching ring at the end of the line, NOT a rope loop or eye.
Winch Requirements and Techniques
All winches must be fitted with appropriate guards in accordance with the Health and Safety at Work Act.
STATIC WINCH
All static winches must be fitted with the following safety devices:
- the engine speed control lever (throttle) must be sprung loaded to idle.
- a guillotine or cutting tool, controlled by the winch operator, capable of severing the tow line in one action
- a tow line tension indicator.
- a weak link (fitted in the tow line) of the correct breaking load. See Section 2: Chapter 1: Appendix D.
- an automatic means of distributing the line across the width of the drum as it reels in.
- The end of the line, which may have a flag or streamer, must be free to pull clear of the drum.
- Additionally it is recommended that a static winch should have the following facilities: differently shaped handles/knobs on throttle and brake controls
- colour coded drums and lines on a twin drum system, such that, viewed from the launch point the left hand line is, for instance, red; and the right hand line is green.
Operating a Static Winch
This information is based on operating certain ‘Koch’ type winches and derivatives.
Operators of other winch types should refer to the User’s Manual for specific differences.
Preparation
Standard daily inspection checks are carried out, with particular attention being paid to any special equipment (eg gearbox) fitted. The winch is positioned facing into wind and effectively secured to prevent the winch moving or swivelling. Set and latch the guillotine(s) taking care to keep the hands well clear during the cocking operation. Feed the tow line(s) through the guide(s) (gloves should be worn to protect the hands) ensuring the cables do not fall down the side of the runners, nor foul any mechanical part. Attach the drogue parachute(s).
The tow lines(s) are then ready to be towed out to the launch point as follows:
- Set drum brake(s) ON and check that the clutch is dis-engaged
- Start the winch engine and leave idling
- Attach the tow line(s) to the retrieve unit using a weak link
- Release the drum brake(s), then apply just enough brake(s) to prevent drum over-run
- Drive the retrieve unit slowly to the launch point, in a straight line. Where two tow lines are being run out care must be taken that they do not cross each other
- The retrieve unit should slow down as it nears the launch point to avoid drum over-run
- Apply drum brake(s) firmly when it is clear that the tow line(s) are fully paid out
- Stop the winch engine
Pre-tow checks
- Check that the tow line is free and has not over-run the drums
- Set both drum brakes firmly ON
- Check that the clutch is dis-engaged
- Switch the battery ON
- Start the winch engine
Towing
On receiving 'Take up slack' signal
- Engage clutch
- Progressively release the relevant drum hand brake, controlling and holding the winching-in rate by use of the throttle until receiving either a 'Stand by' signal or the ‘All Out’ signal. On receiving the 'All out' signal increase the drum speed to start the ascent.
- NOTE : If a 'STOP' signal is given at any time the launch should be aborted. When the cause has been ascertained and corrected the launch may then proceed but from the beginning.
- If the pilot is using a two line release, when the glider reaches approx. 30m (100ft) reduce the tow tension until the pilot has released the top line. Then smoothly re-apply tension.
- On seeing the 'release' signal from the pilot, use the throttle to reduce tension (in high winds first dis-engage the clutch)
- After the pilot has released the tow line (and it has fallen away) open the throttle to retrieve the remainder - reducing the tension each time the drogue 'chute hits the ground. When the drogue is 15m (50ft) away from the winch close the throttle and use the drum brake to slow the intake down.
- When the drogue is 3m (10ft) away dis-engage the clutch and slow the drum to a stop.
- Stop the engine (unless a 2nd line is ready for immediate use)
Wire tow line preparation - forming a closed loop
- Cut the cable cleanly
- Slide two swages on to the cable
- Loop the cable back on itself and slide through the first swage pulling cable through to form a loop some 3 to 5cms between the swage and the end of the loop
- Crimp the first swage firmly
- Twist the cable half a turn and slide through the second swage
- Crimp the second swage firmly - as near the cut end as possible -the distance between the two swages should be approximately 5 to 7cms.
- Pick up debris to avoid possible danger to animals/people/gliders/equipment
Wire tow line preparation - in-line repair
- Cut the tow cable cleanly
- Place both swages on one cable, then slide the second cable through both, making sure that there is half a turn twist between each swage
- Crimp each swage as close to the respective ends as possible - the distance between each swage when finished should be approximately 5 to 7cms.
- Pick up debris to avoid possible danger to animals/people/gliders/equipment
PAY OUT WINCH
All pay out winches must be fitted with the following safety devices:
- A tow line tension indicator. Alternatively an adjustable stop is required to limit the maximum line tension, and a means is required of checking that tension between launches. The smoothness and efficiency of winch brakes has been found to vary considerably between launching sessions (depending on storage conditions) and also as they warm up with use. Winches should be stored under cover and checked frequently when in use.
- If internal expanding brakes are used it is recommended that they are of the double trailing shoe type.
- There must be an operator controlled, single action, effective means of cutting the tow line at the vehicle immediately in an emergency (e.g. a guillotine or cutting tool). A fixed wire cutter or guillotine is required for a wire tow line.
- A tow line weak-link of the correct breaking load.
- The end of the line, which may have a flag or streamer, must be free to pull clear of the drum.
- There must be a means of distributing the line across the drum during rewind.
- A secure seat is required for the winch operator so that he can operate the brake smoothly during a rough ride.
- Recommended trailer dimensions are: hitch to wheel axle(s) 1.8m (6 ft); minimum wheel size 13 inches
- The vehicle, such as a hatch-back or van should allow the winch operator to sit comfortably with a clear view of the glider under tow, with immediate access to the release and in direct communication with the driver.
Fixed Line System
Fixed Line Hang Glider towing requires specific FSC approval.
All fixed line tow systems must include the following safety devices:
- A line tension indicator. It is recommended that the tension indicator scale is direct reading to avoid errors, and is mounted where the driver can see it while driving without turning his head. An audio read out is ideal.
- An approved release at the vehicle (unless the line is hand-held), immediately to hand for the operator from the towing position.
- There must be an operator controlled, single action, effective means of cutting the tow line at the vehicle immediately in an emergency (e.g. a guillotine or cutting tool). A fixed wire cutter or guillotine is required for a wire tow line.
- A tow line weak-link of the correct breaking load.
- The vehicle, such as a hatch-back or van should allow the operator to sit comfortably with a clear view of the glider under tow, with immediate access to the release and in direct communication with the driver.
Towing Paragliders
Operating Procedures for Tow Paragliding
- Introduction.
- Personnel.
- Signals and Commands.
- Equipment - Genral.
- Winches - Requirements and Techniques.
- Fixed Line (vehicle) towing.
- Emergencies from the Tow Unit.
Introduction
Paragliders can be tow launched using a pay-out winch, a static winch or with a fixed line vehicle tow. Depending upon the type of tow unit and/or the equipment used certain procedures differ in varying degrees and are mentioned where appropriate. Instructors and Tow Coaches must make themselves aware of these differences and the relevant circumstances.
Personnel
In a club registered as a school a suitably qualified Instructor must be present and take charge of the operation. In other clubs (ie where no form of ab-initio training occurs), a suitably qualified Tow Coach must be present and take charge.
A Launch Marshal, who has received relevant practical training, but is neither the pilot nor a dual flight student, must supervise at the launch point. The Launch Marshal need not be a qualified Instructor.
The tow unit must at all times be operated or driven by an appropriately licenced Operator, or a potential Operator training under supervision.
If fixed line towing then a Lookout and a Tensiometer Reader are strongly recommended:
- Lookout: Relays launch marshall signals to the Operator/driver. Looks ahead and warns operator/driver of obstacles. Warns operator/driver of approaching runway end by counting down.
- Tensiometer Reader: Calls out tension readings every 2 - 3 seconds. Has a suitable cutting implement ready for cutting the tow line if ordered by the Operator/driver.
Signals and Commands
The signals and commands used when tow launching paragliders are those developed for Hang Gliding.
It is essential that any pilot new to the club is fully briefed on the signals and command system in use.
Parascending Based Signal and Command System:
All the commands at the launch point are given by one person - the Launch Marshal. After confirming that the pilot is ready (student has been briefed or stated his flight plan), and has completed his pre-flight checks (including checking the wind line), connecting the tow line and checking that the launch area on the ground and in the air is clear, the Launch Marshal should:
- Check that the pilot is ready for the launch by asking, "Ready in harness?" and receiving the positive reply, "Ready!"
- Check that the area ahead and behind is clear, then warn everyone that he is proceeding with the launch by shouting, "Taking up slack" as he gives the signal. This signal is continued whilst the pilot launches the wing, takes off and climbs on tow.
Equipment General
The equipment must be safe to use for pilots, launch crews and instructors and free from hazard to bystanders, under both normal and emergency conditions.
The system must permit all IHPA towing signals to be implemented.
The system must provide a smooth continuous tow at a controlled tension.
It must be safe for the winch operator to operate in normal and emergency situations.
All releases must be reliable whether on or off load.
The Weak Link
-
A weak link must be used. See IHPA Operating Procedures - Weak Links (Towing.)
The Tow line
- On failure of the weak link no more than 1.5m of line shall remain attached to the pilot.
- A flag or parachute is required, attached to the line below the weak link, so that the winch operator can observe release or weak link failure.
Winches - Requirements and Techniques
All winches must be fitted with appropriate guards in accordance with the Health and Safety at Work Act.
STATIC WINCH
All static winches must be fitted with the following safety devices:
- the engine speed control lever (throttle) must be sprung loaded to idle.
- a guillotine or cutting tool, controlled by the winch operator, capable of severing the tow line in one action.
- a tow line tension indicator.
- a weak link (fitted in the tow line) of the correct breaking load. See IHPA Operating Procedures - Weak Links (Towing.)
- an automatic means of distributing the line across the width of the drum as it reels in.
- The end of the line, which may have a flag or streamer, must be free to pull clear of the drum.
- differently shaped handles/knobs on throttle and brake controls.
- colour coded drums and lines on a twin drum system, such that, viewed from the launch point the left hand line is, for instance, red; and the right hand line is green.
Operating a Static Winch
This information is based on operating certain ‘Koch’ type winches and derivatives. Operators of other winch types should refer to the User’s Manual for specific differences.
Preparation
Standard daily inspection checks are carried out, with particular attention being paid to any special equipment (e.g. gearbox) fitted. The winch is positioned facing into wind and effectively secured to prevent the winch moving or swivelling. Set and latch the guillotine(s) taking care to keep the hands well clear during the cocking operation. Feed the tow line(s) through the guide(s) (gloves should be worn to protect the hands) ensuring the cables do not fall down the side of the runners, nor foul any mechanical part. Attach the drogue parachute(s).
The tow lines(s) are then ready to be towed out to the launch point as follows :
- Set drum brake(s) ON and check that the clutch is dis-engaged.
- Start the winch engine and leave idling.
- Attach the tow line(s) to the retrieve unit using a weak link.
- Release the drum brake(s), then apply just enough brake(s) to prevent drum over-run.
- Drive the retrieve unit slowly to the launch point, in a straight line. Where two tow lines are being run out care must be taken that they do not cross each other.
- The retrieve unit should slow down as it nears the launch point to avoid drum over-run.
- Apply drum brake(s) firmly when it is clear that the tow line(s) are fully paid out.
- Stop the winch engine.
Pre-tow checks
- Check that the tow line is free and has not over-run the drums.
- Set both drum brakes firmly ON.
- Check that the clutch is dis-engaged.
- Switch the battery ON.
- Start the winch engine.
Towing
On receiving 'Take up slack' signal
- Engage clutch
- Progressively release the relevant drum hand brake, controlling and holding the winchingin rate by use of the throttle until the canopy is inflated and flying above the head of the pilot. If either the Launch Marshal or the pilot is unhappy at this stage the Launch Marshal should show a 'Stand by' signal until the problem is corrected. If all is well the Launch Marshal will indicate 'All out' and the winch operator can then increase the drum speed to start the ascent. Tow tension indicator = 50% of target initially until the paraglider is approximately 100ft AGL, rising to 100% of target to allow optimum rate of ascent. (The target tow tension will usually be around 80kgs to 100kgs, less for training. Higher tensions increase risk much more than height!)
- On seeing the 'release' signal from the pilot, use the throttle to reduce tension (in high winds first dis-engage the clutch.)
- After the pilot has released the tow line (and it has fallen away) open the throttle to retrieve the remainder - reducing the tension each time the drogue 'chute hits the ground. When the drogue is 15m away from the winch close the throttle and use the drum brake to slow the intake down.
- When the drogue is 3m away dis-engage the clutch and slow the drum to a stop.
- Stop the engine (unless a 2nd line is ready for immediate use.)
Notes on towing
Tow tension in the early stage must be kept at a steady level which just allows the canopy to ascend. Too high a tension will cause the wing to pitch up to an unsafe angle.
Wire tow line preparation - forming a closed loop
- Cut the cable cleanly.
- Slide two swages on to the cable.
- Loop the cable back on itself and slide through the first swage pulling cable through to form a loop some 3 to 5cms between the swage and the end of the loop.
- Crimp the first swage firmly.
- Twist the cable half a turn and slide through the second swage.
- Crimp the second swage firmly - as near the cut end as possible -the distance between the two swages should be approximately 5 to 7cms.
- Pick up debris to avoid possible danger to animals/people/canopies/equipment.
Wire tow line preparation - in-line repair
- Cut the tow cable cleanly.
- Place both swages on one cable, then slide the second cable through both, making sure that there is half a turn twist between each swage.
- Crimp each swage as close to the respective ends as possible - the distance between each swage when finished should be approximately 5 to 7cms.
- Pick up debris to avoid possible danger to animals/people/canopies/equipment.
PAY OUT WINCH
All pay out winches must be fitted with the following safety devices:
- A tow line tension indicator. Alternatively an adjustable stop is required to limit the maximum line tension, and a means is required of checking that tension between launches. The smoothness and efficiency of winch brakes has been found to vary considerably between launching sessions (depending on storageconditions) and also as they warm up with use. Winches should be stored under cover and checked frequently when in use.
- If internal expanding brakes are used it is recommended that they are of the double trailing shoe type.
- There must be an operator controlled, single action, effective means of cutting the tow line at the vehicle immediately in an emergency (e.g. a guillotine or cutting tool). A fixed wire cutter or guillotine is required for a wire tow line.
- A tow line weak-link of the correct breaking load.
- The end of the line, which may have a flag or streamer, must be free to pull clear of the drum.
- There must be a means of distributing the line across the drum during rewind.
- A secure seat is required for the winch operator so that he can operate the brake smoothly during a rough ride.
- Recommended trailer dimensions are: hitch to wheel axle(s) 1.8m (6 ft); minimum wheel size 13 inches
- The vehicle, such as a hatch-back or van should allow the winch operator to sit comfortably with a clear view of the glider under tow, with immediate access to the release and in direct communication with the driver.
Notes on towing
Tow tension in the early stage must be kept at a steady level which just allows the canopy to ascend. Too high a tension will cause the wing to pitch up to an unsafe angle.
Fixed Line (vehicle) Towing
Equipment Requirements
All fixed line tow systems must include the following safety devices:
- An approved release at the vehicle (unless the line is hand-held), immediately to hand for the operator from the towing position.
- A quick release must be fitted to both ends of the tow line such that they can be easily operated by the Operator or pilot respectively.
- There must be an operator controlled, single action, effective means of cutting the tow line at the vehicle immediately in an emergency (e.g. a guillotine or cutting tool). A fixed wire cutter or guillotine is required for a wire tow line.
- The pilot’s quick release must be fitted with a protective cover.
- A weak link must be fitted in the tow line system so that approved maximum tow tensions cannot be exceeded - see IHPA Operating Procedures - General - Weak Links (Towing.)
- The vehicle, such as a hatch-back or van should allow the operator to sit comfortably with a clear view of the glider under tow, with immediate access to the release and in direct communication with the driver.
- When a fixed line tow launch is used, prior to launch the paid out length of tow line must be capable of stretching 6m when a 100kg load is applied to it.
Determining Tow Line Lengths
The minimum tow line length is 100 metres. This is because canopies (especially round ones) need time to recover and ‘fill’ after release and the descent rate is increased during this time.
The appropriate tow line length should be used such that the height ranges indicated for the relevant Training Exercises are achieved. (See appropriate Student Training Record Booklet.)
Sometimes the physical size of a site will impose limitations - reducing the towing distance - or its shape may limit the suitable landing areas after release. Where towing distance is the limiting factor greater heights can often be achieved by using a shorter tow line rather than struggling with a longer line and risking running out of towing space. Some exercises maynot be possible on particular sites or in certain conditions of wind direction or speed. In all cases the judgement of the instructor is more important than blind acceptance of the recommended lengths - but variance must be justifiable.
Effects of Tow Line Materials and Lengths
All materials behave differently when tensioned and this is true of tow lines; for example, polypropylene has a low elasticity, hollow braid nylon is much higher and parafil nylon stretches at lower tensions but behaves like steel wire at higher tensions. Elasticity is proportional to length and although the tension in the tow line is read at the tow unit, it is the tension at the glider end which is affecting the glider. Therefore, the driver needs to take account of the elasticity of the tow line and its length when taking up slack and reacting to glider fluctuations and changes in tensiometer readings.
Tow Line Management
The tow line should ideally be laid out in a straight line and in a direction directly into wind. A small amount of slack should be retained at the launch point to avoid the launch crew having to move forward onto the tow line and to give the launch marshal some warning as the tow line slack is taken up during the initial stage of the launch. Large loops or excess slack should be eliminated as ‘sideslipping’ or snatch launches may result. When returning the tow line to the launch point after a previous flight the route taken should ensure that the tow line is laid out as described above - large loops should be avoided, so should any knots or tangles that could arise from towing the tow line over itself or another line. The surface over which the line is being dragged should be considered and towing speed should be kept low where a vulnerable tow line is being dragged over an abrasive surface. In some cases it is useful to have a line holder equipped with a stick-mounted pulley wheel through which the tow line is pulled to help in laying it out. Sometimes it will be necessary to arrange with the launch point for the tow line to be stretched out to remove any bowing. Drivers retrieving lines should take care to watch out both in their direction of travel and for any obstructions in the path of the tow line.
Driving Position and Techniques
The operator/driver must sit where he can reach the controls of the tow unit but must be able to view the glider throughout the launch, flight and landing. Most drivers find it comfortable to sit diagonally across the driver's seat and (assuming a right hand drive vehicle) by resting the left arm on the bulkhead behind them can see the glider over their left arm. The quick release cord is within reach, the operator/driver can reach the pedals with both feet, steer with the right hand and is able to change gear with either the left or right hand. The choice of 2 or 4 wheel drive on land will depend on the traction the vehicle has on the surface. Unless 4 wheel drive is necessary to gain traction it should not be used since it creates more mechanical wear and can lead to greater tyre wear and possible half-shaft damage when the vehicle is turned on firm surfaces. It should be possible to change into 4 wheel drive when on the move. The choice of gear for commencing a tow will depend on the optimum towing speed which itself will depend on the wind speed, glider type and pilot weight. It is not always advisable to start off in 1st gear as a change to 2nd gear to gain speed might need to be made at the critical time after inflation when the driver's full concentration should be on the glider in readiness to react to a rotation. Thus a gear should be chosen which can be kept throughout the initial phase of the launch.
Where 4 wheel drive is found to be necessary and towing speeds are low the combination of gears (High/Low ratio and 1,2,3 or 4) should be chosen to achieve maximum traction.
Taking Up Slack
Before reacting to the' take up slack' signal the driver should ensure he is aware of the type of launch that is required and that all preparation, briefing and checking has been carried out at the launch point. The driver will brief or warn the crew of his tow unit and check that the course of the tow unit and the launch path of the glider are clear. He will then move the vehicle slowly forward watching primarily for the inflating canopy and listening to the rise of the tensiometer readings but also being prepared for a stop signal, the absence of the take up slack signal, any intruder into his path or the glider launch path and any abnormality with the inflating canopy.
The driver's eyes remain fixed on the launch point; his look-out is required to watch for the stop signal and subsequently check that the path of the tow unit is clear. As the tow line becomes taut the driver should react to the behaviour of the glider and any changes to tow line tension resulting from glider type, student ability and wind speed. For example, if the wind is high the driver may need to ease off the accelerator as the canopy inflates in order to prevent a rocket take-off; on the other hand, in low winds the driver must assist the canopyto inflate by accelerating to prevent the canopy (and pilot) from being dragged along the ground.
Where the tow line cannot be laid out directly into wind the canopy must be faced into wind to reduce the possibility of a rotation when it is first inflated. The pilot should be briefed to use the controls (rear risers only on round canopies) to hold the canopy into wind during the critical take-off phase.
Launching and Controlling the Glider to Self-Release
The most critical height range for a fast rotation or tow line break is from ground level to about 75 ft since even a rapid emergency response may not be sufficient to allow the canopy time to recover before the pilot hits the ground. Therefore, once the canopy has been successfully inflated it should be climbed at steady but fairly low tensions. When the glider has passed 100 ft the tensions can be increased to give the optimum rate of climb for the distance towed. The glider type, age, trim and the weight of the pilot will all affect the tensions required to gain and maintain height; and wind shear or gradient can exert an influence.
During the launch the driver must continue to observe the glider, judging from its attitude and behaviour and from variations in the tow line tensions how best to adjust the tow unit's speed. The direction the tow unit takes is not critical; indeed, where winds are very low it is possible to tow around in a circle or a ‘figure-of-eight’.
Release Procedures
It is usual for the driver to respond to a release request from an experienced pilot but the driver must remember that he is responsible for agreeing to the release and may decide that the pilot should stay attached until in a safer position to release. For students in the early stages of training the driver will determine where they should release and may agree a signal to indicate that they are clear to release. In some clubs a 'clear to release' signal is always given. When operating the release the intention is to slacken the tow line to the point that neither it nor the glider will experience a shock due to disconnection. Since tension is reducing during this slackening period the glider will stop climbing and start to descend so it is desirable to achieve a slack tow line quickly and this can be done by bringing the tow unit to a stop and reversing; by turning the tow unit around and driving towards the glider; or just by bringing the tow unit to a stop. The method chosen depends mainly on the wind speed and thus the tow speed, and to some extent driver preference, though each method must be practised regularly, particularly by trainee Operator/drivers, to improve the effectiveness of this emergency procedure.
! Once the tow has finished it is essential that the operator confirms that the tow line has released from the glider. If there is any doubt, the operator must release the line from the vehicle immediately. The driver must then keep the vehicle positioned in order to assist the pilot should an emergency occur.
Emergencies from the Tow Unit
Training in emergency procedures, including regular dummy practice - especially by Trainee Operators - is an essential part of a paragliding operation.
Tow line breaks/ jettisoned tow lines
Normally the tow line should not be released under tension – but in an emergency situation it should be guillotined without hesitation.
Rotation / ‘lock-out’ on launch
The term 'rotation' describes the condition where the canopy ceases to ascend vertically but attempts to turn away from the direction of tow; the resulting increase in tow line tension will accelerate the turning action and, if not corrected, cause the canopy to dive rapidly to the ground.
Paragliders will change their heading off to one side or the other and their perceived shape will change; the angle between the tow line and the canopy heading must never exceed 45°.
Symptoms
The canopy flies off to one side - it may be slow or rapid, and it may occur before the pilot's feet leave the ground, or at a later stage.
Corrective actions
If the turn is slow: reduce the tow tension to allow gravity (and the pilot) to assist in recovery; once stabilised and flying true, increase the tension and try again. If the ascent is now true then continue with the launch in the normal manner. If, however, the divergence recurs, the launch must be abandoned by gently removing the tow tension.
If the turn is rapid and at very low altitude: reduce the tow tension immediately by guillotining the tow line.
Causes of rotation on launch
- Incorrect canopy trim - canopy damage (tears etc)
- Tangled, knotted or broken suspension/control line
- Incorrectly adjusted/ill fitting harness
- Partial cell collapse or front edge tuck
- Failure of pilot to correct partial collapse/tuck - or over-correction
- Pilot induced problem
- Wind shear
Weak Links
Weak Links (Towing)
Approved maximum weak link values for tow launch operations.
- All weak link values stated are maximums.
- All weak link values stated are for professionally purpose built calibrated weak links such as Tost and Koch. These values must be reduced by 20% if using any other type of weak link.
- 1daN is approximately 1kg force.
- Paragliders:
- Up to 125 kg total weight in flight: 125daN weak link.
- More than 125 kg total weight in flight: 150daN weak link.
- Hang glider winch tow:
- Up to 150kg clip-in weight: 125daN weak link.
- More than 150kg clip-in weight: 150daN weak link.
- Hang glider Aerotow: (Glider end of tow rope.)
- Up to 75kg clip-in weight: 100daN weak link.
- 75kg to 150kg clip-in weight: 125daN weak link.
- More than 150kg clip-in weight: 150daN weak link.
- Tug Aerotow: (Tug end of tow rope.)
- Up to 150 kg glider clip-in weight: 150 - 180daN weak link.
- More than 150kg glider clip-in weight: 180 - 225daN weak link.
Tandem Pilots
Operating Procedures for Tandem Pilots
Introduction
Section 1 - Considerations
- Yourself
- Passenger
- Equipment
- Site
Section 2 - Common Practice
- Briefing
- In flight
- Landing
Section 3 - Techniques
- Hang Gliding:
- Hill
- Winch / Aerotow
- Aerotow hazards
- Paragliding:
- Hill
- Winch
Introduction
A TANDEM RATING IS REQUIRED BEFORE FLYING WITH PASSENGERS.
TANDEM RATINGS ARE AVAILABLE IN THE FOLLOWING CATEGORIES:
- Hang Glider (Hill)
- Hang Glider (Tow)
- Hang Glider (Aerotow)
- Paraglider (Hill)
- Paraglider (Tow)
Tandem flying is not an activity to be undertaken lightly. Before you take any steps towards flying with a passenger you must seriously consider the skills and level of responsibility that will be required of you. The relatively routine procedures of solo flight will all be more complicated. For you and your passenger's sake proceed very cautiously. These operating procedures are intended to act as a guide to the practicalities of tandem flight. For further information on the rules and regulations of tandem flight, and how to achieve tandem ratings, refer to the IHPA Operations Manual - Operator Endorsements - Instructor, Coach, Operator and Tandem Pilot Endorsements.
SECTION 1 - CONSIDERATIONS
1. YOURSELF: Before committing to flying tandem take a critical look at your reasons for taking a passenger. Avoid getting into the situation where you feel pressured into flying because you're worried that you may disappoint someone. Ultimately you will be responsible for their life as well as your own, and disappointing them is much better than injuring them. Avoid making promises that may be difficult to fulfil. It's wise to stress to potential passengers the narrow margin of suitable conditions and how the flight may have to be postponed until another day. Are you familiar with all the equipment that you will be using? Have you flown the site before? As with all aspects of flying, it's best to change only one variable at a time. You must remain cool, calm and collected particularly in your assessment of the conditions. Remain objective, and don't allow your passenger or your peers to influence your decisions.
2. THE PASSENGER: You are responsible for the passenger and it is up to you to decide whether they are suitable to fly. Firstly, on the practical side of things you must know their weight and establish whether your combined kitted up weight is below the maximum permitted payload for the type of glider that you intend to fly. Hang gliders respond to weight shift, therefore a heavier passenger moving the wrong way will have a greater affect on the control of the glider than the lighter pilot moving the right way; it is therefore recommended that the pilots don't carry passengers heavier than themselves. Another consideration is the physical strength of the passenger. If a stronger passenger starts to panic you may lose control of the glider.
Assess the fitness of your passenger. Ask them if they have any medical condition or disability. Do they suffer from fits, dizziness or a heart condition? If so are they taking any medication? Explain to the passenger the sensations of flight and the affects of turbulence. You must stress that this is an 'adventure' sport and there are inherent risks.
Try to assess your passenger's 'attitude' towards flying. Chat to them to find out why they want to fly tandem. You must be sure that they really do want to fly and are not just responding to peer pressure. If you have any doubts then make an excuse and cancel the flight.
If your passenger is not a member of the IHPA then you are advised to get them to sign the IHPA Waiver form of Indemnity. If you are operating within a school, then your passenger must be a member of the IHPA.
Make sure that your passenger is wearing suitable clothing and footwear, and has removed any sharp objects from their pockets. Even if your passenger is an experienced pilot, you are the pilot in command and their safety is your responsibility. Don't assume that an experienced pilot won't do something stupid: You are taking pilots out of their familiar flying environment and are increasing the likelihood that they will overlook even the most basic things. CHECK EVERYTHING YOURSELF!!
3. EQUIPMENT: Spend some time familiarising your passenger with the equipment that you will be using. Get them to follow you through the daily inspection and pre flight checks, and explain to them what everything is and what you are looking for in the check. Make sure that your passenger's harness and helmet fit and are secured correctly. No matter how eager you both are to get airborne you must spend time on the ground sorting out the relative flying positions that you'll adopt once in the air. Know your equipments peculiarities before taking new passengers. You can familiarize yourself with peripheral equipment such as harnesses in solo flight. This may be more difficult with tandem gliders due to the minimum weight requirements. If this is the case then you should gain experience of the glider by flying with another tandem rated pilot. The point is that you should avoid flying with a new passenger whilst using unfamiliar equipment. Remember, never change more than one variable at a time!
Equipment - Hang Gliding:
Harness - Preferably use a Pod type harness for your passenger, as they present the least risk of tripping on take off, and are easy to get into during flight. If a Stirrup harness is being used then make sure that a foot rubber is used to keep the stirrup clear whilst running. Cocoon harnesses are only suitable for trolley launched towed flights, because of the danger of the passenger tripping on the apron.
Clip into the glider and check that the passenger is suspended around 25cm (10") higher than you and will leave the ground before you. Make sure that the leg loops on the passenger's harness are not too long as they may end up being last to leave the ground despite being hung higher, this could adversely affect the control of the glider.
Wheels - 18cm (6") diameter wheels on the basebar are mandatory, (9" for tandem tow and aerotow flights). You should however avoid using 'barrow' type wheels as they reduce the usable width of the base bar excessively.
Helmets - As for solo flight. You must ensure that your passenger is wearing a suitably fitting helmet, and that the chin strap is properly done up before clipping in.
Glider - The glider must have a certificate of airworthiness and be cleared for tandem use by the manufacturer. You must ensure that the 'all up' weight of you and your passenger is within the permitted payload. When assessing the payload be sure to include the weight of harness, helmet, parachute, clothes, etc.
Modern purpose built tandem gliders are trimmed for tandem flight, and the accompanying handbook should be followed. Many pilots find that older adapted gliders trim much slower with the additional weight of the passenger and are therefore having to constantly pull on to avoid stalling. To prevent this move the passenger's hang point slightly further forward than the normal hang point used by the pilot. Some experimentation may be necessary with lighter or heavier pilots, but make all alterations cautiously. The pilot and the passenger should be clipped into separate main and back up loops.
Emergency Parachutes - tandem emergency parachutes are much bulkier than solo ones and may not fit in the parachute container of some harnesses without modification. The container may then be an awkward size to mount on your chest or the side of your harness. Consider the parachute bridle to harness attachment point carefully and ensure that the connectors are strong enough to hold you and your passenger during the opening shock. Be very careful if using harnesses containing solo emergency parachutes. Any deployment (accidental or deliberate) of these will almost certainly lead to enough drag to stop the glider flying, but will then produce a descent rate that is not survivable.
Hang Glider Tow Bridles - Tow bridle set up for Aerotow:
-
- There are two approved systems that may be used: the 2:1 Tow leg set up (adapted for aerotowing) or the American 50/50 Aerotow bridle set up.
- The 2:1 Tow leg set up (adapted for aerotowing)
The connection to the tow is slightly different than for solo flight. The two ends of the Billy cord yoke that attach to the harness loops at the solo pilot’s right and left hip must be attached to the inner most hip harness loops of both the pilot and the passenger i.e. If the passenger is on the pilot’s left then the passenger’s right hip loop and the pilot’s left hip loop must be used. The Billy cord must be routed through the control frame (over the base bar) as in fig’s 2 and 3. The Billy cord ends should be of fixed length, and not free running through the end of the main Billy cord, (otherwise the passenger could drop back as the pilot is pulled forward and vice versa). The tow leg top mounting will normally be between 10 - 15cm in front of the hang point on keel pocketless gliders, and 15 - 20cm in front of the hang point on keel pocketed gliders. An additional weak link of 40kg breaking strain must be incorporated at the release end of the threader to prevent any possibility of a tow continuing from the glider in the event of a malfunction of any part of the system.

Fig 2 - 2:1 Tow leg set up for aerotowing

NB: Both ends of the pilot link piece and the main ‘V’ bridle have eye loops formed by splicing the braid into itself.
This ensures that there are no external protrusions which would hinder it releasing freely.

There is one approved system: the 2:1 Tow leg set up
The Tug - Check that the Hang Gliders all up weight is within the limits stipulated on the tug's Permit to Fly.
Launch Trolley - Use of a launch trolley (or similar BHPA Approved castoring wheeled launch system) is mandatory when aerotow launching two-place gliders in winds of less than 10mph, and is recommended for all tow launching of two-place hang gliders. Launch Trolleys should comply with the IHPA Technical Manual - Operating Procedures (Aerotow.)
Equipment - Paragliding:
Harness - The pilot should have a harness with a wide seat that allows him/her to easily spread his/her legs either side of the passenger. The pilot’s harness should also have an efficient back pad, as if the pilot falls backwards the passenger will fall on top of him. If the passenger's harness has an emergency parachute in the back it must be removed as there is a risk that it could accidentally deploy when the two harnesses move apart in flight. Check that the passenger’s leg loops are not too tight and that they can get into a sitting position. If the passenger can't get into a sitting position the leg loops may dig in and restrict their blood circulation, causing them to feel faint.
Helmets - The pilot should wear a full faced helmet as the back of the passenger's helmet will be directly in front of the pilot's face and there is a very real danger of the pilot receiving mouth / chin injuries in otherwise very minor mishaps. The pilot must ensure that the passenger’s helmet is of a suitable size and that the chin strap is fastened before clipping in.
Canopy - Only certified tandem gliders may be used, with due regard to the correct weight range and the manufacturer’s recommendations. You must ensure that the Maillons used are adequately rated for tandem loads. Most tandem paragliders come with spreader bars as standard. Spreaders cause a cantilever between pilot and passenger. If they are used with a passenger who is either much heavier than the pilot, the pilot will be positioned higher. If the passenger is lighter than the plot, then the pilot’s position will be lowered, (this may cause difficulties for the pilot in seeing around the passenger). V-tabs solve this problem but do not separate pilot and passenger so well; and so are less comfortable for longer flights. Some spreader bars are convertible to V-tabs by removing the rigid separating bar. A few of the latest tandems have integral spreader bars that are impossible to convert.
Emergency Parachutes - tandem emergency parachutes are much bulkier than solo ones and may not fit in the parachute container of some harnesses without modification. The container is an awkward size to mount on the side of your harness or in front on your passenger’s chest strap. Consider the parachute bridle to harness attachment point. If the emergency parachute is steerable will you be able to reach the steering toggles? How far below you will the passenger hang after deployment? If you attach the parachute to your harness is the harness to spreader bar attachment strong enough to hold the passenger during the opening shock? Be very careful if using harnesses containing solo emergency parachutes. Any deployment (accidental or deliberate) of these will almost certainly lead to enough drag to stop the glider flying, but will then produce a descent rate that is not survivable.
4. THE SITE / CONDITIONS: Most tandem hang gliders and paragliders are noticeably less manoeuverable than solo machines; consequently you use up much more sky. For this reason you need a big uncrowded site. Take off and landing will both be more involved, and therefore you won't want to contend with any additional complications. Pick a site with large rotor free take off and landing areas. If you're flying a hang glider you may end up landing on the wheels, so check that the landing field is smooth enough. Is there enough room to make a sensible approach? Obviously good conditions are essential, though these will be different for each discipline. Paragliders require conditions similar to those suitable for solo flying, less two or three mph. Check the forecast to ensure that there won't be an increase in wind strength, it's far more difficult to land a tandem in breezy conditions than it is a solo. Hang Gliders should avoid scratching and so require good soaring conditions i.e. 20mph +. This will make take off and landing easier by reducing your groundspeed. It's worth taking a test flight on a solo glider to get a feel for the conditions, and ascertain whether they are suitable for tandem flight.
For tandem aerotow flights a larger site may be necessary due to the reduced climb rate when towing tandem gliders. The tug pilot should be briefed to keep the hang glider within gliding range of the site at all times to prevent an unplanned wheeled landing in a strange field with an unknown surface.
Section 2 - Common Practice
BRIEFING: A tandem flight for a passenger with no experience of our aircraft is a fairly major event and is likely to create a good deal of excitement and anxiety. In this heightened state the passenger is less likely to take in lots of new information. Therefore for a briefing to be effective you must Keep It Simple -KIS
Your briefing should result in everyone understanding what their role is, what to expect, and how to respond if things don't go as planned. Make sure that the information has 'sunk in' by using the instructor 'Question and Answer' technique. There is an awful lot of information that you could include in your briefing but it would probably get forgotten or confused, so it's essential that you focus on the key points necessary for a safe take-off, flight and landing. Much of the information on things such as the way a wing produces lift could be explained casually as you rig or do your pre flight checks. The procedure for take-off must be clearly explained to the passenger including what they can and can't hold on to, what to expect from the glider and how you want them to respond. Explain to the passenger that you will be able to talk to each other throughout the flight and you will remind them of what to do at each stage of the flight. 'Anchor men', 'Wing tippers', and 'Wiremen' must all be thoroughly briefed as to their duties, otherwise you could find them being more of a hindrance than help. Just prior to take off reiterate the main points of the take-off procedure again so that they remain fresh in the passenger's mind.
IN FLIGHT: After take-off be very gentle doing your first turn as you need to get used to the glider. During the flight explain to your passenger what manoeuvres you are about to do and why, and then execute them gently. What may seem like a gentle turn to you could be very disconcerting to a first time passenger, and could possibly cause them to feel airsick. If the passenger does complain of airsickness try to get them to concentrate on something else. If it persists then land as soon as possible. You will be flying with restricted visibility, altered control and possible loss of concentration due to chatting; in addition your glider will be covering a large area quickly. It is vital that you remain alert and compensate for these limitations by executing all manoeuvres cautiously. Obviously you must only allow the passenger / student to handle the controls if you have plenty of height and are well clear of other pilots, and certainly not below 500ft whilst on tow.
APPROACH AND LANDING: Brief the passenger for landing well in advance and get them into the position for landing early. Do a fairly high circuit with a long straight final glide into wind: putting in last minute turns at low level is asking for trouble. Make a good hard flare for a one step landing; a fast running landing with two pairs of legs is likely to result in a fall. Once you have landed unclip the passenger from the glider first. Never leave the passenger clipped into the glider alone.
Section 3 - Techniques
HANG GLIDING - HILL
(a) Pre-launch: After doing your pre flight checks, clip your passenger into the glider to get them used to the feel of the harness and getting into and out of prone (it should go without saying that you should never leave your passenger clipped in with the glider unattended). Clip in yourself and check the relative height of the two harness's (the passenger should be suspended 25cm higher than the pilot). Once airborne and prone tell your passenger to lock himself or herself to you by placing one arm across your shoulders (but not holding the parachute handle), and the other hand on your wrist. Practice some control movements explaining how the glider will respond to these inputs. Emphasise the need to move in unison and make it clear that they should not hold the control frame. During the briefing you must stress to the passenger that they should continue running throughout the whole take-off even when they feel the harness straps lifting them (to prevent them from trying to jump into the air at the first tug on the harness). Make it clear that they should not go prone until you tell them to do so. If you intend to top land, again choose a site with a large top landing area. It's worth briefing your wiremen as to when and where you intend to land so that they can secure the nose of the glider when you land in windy conditions.
(b) Launch: The technique for take-off is basically the same as for solo flight. The passenger should be positioned to the side and slightly behind you, with one arm across your shoulder holding your harness at the arm pit so that you can feel their knuckles. Their other hand should be holding your harness at the nearest arm pit. Before you start your take off run, make it clear to the passenger which foot to put forward first, the idea being that your neighbouring legs move in the same direction at the same time to avoid tripping each other. During the take-off run your passenger will be lifted from the ground first, but you must continue running to gain extra airspeed.
(c) In Flight: Once airborne the pilot should go prone first and then instruct the passenger to do so. Make your first turn very gentle, away from the passenger, and warn them before you start it. If at any point in the flight you begin to get low, cut your losses and head for the bottom landing to set up an approach with plenty of height, rather than trying to scratch back up. While you still have plenty of height tell the passenger to get their legs out of prone and place their hands on your shoulders and then get out of prone yourself. Get onto the uprights early and level the glider into wind with plenty of height. Remember that a tandem glider with passenger will be less manoeuvrable than a solo glider, the handling will be heavier and you will cover much more ground on your approach.

(d) Landing: Do not attempt an 'S' turn approach, as this commits you to making numerous turns, close to the ground. This will not only be physically demanding, it will be difficult to judge where you will land and it could be very disconcerting for the passenger. Use the constant aspect approach to position yourself into wind with a long final glide. If the landing field is smooth and flat enough you are advised to land on the wheels (check out the landing field first). Most hill sites don't have smooth, flat, bottom landing fields though. In this case, on final approach you must maintain plenty of airspeed and flare hard for a stand up landing. If you try to run off the landing you risk at best ending up in a pile of tangled legs! Once down, unclip the passenger first and then yourself. When top landing in windy conditions wait for assistance from wiremen before unclipping.
TOW / AEROTOW
Tandem tow and aerotow hang gliding activities must comply with the operating procedures laid down in the IHPA Technical Manual - Operating Procedures Towing & Weaklinks. For tandem aerotowing the use of a launch trolley or wheeled under carriage is mandatory in winds of less than 10 mph and is recommended for all tandem launches. The launch trolley removes the hazards caused by two pairs of legs running in close proximity, allows both pilot and passenger to go prone before take off and provides an opportunity to rehearse in flight controls and allows the pilot to get correctly positioned off centre of the base bar. (The natural tendency of the solo pilot to position in the centre of the base bar must be resisted, as this will lead to a turn immediately on lift off, due to the passengers weight being to one side. The combined mass must be central.)
Warn your passenger to lower their head when slack is taken up and later when the line is about to be released. That way if the line springs back it will only strike the top of the helmet.
Tandem Aerotow pilots should aim to keep the tug’s kingpost on the horizon as any lower than this and you run the risk of flying into the tug’s propeller wash.
Line Breaks: The passenger must be thoroughly briefed on the procedure to follow in the event of a line break. If you are being winch launched you should explain that the glider will be in a stalled attitude and they should expect the nose of the glider to drop suddenly. Explain that this is normal and they should not panic. Recovery from a line break is the same as for a solo tow although you should always land on the wheels rather than attempting to land on your feet.
AEROTOW HAZARDS
1. The difference between being a little out of position and being locked out is very small on a tandem glider.
2. On tow the Pilot in Command must have his hand actually on the release at all times.
3. Tug pilots should be specifically briefed if the tandem pilot is thinking of letting the student do any part of the tow.
4. If the student is flying the glider on tow and gets the least bit out of position release immediately! You will not fight it back into position, and the situation will go from inconvenient to dangerous in the twinkling of an eye. This is especially important when near the ground, the dangers diminishing as height is gained. Only Aerotow Coach qualified tandem pilots, training other already aerotow solo qualified potential tandem pilots have any need to allow the ‘student’ to handle the controls near the ground. Six fatalities have occurred in America with this activity.
5. Unless the student is actually learning to aerotow (eg on an endorsement) the benefits of letting them have a go during the tow are few, and probably not worthwhile. Even with Aerotow endorsement courses the main benefit of a tandem flight is to show the trainee the positioning: a quick ‘shot’ on the controls is unlikely to massively increase their preparedness. This is especially true if you consider that the pitch forces, glider response rate and release system are all totally different to those they will experience when they tow their own glider.
PARAGLIDING - HILL
Get into your harness and attach the spreader bars and canopy to you first. Build a wall, check the canopy out and get ready to take-off. Lastly attach the passenger.
In general, use forward (alpine) take-offs for light winds and reverse techniques for moderate winds. For stronger winds with the help of an anchorman, it may be easier to revert to a forward take-off technique, as you will be lifted off the ground immediately in a flying position.
Spend time selecting your launch area. The most suitable area to launch from will consist of a gentle slope with a gratandem increase in gradient. If you try taking off over a sharp edge the passengers weight comes off the ground first pulling you and the wing forwards. This is extremely dangerous if the wing is not already flying properly.
On a steep slope you may have to stand side by side along the slope to take-off. If your passenger stands in front of you down the slope you may not be able to stand up straight.
With all reverse take-offs a good ‘crossed-brake’ technique is preferable in order to keep the canopy under control at all times. Due to the position of the passenger, one riser is much further away from you than the other. You must compensate for this as you pull up.
Take-offs have to be more precise because if the canopy does not come up straight you cannot easily side step to make a correction.
Anticipate being pulled back a fair way before getting the canopy flying and make sure you have a large ‘drag back’ area.
A heavier or taller passenger will still be running long after you are airborne.
Take-off techniques can be divided into the following categories. They are all made easier by having well briefed helpers of sufficient skill available.
Be aware that because the canopy attachment points are in front of the pilot when flying tandem, in the correct flying position the leading edge of the canopy will seem to be a lot further forwards than when flying solo. A common mistake on take-off is to let go of the risers too soon on the pull up.
Reverse take-off 1: The pilot faces the canopy, the passenger faces down hill. This is probably the easiest reverse technique. The pilot does a reverse take-off procedure and as the canopy comes up, turns to face forwards.
Advantages - the passenger is facing direction of travel and just has to stay standing and run forwards also the passenger can help brace against drag loads as the canopy is pulled up.
Disadvantages - the passenger has to be able to stay standing whilst possibly being pulled backwards. The risers are not of equal length making pulling canopy up difficult (one riser pull up and brake works well on some canopies). The passenger is not in a position to help control the canopy (see technique below).
Reverse take-off 2: Both pilot and passenger face the canopy, side by side. The passenger ducks under one set of lines and both turn quickly as the canopy comes up.
Advantages - risers are of equal length for the pilot making it easier to co-ordinate the pull up. The passenger can see canopy and can react accordingly. The passenger can easily help with launch i.e. helping to pin canopy with ‘C lines’ prior to take-off. It is also easier for the passenger to stay standing if the canopy is blown backwards.
Disadvantages - needs a relatively experienced passenger who turns quickly and in the right direction!
Reverse take-off 3: As 1 above but with the passenger sitting. This is only possible with V tabs. As the canopy comes up, it lifts the passenger off the ground. The pilot then turns and runs the passenger/canopy combination forward. (This technique is much more difficult if using spreader bars as the cantilever can mean that the passenger is not lifted off the ground at all.)
Advantages - The passenger cannot fall over and injure themselves. Ideal position for the passenger to be in if dragged backwards.
Disadvantage - Ground handling must be precise, as the passenger anchor can lock the canopy out if it comes up crooked.
Forward take-off:
Advantages - No complications of having to turn around.
Disadvantages - Good forward take-off technique needed. Some canopies are difficult to forward launch without using correct trim settings. Canopy will only be flying properly when the canopy appears (relative to solo canopy) to be a long way in front of you.
Run side by side to reduce the risk of tripping each other up and kicking each other in the shins.
Landing: Brief your passenger for landing well in advance. Ensure that your passenger gets out of the sitting position early and into a PLF position.
Remember that due to stepped hang-points on the spreader bars the passenger’s feet can be up to two feet closer to the ground than yours.
You may find that the brake pressure on some tandems makes flaring very hard work, sometimes taking wraps can help but be ready for it. Know your canopy peculiarities before taking off. You must try to land into wind. It is difficult to run out a down-wind landing with two pairs of legs!
For bottom or top landings, the circuit needs to be well planned, as there is little margin for error. It needs to be larger than for a solo canopy due to the lack of manoeuvrability. Normal field selection procedures are appropriate but take a longer landing run into account. Last minute changes must be avoided as any late turns can result in a very fast and heavy landing.
The best method is to land side by side. If you normally collapse your canopy to the right, sweep your passenger over to the right with your right leg. Brief your passenger to turn around to their right to face the canopy immediately on landing (tap them on the shoulder just to confirm direction). On landing, turn to face the canopy yourself then bring it down whilst running side by side after it.
On landing, after getting the canopy safely collapsed, unclip your passenger. Never leave a passenger clipped to the glider on their own.
i) In light wind landings your passenger must be ready to run. Either sweep them to one side so that you land side-by-side or get them to run to one side on landing. If you are going to land side by side, sweep your passenger over early as it will cause you to swing about (not sensible close to the ground on finals.)
ii) In fresh winds without helpers, you must be able to turn around and collapse the canopy efficiently. It is difficult to stop a 43m2 canopy dragging you if you get it wrong. Never try to bring the canopy down until both of you have turned around.
iii) In strong winds making a controlled landing is almost impossible. You should never get in a situation where this is possible. Remember your legal duty of care to your passenger!

PARAGLIDING – TOW (modern high performance canopy)
Tandem tow launching should not be attempted if the wind is too strong to forward launch, and certainly in no more than 15mph wind. As in the hill launch the passenger should be clipped in only when the pilot has clipped in.
The tow line should be connected either:
1. to the canopy risers just above the maillons or karabiners.
2. to the passenger’s harness at a point just below the harness maillons or karabiners.
A short three ring circus release can be used or a spinnaker clasp release, whichever release is used you must ensure that there is no chance of it becoming tangled or disappearing from view during the tow. The passenger should be briefed on the operation of the release mechanism in the event that the pilot is unable to release. A second cord is threaded from the release over the passenger’s shoulder allowing the pilot to operate the release.
Use the standard tow launch technique. (See BHPA Pilot Handbook.)
During the passenger’s briefing the pilot should stress the need for them to keep running throughout the launch. The passenger should be made aware that you may shout directions to them during the launch, ie. ‘run right’ or ‘run left’, so the pair of you remain beneath the canopy during launch. The pilot will leave the ground first and should not be tempted to pull the passenger off the ground by pulling on the controls. The canopy must be ‘flown’ off the ground. The passenger must therefore continue to run, although this will probably become more like ‘moonwalking strides’. During the first 60ft of the flight it is important that the winchman does not apply too much power and should be thoroughly briefed on this. Following the release the procedure for the flight and landing are the same as for hill flying.
It is advisable to use an airbag harness for the passenger with an internal back protector. The passenger should be briefed thoroughly on low level line break procedure (not enough height to pendulum through). Brief the passenger to put their legs forward on the ‘legs forward’ command, and then land them on the airbag.
SIV Courses
SIV Courses
SIV Course Information Sheet
A possible way of learning to deal with unstable situations would be to attend an SIV course ran by experienced SIV instructors. SIV stands for ‘Simulation d’Incident en Vol’ and roughly translated means simulating unstable situations in flight. Here you can learn about the way your particular canopy handles and how to make the correct control inputs in unstable situations, progressively building up to more complicated manoeuvres. This must all be done over water with the use of buoyancy aids, radios, video equipment and support boats etc. NB. Landing in water is never 100 per cent safe, even in controlled situations.
It is arguable whether attending an SIV course is fundamental to a pilots’ development. Establishing good ‘active flying’ skills is more important as this will prevent the majority of collapses in the first flace. Having said that, a good SIV course that is both progressive and well ran, with plenty of feedback, can teach you a lot about your wing and how it feels at the onset of a spin or stall etc. The course should be geared to your individual needs and experience, and the manoeuvres should be progressive. A badly run course will teach you nothing and may have a detrimental effect on your development as a pilot.
Be clear as to why you want to attend an SIV course and what you hope to achieve by the end of it. The aim of SIV is to teach you about the handling characteristics of your wing at the edges of its flight envelope. What it feels like just prior to an unstable situation and how to make the correct inputs if it does become unstable. SIV should also teach you to recognise when a situation is hopeless and the only option is to deploy your reserve. SIV IS NOT designed to teach you how to fly beyond the normal flight envelope of the glider. Paragliders are not designed for aerobatics. Discuss with the course provider what you hope to achieve and ensure that they can provide what you require. Depending on your level of experience it may take a number of SIV courses to cover all the unstable manoeuvres.
Before booking on an SIV course make sure your equipment is in good order and well maintained. SIV manoeuvres can place severe strains on all elements of your equipment. Make sure your reserve parachute is of a suitable size and is correctly fitted to your harness (if you are unsure about this then have it checked by a qualified reserve packer). Practice dummy deployments to familiarise yourself with the technique (and to ensure the parachute will deploy!). Become as familiar as possible with your canopy and equipment. An SIV course is not the place to familiarise yourself with a new wing. You will get more from the course if you are already familiar with the normal flight characteristics of your wing.
The following are not considered reasonable as elements of an SIV course: established spins, parachute deployments, cascaded or combination manoeuvres (e.g. spiral dives with ears in).
NEVER DO ANYTHING YOU ARE NOT ENTIRELY HAPPY WITH.
Read through the following ‘RECOMMENDED SIV SYLLABUS’.
NB: The IHPA does not license SIV courses or SIV course providers.
Confirm that your chosen SIV course can fulfil the recommendations.
RECOMMENDED SYLLABUS FOR SIV (SIMULATED INCIDENTS IN FLIGHT) TRAINING COURSES
Personnel:
- At least two qualified Instructors should be present, one at launch, the other supervising the manoeuvres should hold a Senior Instructor rating.
- There should be at least two persons present in the rescue boat (normally though not necessarily the instructor + the driver).
- Pilots taking part in these courses should hold at least a Para Pro 3 (Novice) rating.
Venue:
- As per the Pilot rating recommendations, most SIV manoeuvres should be conducted over water.
- There must be sufficient altitude and with adequate room for a pilot to complete a major manoeuvre well clear of the shore and still fly back with sufficient height to make a safe landing.
- Launches by winch should only be undertaken with suitably qualified pilots and by a qualified crew.
Equipment:
- A rescue boat with adequate performance and crew to reach a downed pilot quickly.
- A reliable radio system must be in use. The receiver must be mounted in such a way as to ensure the pilot can clearly hear instructions even with considerable wind noise. Abort manoeuvres if radio fails.
- Pilots must wear life jackets or buoyancy aids. These must not interfere with normal operation of the controls & harness.
- Pilots must be equipped with emergency parachutes, checked by the instructor. (See Pre-Flight Training Procedure 2)
- Back-mounted Air bags or Foam/air protectors that could act as flotation devices must be disarmed or removed before overwater manoeuvres.
- Canopies should be given a thorough pre-flight checking including intercell walls, line hook-up points etc. Instructors must note any damage to the canopy before the flight.
- All canopies must be flown within their placard weight ranges.
- Karabiner separation distance should be as stated on AFNOR test certificate. Very loose or very braced harnesses can significantly alter the gliders' behaviour.
- We strongly recommend a video recording of the manoeuvres.
Pre-Flight Training Procedures:
- All pilots must be made aware of the risks involved and it should be explained that the tasks are voluntary. If the instructor is giving a command and the pilot is uncomfortable, the pilot should not attempt it. Pilots should be made aware of the dangers of overreacting during manoeuvres. What to do in an emergency or loss of communication should be thoroughly understood (e.g. deploy a reserve or fly back to the landing area.)
- Pilots should be trained and practised in the procedure for deploying their reserves and how to perform a water landing.
- Pilots should have the manoeuvres and the recovery procedures thoroughly explained. We highly recommend the video “Security in Flight” by Jocky Sanderson as a source of information on this subject. Potential complications such as cravats should be discussed in depth.
- The canopy’s manual must be read and understood.
- All pilots must understand that the purpose of the course is to recognise potential problems, prevent them from occurring and learn how to recover as quickly and safely as possible.
Manoeuvres:
Before any manoeuvres are attempted the pilot must have had at least one normal flight, to familiarise themselves with the site and landing area.
The manoeuvres can be completed in the order the instructor thinks appropriate, and more than one may be attempted on each flight. The more disorientating manoeuvres (spins or developed
stalls) are not generally grouped together on the same flight. It is recommended that before the usual SIV exercises are attempted as below, the pilot practices, big ears, steep 360’s, weight-shift
turns, wing-overs and pitch control exercises.
- Asymmetric tuck <50% Right then left. Showing good recovery. (Repeat with different harness settings)
- Asymmetric tuck >50% Right then left. Showing good recovery
- 100% tuck Showing good recovery
- Search for stall point & recovery (brakes)
- “B” line stall Showing good recovery.
- Spiral dive showing good recovery
- Incipient spin showing good recovery
NOTE:Though not a necessity for normal flight situations, the full stall does have a place in recovering from certain situations such as a cravatted canopy, a very potent area of lift, or an otherwise unrecoverable spin or deep stall on some canopies for this reason it may be included on an SIV training course when both instructor and pilot considers it appropriate. It should not be regarded as a mandatory manoeuvre, and suitable warnings about the potential seriousness of a poor recovery should be made. The following are not considered reasonable as elements of an SIV course: established spins, parachute deployments, cascaded or combination manoeuvres (e.g. spiral dives with ears in.)
Post flight:
- Debrief of each manoeuvre, using video recording.
- Post flight check of canopy including thorough check of intercell walls and line hook-up points. Any glider or other equipment that has come into contact with salt water must be thoroughly rinsed in fresh water. (All maillons & karabiners must be removed and unscrewed for thorough washing as corrosion generally occurs in the threaded area.)
NOTES ON PROCEDURE:
A flight will generally begin by flying out over the water to the point where any loss of control or drift will not take the canopy back over land. During this time the instructor will check communications are functioning and clearly describe the actions for the first manoeuvre. The instructor will check he has been clearly received. When the pilot has reached the correct
location the instructor will tell the pilot to proceed and will talk the pilot through the appropriate manoeuvre and then recover.
If there is sufficient height the procedure can be repeated, or a different manoeuvre attempted.
Manoeuvres should never be cascaded into one another. Wait for normal flight to be fully established before undertaking the next procedure.
All SIV courses should be tailored to suit the student’s actual experience, canopy and expertise.
Red Ribbon System
The Red Ribbon System for Low Airtime Pilots
Elementary and Novice pilots MUST fly with a broad red ribbon (about 1m long) attached to the top of their Kingpost (HGs) or attached to their harness (PGs) until they have logged a minimum of 10 hours AFTER being awarded a pilot rating of Safe Pro 3 (Novice) or Para Pro 3 (Novice.)
The red ribbon is a simple means of identifying relatively inexperienced, low airtime pilots to other pilots, who require special consideration both on the ground and in the air.
On the ground: It indicates that the Novice pilot will require a full briefing on the site and weather conditions and advice on whether or not it is safe for you to fly. It should also encourage experienced pilots to make contact with these new pilots entering the flying community, and give advice when necessary.
In the air: Pilots seeing a broad red ribbon trailing from another wing will understand that the pilot is relatively inexperienced and may not be comfortable flying or manoeuvring in close proximity to other pilots and will give you a wide berth.
Novice pilots should not feel embarrassed about flying with a red ribbon as it is there to protect their own safety and the safety of other pilots in the air, and they should continue to use it until they feel comfortable flying closely with other pilots.
Safety Requirements & Practices
Safety Requirements and Practices
Introduction
Hang Gliding and Paragliding participants are expected to train, operate and use equipment in accordance with the guidelines described in this Operations Manual. Minor improvements in training, procedures or equipment may be introduced at club level on the authority of the CFI or Senior Coach, who is permitted to develop these improvements and authorise their continued use by club instructors or coaches. Where a club intends to undertake major development or make any significant variation from normal practice, the CFI or Senior Coach must gain approval from the Training & Flight Safety Officer in advance, in writing.
In order to maintain a good safety record in the sport, certain procedures, training and equipment are identified as Safety Requirements and Recommended Practices, and all Instructors, Coaches and pilots are expected to comply with these. The Training & Flight Safety Officer is alert to the need to revise these practices as the sport progresses and will also consider granting waivers applied for by a CFI, either when one of the Requirements is not sensible to a particular circumstance, or when a development project seeking new techniques is undertaken. These waivers only apply when given in writing from the Training & Flight Safety Officer to the CFI, Senior Coach, or pilot and are for a specified period only. In the following paragraphs reference to 'Instructors' includes registered Trainee Instructors.
Specific Bans
- The tow line must not be connected to a fixed object.
- The harness-to-glider connectors must not be single action release systems.
- Inflatable boats must not be used as tow units.
Insurance
All pilots and operators are required to hold insurance cover appropriate for the activities they wish to engage in. Any deliberate or reckless contravention of safety requirements, recommended practices, or IHPA regulations may render the liability insurance void. If any change in published procedures or accepted normal practices is required to be made, it should not be implemented to any extent until confirmation has been received from the Training & Flight Safety Officer that such change is acceptable.
Safety Requirements
General
- Hang gliding and paragliding Instructors, Coaches and pilots must comply with the current requirements as laid down in the Air Navigation Order.
- Where necessary the relevant authority (i.e. Air Traffic Control) must be informed before flying commences.
- During Training Exercises in a school effective launch and site control must be maintained, through a delegated Duty Instructor, who must be identified to all students and pilots.
- When students are under instruction a wind sock must be positioned at the nominated landing area.
- All equipment must comply with the standard as laid down in this Operations Manual.
- Pilots must don and fix a suitable helmet before fitting their harness to the glider.
- All new participants must be given appropriate landing training before flying. Where a potential hazard is present (water, tree, obstacle, etc.) the relevant briefing must be given.
- Students and pilots undergoing training from Instructors or Senior Tow Coaches must receive, or declare, pre-flight and post-flight briefings or intentions.
- A thorough Daily Inspection of the glider and the harness and parachute system must be carried out before the first flight of the day.
- A standard pre-flight check must be carried out before every take off.
- Elementary Pilot and above must record the details of all flights in a personal Flight Log Book.
- The pilot-in-charge of a glider carrying two persons must hold the relevant IHPA Tandem Pilot qualification.
Recommended Practices
- Water landings should be avoided at all costs; experienced pilots anticipating flying over or near to significant areas of water should ensure that a safe dry landing area is always within reach, wear suitable buoyancy aids and carry a suitable webbing cutting implement.
- When using the hand tow controlled training technique the tow line should not exceed 5 metres.
- When flying with qualified pilots, students on achieving EP, should display a red ribbon streamer attached to the top of the kingpost (HG) or the seat area of the PG harness, and secured to avoid fouling rigging, etc, as a warning to other pilots. It may be dispensed with when the pilot has reached Safe Pro 3 / Para Pro 3 rating plus 10 hours logged flying time.
- The tow unit should be such that the driver can maintain an unobstructed view of the launch and subsequent towed flight.
- In the event of an emergency tow line release a mobile tow unit should be positioned so as to be able to assist and advise the pilot if needed.
- At least one anchor man should be used when the pilot is being harnessed to a canopy which is already attached to a tow line.
- Metal tow lines should not be used in the vicinity of power lines.
- When attaching two harnesses to a single hang point or riser system, physical separation, or a satisfactory means of preventing fouling of the connectors, must be ensured.
- Paraglider pilots should maintain steering control throughout inflation, launch, tow and free flight phases. Where the public have access to a tow launch site a board should be displayed prominently carrying the words “WARNING - TOW CABLES” .
IHPA Regulations
General Administrative Regulations
- All IHPA members acting in an authorised supervisory capacity are responsible for ensuring that Safety Requirements and Recommended Practices are complied with.
- IHPA membership must be held by all who participate or assist in operations.
- Participants must sign a declaration on joining (and annually thereafter): ‘I understand that before I fly I must be physically and mentally fit to do so. Before undergoing any training I undertake to inform my instructor / coach if I suffer from any mental or physical defect, infirmity previous injury, disease or condition which could increase the risk of an accident or the severity of an injury.’
- All ab-initio training must be conducted under the supervision of a suitably qualified and licensed IHPA Instructor.
Age limits
- There is no upper age limit.
- A person must be at least 14 years old to be eligible for training under the direct supervision of an instructor, providing the operation is within the confines of a tow site, or, in hill launch conditions where there is no possibility of achieving soaring flight.
NOTE : for solo hang glider flights the pilot must be at least 16 years old. - For flights where the instructor has direct control, such as tandem flights or towed flights where the tow line is not released, then the above age limits may be waived at the discretion of the CFI - but the Duty Instructor must ensure that the student is of sufficient mental and physical maturity to follow and understand flight briefings.
NOTE: a parent's/guardian's consent form is necessary for minors (under 18 years).
Alcohol and Drugs
According to the UK Air Navigation Order Article 66(2). "A person shall not, when acting as a member of the crew of any aircraft or being carried in any aircraft for the purpose so acting, be under the influence of drink, or a drug to such an extent as to impair his capacity so to act."
In addition to the basic requirement of the law the Association insists that instructors, students and pilots do not consume alcohol nor intoxicating drugs within eight hours of commencing flying or conducting flying operations.
Accident Reporting & Investigation
Accident Reporting & Investigation
- Introduction
- Incident Management
- Investigating and Reporting
- Incident Report Analysis
- Boards of Inquiry
- Reportable Accidents
- Incident Report Form
- Initial Response Procedures
- Board of Inquiry - Standard Terms of Reference
- Primary Contact Recording Log
- Distribution Procedures - Board of Inquiry
- External Structures and Influences
Introduction
Hang gliding and paragliding are risk activities and carry with them the danger of injury to participants. However, the IHPA strives to reduce the risk as much as possible while allowing participants to continue to enjoy their sport. When an incident occurs everyone should be interested in finding out why it has happened and what might be done to prevent a repeat, especially if someone has been hurt. This chapter explains the investigation, reporting and analysis of incidents in the IHPA; it also describes the processes of informal and formal investigations, details the procedures required during a IHPA Board of Inquiry and defines ‘reportable accidents’.
In a school training or club coaching situation the school or club is responsible for completing and submitting Incidents Reports, including the Supplement. Pilots of CP level or above are expected to complete and submit Incident Report forms in their own right.
Incident Management
The initial reaction to an incident is important. Life may be saved by the right actions being taken quickly. Everyone must know who is taking charge; in a School this will usually be the Duty Instructor, whereas in a club it may be a Coach or simply a fellow pilot. A serious incident is not the time for committee meetings about what to do, especially if someone is injured. Depending on the incident and the apparent severity of any injuries, carry out some or all of the following actions:
Liability - Under no circumstances should you admit any fault or liability to any person.
1. Administer minimum First Aid as necessary.
Knowledge is more important than resources - Instructors and Coaches are trained and most have access to a First Aid kit; but individual kits need not be cumbersome and every pilot should make an effort to attend a First Aid course.
2. Call the Emergency Service.
Although it is essential not to waste time it is extremely important to assess the injuries so that precise information can be relayed to the Emergency Service which can then decide which form the rescue will take - ambulance or helicopter. Either telephone or radio may be used to summon aid. Everyone should know beforehand, or be told what form of contact will be used and where it is located. In most cases (especially fatal or potentially fatal) the information is relayed directly to the Police who may attend. In a group situation (School, Club or Event), to avoid the nuisance of multiple or false alarms, a person should be appointed (and identified to others present) to make any emergency call. Ideally, the caller should take a companion - one can then return to confirm that help is on the way whilst the other guides the rescuers to the site. Also, in the unfortunate event of the caller suffering an accident on the way then the call can still be made.
3. Record, but do not disturb equipment.
If possible photograph it; sketch it or draw someone else's attention to it. The Police may impound it in some circumstances, so record its state as soon as possible. Do not test it. Often, when equipment was a possible cause, it had been packed away before an experienced investigator had had a chance to look at it (vital information can be gained from studying the equipment as it looks immediately after an incident).
4. Identify witnesses.
Take names and addresses of witnesses including bystanders if possible. A serious incident requiring further investigation needs information from several sources to build up a picture of what really happened. Sometimes bystanders are better witnesses because they describe exactly what they saw rather than interpret what happened using their own flying experiences.
5. Get witness statements.
Have witnesses write down what they saw or heard. A more accurate picture will emerge from individual reports of what happened rather than group consensus. It is usual for statements to conflict; these should be resolved only when drawing conclusions about an incident not when gathering information about it. The Incident Report (IR) form should be sent to the IHPA Training & Flight Safety Officer (
6. Notify relatives.
If there has been a fatality or serious incident the Police will notify next of kin - as they have been trained for such a situation, let them do it. In lesser cases notifying family or friends indicates a responsible attitude and can help to avoid acrimony and the pursuit of liability claims. The IHPA maintains 'Next of Kin' details for every member.
7. In serious cases inform the IHPA immediately and directly.
Telephone numbers are listed on the IHPA website - do not leave messages but go through the list until you can talk to someone in person. Very serious incidents will need the support of experienced IHPA officers, for example in liaising with the relatives, press, police, AAIU, IAA and any other organisations concerned, and where appropriate, in convening a Board of Inquiry. Any incident, whether serious or not, can be reported by telephone for advice and encouragement. For quick reference the above points are summarised on the IHPA Incident Report form.
Dealing with the media.
Very often the Press, in any of its forms, is on the scene very soon after the incident. Aggressive and leading questions may be posed at a time when defences are down and those involved may be in various stages of shock. Under these circumstances statements and comments may be made which could be mis-quoted, or subsequently damage the image of the sport, or create difficulties for any subsequent investigation. Faced with such a situation it is best for an appointed person (say the CFI or Senior Coach) to provide a short statement such as:
"I can tell you that X has suffered a fatal/serious injury and has been taken to hospital and the Police and/or the IHPA have been informed. An inquiry may be carried out by the Association but for further details you should contact the IHPA Training & Flight Safety Officer."
Investigating and Reporting
Under European Union legislation (Directive 94/56 EC) the BHPA is authorised and empowered, under delegated powers afforded by the Department of Transport (Air Accident Investigation Branch) to record, investigate and report all hang gliding and paragliding incidents. [NB: the IHPA seeks similar authority under the forthcoming ammendments to the Air Navigation Order.] Under this legislation it is also the duty of every pilot (whether or not they are IHPA Members) to report incidents. Non IHPA Members may elect to report accidents directly to the AAIU. The attention of all qualified members and Accident Inspectors in particular is drawn to the legislation.
The purpose of incident investigation is to identify any lessons which might be learned with, obviously, the aim of preventing any repetition. A logical approach to any investigation is important if the evaluation is to be fruitful, whether it is carried at school or club level or by trained investigators during an iHPA Board of inquiry. Investigations conducted by the IHPA Flying and Safety Committee (FSC) fall into 3 distinct categories:
- an informal inquiry which might range from a short telephone inquiry to clarify specific points through to a visit to examine, for instance, equipment or to follow up initial reports.
- a more formal approach either by letter or visit by an investigator to take statements or to conduct a preliminary investigation.
- a formal IHPA Board of Inquiry.
Much useful information can be gathered at school or club level conducted by, say, the CFI or Senior Coach who will need to understand the processes involved.
There are three stages of an investigation:
- Gathering information
- Drawing conclusions and
- Reporting.
Gathering Information
- Get reports from witnesses, including bystanders. Written reports can be more revealing and can be studied at leisure later. Avoid group consensus or conjecture about what happened, especially at this stage.
- While reports are being written, examine equipment, preferably in the state it was at the time of the incident. The initial description of the incident will help decide whether any equipment was a factor.
- Interview witnesses, separately, getting them to explain what they saw or heard, and only then asking questions to clarify points or draw out more information. Show respect for the help the witness is giving but do not express opinions as to the cause.
- Try to get information from any injured person.
- Always seek facts rather than opinions. Expect to hear conflicting accounts of what happened. Keep an open mind as to the cause of the incident.
- The 'uninformed bystander' can often be the most reliable witness as they are less likely to 'suppose, assume, imagine or pre-judge' than a knowledgeable pilot.
Drawing Conclusions
- Try to establish a sequence of events from the information gathered. If necessary go back to seek more information to fill in gaps or clarify points.
- Use the standard specific questions devised for IHPA Boards of Inquiry as an aid to making a full appreciation of the incident.
- Formulate conclusions as to the cause but be prepared to accept that there may be alternative causes or more than one cause. Reason out why one possible cause should be acceptable but another not so.
- List the cause(s) under one or more of the following headings:
- pilot error
- Instructor error
- launch marshal error
- training error
- environmental
- communications error
- equipment
- Decide what needs to be done to prevent a similar incident happening at the school, operator or pilot level.
- Take action at the school, operator or pilot level.
- Report your findings to the FSC.
Reporting
Almost anything that causes or could have caused injury or damage, or is simply unusual or inexplicable is considered reportable. Moreover, failure to submit an IHPA Incident Report Form promptly may jeopardise an instructor’s legal standing and insurance cover in the event of a claim of negligence. But most importantly, the Incident Report could probably contribute to saving another pilot from injury.
IHPA Reportable incidents are:
- Those involving injury, whether to participants or others.
- Those involving damage to property, whether or not it is third party.
- Those in which an insurance or legal claim might arise.
- Those involving the use of non-standard hang gliding and paragliding procedures or training.
- Those in which equipment has broken or failed to function, or has malfunctioned.
- Anything that might highlight safety points or was unusual.
- Those from which the sport may learn.
The IHPA Incident Report
[Note: an on-line reporting system is under development and will replace the need for paper based report forms to be returned by post.]
A IHPA Incident Report (IR) must still be submitted even when a telephone report has been made, and the reporting timetable is important. The IR must be returned to the IHPA Training & Flight Safety Officer within 24 hours of the incident occurring; for ease and convenience the IHPA provide an on-line reporting service. Every effort must be made to complete the form as fully as possible; if information is not available, for example about the forecast length of stay in hospital, then this should not delay the Incident Report but can be telephoned or emailed to the IHPA Training & Flight Safety Officer later. Only when a IHPA Board of Inquiry has been convened should the IR be retained and handed to the President of the Board.
The IR form consists of several distinct parts each of which is simplified to require, wherever possible, a 'tick-in-the-box' response. A Supplement is included and must be completed where the incident occurred in a school or similar situation. It is important that the guidelines provided on the form are read and the steps followed - too often an Incident Report states what happened but does not suggest a cause, or in some cases gives a cause with no supporting facts. A fully completed form avoids the necessity of prolonged and expensive follow up calls or letters which then have to be circulated so that all members of the Accident Prevention Panel may assess and analyse the information.
The Response Process
To avoid any delay or duplication of work it is essential that a procedure for responding to reported incidents is provided for the IHPA Committee as a reference. This process is detailed below and also contains the IHPA definitions of the various categories of accidents and incidents.
Incident Report Analysis
The data from every IR is entered onto the IHPA Accident Database by the IHPA Training & Flight Safety Officer, who also compiles a narrative report. The contents of all IHPA Incident Reports are treated in confidence by officers of the IHPA. Any subsequent publication of that information does not include reference to the club or persons concerned. A summary of these narrative reports is published on the IHPA website and in the IHPA's Free Flight magazine.
Any particular type of incident may receive more detailed analysis to uncover further facts and similarities. This usually requires further reference by the FSC to each Incident Report where a fact or comment previously thought to be insignificant can prove to be the vital clue to the real cause of many incidents. Therefore, instructors and pilots should understand the importance of putting thought and effort into completing each Incident Report comprehensively.
Boards of Inquiry
The object of a Board of Inquiry is to investigate, report and comment on the circumstances of an incident, to:
- answer specific questions.
- determine the cause or most likely cause.
- where appropriate, make recommendations to the FSC for the benefit of future safety in the sport.
The allocation of blame and the proposal of disciplinary measures are outside the scope of IHPA Boards of Inquiry. Nevertheless, Board of Inquiry Presidents are empowered to suspend any IHPA rating or qualification on the spot if they believe that doing so is in the interests of the Association, pilots, the public or the instructor or coach concerned. Whereas an IHPA Board of Inquiry is convened primarily to answer questions internal to the IHPA, where other organisations may have indicated an interest, the Board will try to answer any additional points those organisations may wish to be raised. Furthermore, an IHPA Board of Inquiry fulfils the responsibility of the Association as a national governing body by co-operating with the police, the Coroner, the IAA and the Air Accident Investigation Unit of the Department of Transport. Copies of the Boards' Reports are made available to these bodies either as a matter of course or if requested. In the case of a fatality, the Coroner may call a member of the Board to give technical evidence.
Circumstances for Convening
Any incident involving an IHPA club, instructor, operator or member can be investigated by an IHPA Board of Inquiry. Incidents outside the IHPA in which hang gliding or paragliding type equipment was used may also be worthy of investigation. An IHPA Board of Inquiry must be convened in the event of a fatality. An IHPA Board of Inquiry may be convened to investigate any other accident or incident at the discretion of the IHPA Executive Committee, taking into account the lessons they expect to draw from the accident or incident for the improvement of safety.
NB: The IHPA has no authority to conduct investigations outside the State. Under International law that responsibility rests with the state of occurrence.
Method of Convening
The Chairman of the FSC convenes an IHPA Board of Inquiry and will select and appoint the President and normally two Members on the basis of their experience and training in conducting Boards of Inquiry and availability. The Chairman will then brief the President and issue Terms of Reference for the Board. The President may refer to the Training & Flight Safety Officer for advice or a change in the Terms of Reference but, once appointed, the President is responsible for all further proceedings of the Board. It is expected that proceedings will start within 24 hours of a fatal or very serious incident and within one week of all other incidents. The sooner the Board can meet to gather information, the clearer will be the picture that emerges from witnesses.
Terms of Reference
When an IHPA Board of Inquiry is convened the President will be provided with Terms of Reference for the Board. To avoid delay, standard Terms of Reference for an IHPA Boards of Inquiry are published below, together with guide notes on the conduct of the Inquiry. The Terms of Reference include a list of specific questions - to which the Chairman of the FSC may add in the light of the circumstances of the incident - and which the Board must answer in its Report. Although the apportioning of blame is specifically outside the remit of the Board, where necessary it may bring to the attention of the FSC any serious matters arising from its investigation.
The proceedings and Report of the Board must be treated confidentially by the Board Members and anyone having access to the proceedings or a copy of the Report. Nevertheless, whilst press liaison and public relations fall outside the specific remit of the Board, the President should give full co-operation to the IHPA Training & Flight Safety Officer in handling any press or public enquiries.
The Board must must have proper regard for the IHPA’s legal liability insurance and must avoid any action or public statement that may prejudice the interests of IHPA insurers in handling any potential claim resulting from the incident.
The Board's Report
The Report is made to the FSC which is responsible for acting upon its findings and recommendations. Each Report follows a standard layout and conforms to the following format:
- The front page containing:
- the title
- name of the injured person
- date and place of the incident
- list of Contents
- a synopsis of the incident which will be used as the official report to satisfy EU Directive 94/56 EC
- and the FSC Action and date taken. The front page will also show the draft stage e.g. 1st Draft, Review Stage or Final Draft.
- Then follows the body of the Report comprising:
- Circumstances of the Incident - the factual recording of events leading up to and, if appropriate, beyond the incident.
- Factual information - in which the verified facts of Personnel, Training, Equipment, Site, Conditions, and Flight (and any other area judged to be valuable) are recorded.
- Analysis - where the evidence is examined and evaluated; and the sequence of events determined.
- Recommendations, if any
- Comments - any additional points which the Board feels should be brought to the attention of the FSC.
- Finally, the Appendices - which comprise the Terms of Reference of the Board; and any other information essential to the understanding of the report e.g. any relevant charts, site photographs, equipment damage reports. N.B. No confidential information such as medical or autopsy reports and witness statements should be included.
Report Stages and Publication
The Board, once all the evidence is received, analysed and assessed, will prepare a Review Stage for circulation to all primary parties for any corrections of factual evidence. In the light of any responses the President may elect to amend the Report accordingly, or include them in an Appendix.
The Final draft stage of the Report is presented to the FSC for ratification. Under normal circumstances the Report is accepted or rejected in toto - if the FSC is dissatisfied with the Report it should return the report to the Board or convene another independent Board. The Chairman reserves the right, however, to call for minor amendments in content or wording without jeopardising the original Board's Findings or Conclusions. The FSC must prepare a formal response to the Report which, along with any other relevant material (such as Safety Notices arising from the Report), is attached to the Report before final distribution as detailed below.
All original and copies of any working documents of the Board are retained at the IHPA Training & Flight Safety Officer together with the original, signed copy of the Board’s Final Report when ratified by the FSC. Any distribution of the Report is at the discretion of the FSC but the authoritative bodies as described, any surviving pilot, CFI, Operator or Coach (as appropriate) and primary parties will receive individual copies automatically.
Reportable Accidents
Under the UK Civil Aviation (Investigation of Air Accidents) Regulations 1989 there is a legal obligation to report serious air accidents. A 'Reportable Accident' is defined as:
"An occurrence taking place between the time any person boards an aircraft with the intention of flight until such time as all persons have disembarked, in which:
- any person suffers death or serious injury while in or upon the aircraft, or by direct contact with the aircraft, or anything attached thereto; or
- the aircraft receives substantial damage."
The following BHPA reporting procedures are interpreted as complying with the requirement.
Whenever anyone is killed at or in the vicinity of, and as a result of a hang gliding and paragliding event the local police must be informed at once. All police forces in the UK have been advised that the BHPA is the national governing body of the sport and they have been encouraged to make contact with the Association.
[The IAA should advise the Gardai that the IHPA is the national governing body of the sport and that they are encouraged to make contact with the Association regarding any accidents or incidents.]
PROCEDURES FOR RESPONDING TO INCIDENT REPORTS
If any responsible officer hears of, witnesses or has an incident reported to them, first obtain as much information on the incident as possible, write it down and remind the person reporting it to complete an Incident Report form and return it to the IHPA Training & Flight Safety Officer (or fill in the on-line report form) within 48 hours. If they do not have an IR form take the name and address and arrange to have one supplied. Depending upon the Category Classification (see the Accident Categories list below) take the appropriate action:
- Fatal or Serious Accidents - Call the IHPA Training & Flight Safety Officer immediately; if unsuccessful try each of the other IHPA Committee members. Pass on the information - they will then take over the responsibility for further action and pursue the matter. Names and telephone numbers are listed on the current edition of the IR form.
- Minor Accidents - Ensure that an IR form has been completed and returned within 10 days.
- Incidents - Treat as a Minor Accident unless there is a good reason for greater urgency.
- Airprox (previously Airmiss) - All Airproxes are to be reported IMMEDIATELY to the IHPA Training & Flight Safety Officer who will advise and assist in submitting a formal report if necessary - an IHPA Incident Report should also be submitted.
- If involving aero models then no AIRPROX is to be filed but an IHPA Incident Report form is to be submitted - this will be copied by the IHPA Training & Flight Safety Officer to the Model Aeronautics Council of Ireland (MACI).
- If involving a glider, microlight aircraft or powered aeroplane it should be reported by telephone immediately after landing to the local Air Traffic Control Centre.
INTERNAL PROCEDURES
Once an initial report has been received by any member of the IHPA Committee the following procedures will be followed:
- The Training & FLight Safety Officer will alert the Chairman of the FSC and:
- Decide who will take what action in the following areas:
- the level of investigation necessary
- liaison with the authorities:- the Coroner, the Gardai - the Air Accident Investigation Unit
- media liaison - the IHPA Training & Flight Safety Officer will prepare a statement for release.
- Agree on the constitution of any investigation team or Board of Inquiry.
- Ensure the involvement of any other relevant persons or bodies (AAIU, coroner, Gardai.)
- Decide who will take what action in the following areas:
- Circulate brief details to the members of the IHPA Committee.
IHPA ACCIDENT CATEGORIES - DEFINITIONS
- Category 'S' - SERIOUS - An accident resulting in death or serious injury to the pilot or other person(s); or in which the glider suffered major failure or was otherwise severely damaged whilst the pilot was attached.
- Category 'M' - MINOR - An accident in which the pilot or other person(s) received only slight injuries and/or the glider received only minor damage.
- Category 'I' - INCIDENT - An occurrence, often of a technical nature, which, in less favourable circumstances might have led to an accident, and about which information should be circulated.
- Category 'A' - AIRPROX - A situation in which, in the opinion of a pilot or controller, the distance between aircraft as well as their relative positions and speed have been such that the safety of the aircraft involved was or may have been compromised.
SUMMARY OF DEFINITIONS
Accident - An occurrence in which a person is fatally or seriously injured as a result of being in, or being struck by, an aircraft - OR - The aircraft sustains damage or structural failure, (except for engine failure or damage which is limited to the engine or propeller).
Fatal Injury - An injury sustained by a person in an accident which results in his/her death within thirty days of that accident.
Serious Injury - Injury sustained by a person in an accident which:
- requires hospitalisation for 48 hours or more.
- results in the fracture of any bone, except simple fractures of fingers, toes or nose.
- involves severe haemorrhage, nerve, muscle or tendon damage.
- involves injury to any internal organ.
- involves second or third degree burns.
Minor Injury - Any injury of less severity than those categorised as Serious.
Incident - An occurrence, other than an accident, associated with the operation of an aircraft, which affects or would affect the safety of operation.
Serious Incident - An incident involving circumstances indicating that an accident nearly occurred.
TERMS OF REFERENCE OF THE BOARD
Requirement: A Board of Inquiry is required to investigate the following fatal accident :
Name:
Club:
Site:
Date:
Members of The Board:
President:
Members:
Purpose: The Board is required to investigate, report and comment on the circumstances of the incident and thereby:-
- Determine the sequence of events.
- Establish, if possible, the cause or most likely cause of the incident.
- Answer the standard and specific questions listed below.
- Where appropriate, make recommendations to the FSC for the benefit of future safety within the sport.
Standard Questions:
- Was any IHPA Mandatory Safety Requirement contravened and did this contribute to the incident?
- Was any operating procedure used different from those contained in the IHPA Operations Manual, or within the Boards own experience; was it reasonable, and did it contribute to the incident?
- Was there any equipment failure or cause contributing to the incident?
- Was there any human-factor psychological cause contributing to the incident?
- Was there any physical or physiological cause contributing to the incident?
- Was there an environmental condition which contributed to the incident or severity of the injury?
- Did any training or lack of training contribute to the incident?
- Was the cause or were the circumstances similar to any previous accident or incident reported to the FSC or known to the Board?
Specific questions:
- Decided by the FSC and the Training & Flight Safety Officer as appropriate to the circumstances of the accident under investigation.
After ratification by the FSC copies of the Board's Report are to be sent, where appropriate, to the Department of Transport Air Accident Investigation Unit and to the Coroner.
PROCEDURES FOR THE DISTRIBUTION OF BOARD OF INQUIRY REPORTS
Preliminary information
When a Board of Inquiry is convened the Chairman of the FSC is to instruct the IHPA Training & Flight Safety Officer to open a file as necessary.
The Chairman is to ensure that the President and Members of the Board receive copies of the Terms of Reference, Witness Statement blanks, and that, where necessary, the a copy of these Accident Reporting & Investigation Procedures are made available.
The President of the Board is to ensure that a copy of all report stages is lodged in the file in the IHPA Training & Flight Safety Officer. He is to ensure that the Final Report is produced in standard format by the office for presentation to the FSC which, upon ratification will direct the IHPA Training & Flight Safety Officer to distribute copies to all notice parties.
THE REPORT STAGES
- Internal Draft Report
This stage is confidential to the President and members of the Board and will be circulated as the President determines. It is to be clearly marked on the title page as "First/Second/Third Draft" as appropriate and the date is to be shown. - Review Stage Report
When the Board is satisfied that it has completed its investigations a further draft is produced (clearly dated and marked on the title page as "Review Stage") and copied (less the evidential documentation) to those 'primary parties' who were directly involved in the accident or incident.
It is to be made clear in the standard covering letter to the primary parties that :
- the purpose of providing this draft is to seek corrections of fact,
- any opinion they may wish to express will not form part of the Final Report but may be attached to it in a manner decided by the President of the Board,
- the Review Stage remains confidential to them and the Board and should not be circulated further.
- Final Report
The report is prepared and presented for ratification by the FSC. It is to be accompanied by a letter stating that any FSC member wishing clarification on the contents is to discuss it with the President of the Board prior to the FSC meeting. Subject to any minor amendment by the Committee it may then be released to the primary parties and those authorities indicated. The date of ratification is to be clearly shown on the title page, and a formal response by the FSC accompanied by any other relevant documents (such as Safety Notices) is to be attached.
In the event that the Coroner requires a preliminary report this may be prepared on the authority and after liaison with the President of the Board of Enquiry.
Training & Endorsements
Hang Gliding
Safe Pro 1 & 2
Syllabus
Safe Pro 2 (Elementary) Training Syllabus
Hill Training Syllabus:
Introduction
It is important that schools should cover all aspects of this syllabus during the course. The CFI may however wish to teach the various aspects in a different order, depending upon the weather and the needs of his students. Never-the-less all aspects of the syllabus must be covered in full as appropriate to the course of instruction.
Stage One Theory
- Introduction to the hang gilder - using a glider, namo its parts and explain its aerodynamic qualities.
- Basic principles of flight - how an aerofoil creates lift; application to a flex-wing; angle of attack and the stall; the importance of airspeed; stability - reflex, dihedral, washout, pendulum stability.
- Weight shift control - pitch, roll and yaw axes.
- Simple vector analysis - wind speed, airspeed, ground speed, drift.
- Basic take-off and landing techniques.
- Rules of the Air, Collision avoidance, Recommendations and Code of Good Practice.
- History of the sport - evolution of glider design (optional).
Stage One Practical
- Simulator work - the harness; harness checks; familiarisation of weight shift control; introduction to the radio; corrections for turbulence; drift.
- Rigging and de-rigging procedure.
- Daily Inspection - visually inspect all parts of the glider for damage or irregularities - finger-tip feel all nuts and bolts not accessible to the eye.
- Hang check - stress the importance - what to look for - how to hang check another pilot if acting as a nose-wire man.
- Pre-flight checks.
- Ground handling - three axes of control; pre-take off control of glider; post-landing control of glider; parking the glider; ground looping - how to avoid.
- Basic take-off technique - in-flight control; correct airspeed in straight flight; landings.
Stage Two Theory
- Site Assessment - turbulence and rotor; assessment of weather conditions, wind gradient and venturi effect; effects on airspeed, ground speed and turns near ground.
- Introduction to flight planning.
Stage Two Practical
- Perfecting take-offs.
- Accurate airspeed control.
- Lateral control - roll correction for drift.
- Landing approaches - assessment of height; controlled stand-up landings.
Stage Three Theory
- Flight planning - co-ordination of heading, height, turn points; landings in predetermined areas.
- Flying for max. glide and minimum sink.
- Co-ordination of pitch and roll in turns.
- Basic Air Law - The need for Air Law - Rules of the Air.
- A brief description of current BHPA Airworthiness Scheme.
Stage Three Practical
- Simulator work.
- Unassisted take-offs.
- Practical co-ordination of pitch and roll.
- Gentle turns.
- Slow flight appreciation.
- Perfecting correct landing approaches.
Stage Four
- The Safe Pro 2 (Elementary) Examination
Tow Training Syllabus:
Stage One
- Brief introduction to hang gliding
- IHPA administration
- Familiarisation with the Towing Concept
- Rigging and derigging
- Daily Inspection - visually inspect all parts of the glider for damage or irregularities - finger-tip feel all nuts and bolts not accessible to the eye.
- Hang check - stress the importance - what to look for - how to hang check another pilot if acting as a nose-wire man.
- Preflight checks.
- Ground handling.
Stage Two
- Towing experience (recommended.)
- Short, low flights below 12 ft (tethers.)
- Aims : to practice the launch sequence and its 'feel' to maintain a steady speed (pitch control) to practice good stand up landing.
- Principles: very gentle climb out, initially to 3 ft to 10 ft above ground short straight and level flight.
Stage Three
- Short low flights below 12 ft (solo)
- Aims: to keep the glider on straight heading to practice pitch/roll co-ordination to build air experience time Principles: very gentle climb out to maximum 12 ft maintain straight and level flight for a short while cut winch and float down.
Stage Four
- Low flights below 30 ft (solo)
- Aims: to learn drift correction to gain height experience. Principles: gentle climb out achieve steady, straight and level flight drift gently one way and correct, then the other and correct fly down to land.
Stage Five
- Medium flights between 30 ft and 60 ft agl.
- Aims: to develop release technique to practice first emergency release procedures to increase height and improve height judgement to experience first free flights.
- Principles: student must first be carefully introduced to the extra height when confident they can release the tow line and fly down on a straight course, compensating for wind and drift.
- The student must be briefed to check the release and, if failed, what "emergency' action to take.
- This stage must not be rushed nor the student progressed too fast.
Stage Six
- Medium flights between 60 ft to 120 ft. agl
- Aims : as in stage 5 - shallow free flight turns of 45° change in direction to both left and right.
- Principles: As stage 5 - with importance placed upon turns being executed with sufficient height and flights ending with stand up landing into wind.
- Students must not be progressed too fast.
NOTE: Instructors should refer to the Safe Pro 1 and 2 Hill Training Syllabus above and ensure that student training covers all the aspects appropriate to this level.
Training Programme
Safe Pro 2 (Elementary) Training Programme
Instructors should ensure that their tuition is informed by the following required texts:
- Hang Gliding Training Manual by Denis Pagen
- Understanding the Sky by Denis Pagen
- BHPA Pilot Handbook by Mark Dale
This is especially the case where little or no detail is offered in these notes. Instructors should ensure that all student pilots own a copy of both of these books before proceeding with any training.
The Hang Gliding Training Programme:
Exercise 1
- Objective: To introduce the student to the sport and the sport to the student in order to stimulate interest.
- To Include: The IHPA, The Risk, Training Issue. Conduct of the course, Clothing.
Exercise 2
- Objective: To familiarise the student with the equipment, its care and function.
- To Include: Rigging and de-rigging procedure. Safe parking of the glider. Daily Inspection and Pre-flight checks. The harness, helmet, footware. Basic principles of flight - how an aerofoil creates lift; application to a hang glider; angle of attack and the stall. Failed landing 'roll out' and 'swinging through'.
Exercise 3
- Objective: To introduce the basic take-off skills.
- To Include: Ground handling; launch crew duties; pre-take off control of glider; the take off run and looking ahead; post-landing control of glider. Simulator: body position and control -pitch, roll and yaw axes.
Exercise 4
- Objective: To introduce the basic elements of straight flight in a safe, controlled manner.
- To Include: Basic take-off technique; in-flight control; correct airspeed in straight flight; body position; roll correction; landings.
Exercise 5
- Objective: To consolidate the student's learning of the basic flight elements, introducing deliberate roll control and greater ground clearance.
- To Include: Lookout; 45° turns; avoiding twisting.
Exercise 6
- Objective: To familiarise the student with the basic elements of site assessment, weather assessment and flight planning.
- To Include: Site Assessment - turbulence and rotor; assessment of weather conditions, wind measurement on site, wind gradient and venturi effect; effects on airspeed, groundspeed and turns near ground. Simple vector analysis - windspeed, airspeed, groundspeed, drift Introduction to flight planning, flight plans for higher flights involving turns, the importance of building in options and staying flexible, landing approaches, the 'S' turn.
Instructor Notes
Hang Gliding Instructors Notes
The purpose of these notes is to augment the information given in the IHPA Student Training Programme, further ensuring that all instructors provide the required common standard of student training.
Heights: Individual clubs may have particular sites where it is not always possible to safely conform to the heights indicated in the Student Training Record particularly in Phase 3 and perhaps in Phase 4. ln such instances the CFI can authorise minor variation (maximum 25% increase.) Where this applies, instructors must ensure that the student has had sufficient additional training at the previous exercises in order to he well prepared and confident to undertake the higher flights.
lnstructors should ensure that students are aware of the dangers and do not turn significantly away from into wind (absolute maximum 45 degrees) when at or below norrnal final approach heights (say 20 m / 75 feet.)
Once it is clearly established that conditions are flyable, instructors may then explain that certain exercises or students may require smoother condrtrons (e.g. take-off) so that waiting for a smooth bit is not viewed as an instructor prepared to recklessly carry on in spite of clearly unsuitable weather. As it is vrtal that students leam to appreciate what is acceptable and what is not in terms of wind and weather, this wind checking should be a natural part of their training.
- Instructor(s) introduction.
- Student introductions.
- Stating that the prime concem is safety.
- Aim of the course: IHPA Safe Pro 1 & 2 (Elementary) rating. What this is / means.
- Asking about health, fitness and medical conditions. (Presumably they have signed a booking forrn saying so.)
- Progress:
- Tiredness or even slight injury increases risk. Stress that if anyone gets tired (or hurt) they must stop, and advise their instructor. No soldiering on.
- Under-confidence: Students must tell their instructor if they are worrred. lnstructors will always take them back a step (or maybe do a tandem) or just wait till another day. Fear causes accidents and we do not want any!
- Over-confidence: Students must tell their instructor if they want to progress. Students should be advised that keenness is good, but that they MUST NOT add elements to any flight. Their instructor will progress them as fast as is safe and no faster!
- Point out that those students who ask questions make the best progress. lf at any stage they do not understand something fully then they must ASK. (How do they know they don’t understand? They may think they understand - instructors must use the question and answer technique.)
- Point out that it is not a race: flexible ending time depending on progress and fitness. There is no point burning out by 3pm! (Most accidents happen in the late afternoon to tired pilots.)
- Weather. Flying will stop if, in the instructor's judgement, conditions become too poor to fly safely Sometimes weather conditions may be such that it is unsafe to fly new students even though more experienced pilots are still in the air. Make it clear that the instructor's decision is final. There should be no arguing or pressure to change the decision.
- Personal Accident Insurance: Training in accordance with a well structured training programme is very safe, but flying can never be 100% risk free. There have been accidents and any sensible pilot should consider personal accident insurance.
- Advise on Clothing / Footwear.
- General rules:
- No booze
- No drugs
- No shouting at airborne pilots.
- No launching without specific permission from an instructor.
- SchooI / site rules: e.g. Dogs / gates / smoking near gliders / litter, etc.
- Outline the programme for the day.
- Toilet facilities (or lack of.)
- Food and drink arrangements (especially on hot days.)
- Transport details.
- Remind students that THEY ARE HERE FOR FUN!
- Check that students have grasped the salient points of your introductory talk - summarise using question / answerback technique.
- Give students a chance to ask questions. Restrict to those dealt with and make it clear that the training scheme will introduce new points appropriately - otherwise there is overkill and no one remembers anything!
These should cover:
- Likely conditions.
- Tasks / aims for the day. (Consult individual Student Training Records.)
- Any theory required?
- Any particular equipment considerations?
Suggestions for explaining this requirement.
- The IAA allows us to self-govern because the association has proved that it can do this effectively.
- The association negotiates 3rd party insurance cover for its members. This means that if you land on or damage a farmer's property then you will be insured against damage caused.
- lt is a condition of our access to most sites that we have this kind of insurance against damage AND that pilots have signed the IHPA waiver of indemnity in favour of the landowner.
- The IHPA produces the handbooks, logbooks and packs that you receive, and publishes Free Flight magazine which contains safety notices, news on sites and competitions etc.
- The IHPA provides a recognised and standardised training scheme both for pilots and instructors that has been proven and retined over many years.
- The IHPA registers and inspects schools (like this) for your safety, and checks that all instructors are competent and qualified.
- Explain the need for dual record signing (Student's & Instructor's logs) to remind both the student and instructor of their progress in training and also to protect both the student and instructor.
- The Student Training Record & Logbook should be kept by the student, while the Instructors Record Sheet remains in the school as a record of progress. lf the student moves to another school the CFI will need to make contact with the previous school to confirm where a student is up to.
- Explain about need for signatures as each exercise is completed.
- When signing off the previous exercise, get your studcnts to read up on the next exercises as part of the preparation . lf you simply push the book under their nose for signing, then they will say so in court when you are trying to use the book to prove that you were a good instructor, and it will have little or no value.
- Make sure they read the opening information box - even read it to them to ensure this has been made clear!
- Point out the certification stickers / panels and explaining them, as well as mentioning the weight range of the wing.
- Ensure that everyone understands the Daily Inspection checks: Students must be taught the logical approach and, of course, what to check.
- Any item that is fitted as a safety device (e.g. emergency parachute) must receive special attention.
- Include the basics of how an aerofoil creates lift. lt may be useful to get out other gliders at this point for them to rig and check themselves.
8. Briefing:
11. Getting Airborne: Introducing a windsock as a target can help prevent bad habits forming such as looking down (or up) and help ensure that the students are focussed on their target area. The purpose of the low hops is to familiarise the student with launch and landings. The range of control movements should be openly discussed with them.
18, 19 and 20. Theory: This may be done at any point during a course, though a large dose of theory before any flying has been achieved may be discouraging for some students. Sessions should be conducted when the students are warm and dry and not too tired. Providing pencils and paper for notes is also a good way to help knowledge be absorbed. Question and answer, relevant anecdotes about personal experiences (not long war stories!) and visual aids all help to make these subjects easier to understand and digest. Avoid unstructured rambles. All schools should have set notes for you to use - stick to them, and that way nothing will be left out.
Phase 6: Consolidation and Conversions
26. Higher Flights / Circuits:
34. Flying With Others: The student should have an idea of his "personal space" that he will not allow anyone to enter. Helping him visualise this comfort zone, and be aware of all the other craft in the air is an important survival tool. Moving the head and scanning is something that many pilots are very poor at in the early stages. Most experienced safe pilots never have to use the anti-collision rules, as they never allow anyone to get close enough. That is the aim of this exercise.
- The limitations of the Safe Pro 2 (Elementary) pilot rating should be mentioned: it is a Novice rating that entitles them to wobble around club sites, whilst they gain experience and progress to the fully qualified Pilot rating. lt does not entitle them to fly XC.
- How to gain the Safe Pro 4 (Intermediate) pilot rating should be discussed, and the fact that they should aim to achieve this within their first or second season. Working through the tasks will give their flying direction, and will ensure that their skills and abilities increase. They should be strongly encouraged to hook up with Club Coaches, and be given instructions on how to contact and join the IHPA and local clubs.
- Do not forget to de-brief the exams. (All incorrect answers should be discussed.)
- The Student Training Record booklet must be kept in good condition and indexed for easy retrieval for at least 6 years after the student has left the school - even if the school closes down! Thereafter, they must be forwarded on to the IHPA Training & Flight Safety Officer for archival purposes.
Pilot Requirements
Safe Pro 2 (Elementary) Pilot Rating Tasks and Experience Requirements
Safe Pro 2 (Elementary) Pilot Tasks
- Rig and de-rig glider correctly and with care.
- Safely exercise the duties of the "Noseman".
- Thoroughly understand the difference between, and to use the:
- Daily Inspection
- Pre-flight Check
- 5 stand up landings within a designated area in light wind conditions.
- Consistently demonstrate safe airspeed control.
- Demonstrate the ability to execute shallow left and right turns.
- Demonstrate the ability to evaluate sites and condition and to give simple flight plans.
- Pass the IHPA written Safe Pro 2 (Elementary) examination paper.
- Keep a flight log book - record all training exercises and flights.
- Pass a final assessment based on attitude and airmanship.
Safe Pro 2 (Elementary) Pilot Experience Requirements
Students wishing to apply for a Para Pro 1 rating must, under the direct supervision of an Instructor:
- Complete a minimum of six days instruction.
- Demonstrate their proficiency in ground handling.
- Complete a minimum of: 15 low level flights (hill); OR 2 man tows of below 12 feet ground clearance (tow)
- Complete a minimum of: 10 medium level solo flights to at least 40 feet AGL (hill), OR 10 winch tows to at least 30 feet AGL (tow)
- Complete a minimum of 10 winch tows to between 30 and 120 feet AGL (tow)
Exam Study Guide
Safe Pro 2 (Elementary) Exam Study Guide
Safe Pro 2 / Para Pro 2 (Elementary) Exam
- Be able to define the terms Lift, Drag and Angle of Attack.
- Understand the relationship between pressure and airflow above and beneath the wing or canopy.
- Understand what causes a wing to stall.
- Understand what happens to lift and drag when control inputs are applied.
- Understand wind gradients and its effect.
- Understand how ground obstacles can affect local airflow.
- Understand what to look for when assessing take-off and landing areas.
- Understand the basic principles of wind and airflow over hills.
- Understand how turbulence is produced, and its hazards to the pilot.
- Understand the relationship between airspeed, wind-speed and ground-speed.
- Know your responsibilities to other air users.
Operating Limitations
Safe Pro 2 (Elementary) Operating Limitations
Safe Pro 1 - Student Pilot - Airmanship Requirements and Operating Limitations:
- All flights must be conducted with the instructor in direct contact with the student, by radio, at all times, so that instructions may be delivered to the student in a clear and calm manner. Reliance on pre-flight instructions or shouted instructions, once airborne, is not acceptable. The student’s radio should be mounted on or near the shoulder of the harness, with the volume adjusted to allow for easy hearing.
- The instructor must be convinced that the student is able to take care of their own safety while ground handling or conducting low level flights, and that they have mastered the knowledge and skill requirements specified for Safe Pro 1 before allowing them to continue to Safe Pro 2.
- Students must conduct all their training activities under the direct supervision of a Certified Flying Instructor. They are not permitted to attempt or practice any training activities outside of the training school environment.
- Students must attach a broad red ribbon to their harness, such that it is visible when ground handling and in flight, to alert other pilots to the fact that they have limited control of their wing and to give the student plenty of space.
- Students training towards Safe Pro 1 must not attempt to fly at altitude, as per Safe Pro 2. They are restricted to ground handling and low flights, generally not exceeding 50 metres above the ground.
- Students must not attempt to launch if other gliders are in the air anywhere near their area of operations. Instructors will limit airborne training activities such that there is only ever one glider in the air at a time.
- Students are not permitted to attempt or engage in ridge soaring, thermal soaring or cross country (XC) flying.
- Students training towards Safe Pro 1 are restricted from training in all but the very lightest of winds, not exceeding 10mph (16Km/h) straight up the hill. Conditions must be smooth and stable at all times with no gusting or thermal influence.
- Students are restricted to training on either flat ground or a beginner’s hill, which, ideally, is a smooth gentle slope with very low vegetation, grass, peat-moss, heather or sand, with a profile that allows for low flights with the type of glider in use. The take-off and landing areas and the area in between should be free of obstacles and other hazards, with a good clear margin on either side. It should be possible to do the whole flight in a straight line without the need to manoeuvre.
- All flights must be written up in the Student’s Training Record and Log Book.
- Students are not permitted to fly in competitions.
Safe Pro 2 - Student Pilot - Airmanship Requirements and Operating Limitations:
- The instructor must be convinced that the student is able to take care of their own and other’s safety while ground handling or conducting altitude flights, and that they have mastered the knowledge and skill requirements specified for Safe Pro 2, before allowing them to sit the written exam.
- Students must conduct all their training activities under the direct supervision of a Certified Flying Instructor. They are not permitted to attempt or practice any training activities outside of the training school environment.
- All flights must be conducted with the instructor in direct contact with the student, by radio, at all times, so that instructions may be delivered to the student in a clear and calm manner. Reliance on pre-flight instructions or shouted instructions, once airborne, is not acceptable. The student’s radio should be mounted on or near the shoulder of the harness, with the volume adjusted to allow for easy hearing.
- Students must always fly with a broad red ribbon to their harness, such that it is visible when ground handling and in flight, to alert other pilots to the fact that they have limited control of their wing and to give the student plenty of space. The red ribbon may be removed once the student has been awarded a Safe Pro 2 rating and has accumulated an additional ten hours in the air. Student and intermediate pilots are encouraged to continue flying with a red ribbon until they feel confident in the air with other pilots. The red ribbon is for there for their own and other’s safety.
- Students training towards Safe Pro 2 must not attempt any soaring flights, as per Safe Pro 3. They are restricted to ground handling and flights away from the hill, but high enough height and clearance to be able to manoeuvre relatively freely.
- Students must not attempt to launch if there other gliders are in the air anywhere near their area of operations. Instructors will initially limit airborne training activities such that there is only ever one glider in the air at a time.
- Students are not permitted to attempt or engage in ridge soaring, thermal soaring or cross country (XC) flying.
- Students training towards Safe Pro 2 are restricted to training in winds not exceeding 10mph (15Km/h) straight up the hill. Conditions must be smooth and stable at all times with no gusting or thermal influence.
- Students are restricted to training on either flat ground or an intermediate hill, where take-off, landing and the flight in between is considered by the instructor to be easy and with good margins of clearance from any obstacles or other safety hazards. The landing area should be large and easy to reach by normal manoeuvring with a good margin of height, and clearly visible from the take-off area.
- All flights must be written up in the Student’s Training Record and Log Book.
- Students are not permitted to fly in competitions.
- A student’s signed application for a Safe Pro 2 rating must be accompanied by, and will not be issued in the absence of:
- A completed and signed IHPA Student’s Membership Application form (if the applicant is not already a member.)
- Evidence of an existing insurance policy.
- A signed and witnessed IHPA Indemnity Waiver form.
Safe Pro 3
Syllabus
Safe Pro 3 (Novice) Training Syllabus
Hill Training Syllabus:
Introduction
The prospective Safe Pro 3 (Novice) Pilot needs instruction in practical and theoretical skills. This will inevitably involve instructors in a considerable amount of work preparing lectures and planning teaching strategies. The aim is to turn out students equipped to progress safely within the sport, which, hopefully, all instructors will see as a worthwhile goal and so will view the need to perfect their instructional abilities as a stimulating challenge.
Theoretical aspects
The theoretical knowledge required for Safe Pro 3 (Novice) can be conveniently divided into two. Firstly there is the immediately essential, practically orientated theory which students will need lo fully understand before they can begin to learn some of the flying skills required at this level.
Secondly, there is the 'wider awareness' necessary as a firm foundation for a long, safe career as a responsible member of the hang gliding community and the aviation world in general. This second level will be called 'Examination Subjects" as the students level of understanding will be directly tested by the Safe Pro 3 (Novice) exam.
Practically oriented theory
These topics will need to be explored, either within set classroom sessions or as the topic arises 'out on the hill':
Flight Planning:
- revision
- flight plans for higher flights involving turns
- the importance of building in options and staying flexible
'Square' Circuits:
- area off to one side for losing height, the base leg, final turn and approach
- introduce idea of downwind leg for future use (NOTE: Safe Pro 3 (Novice) students are not expected to fly downwind legs)
Stall Recognition and Recovery:
- the five symptoms of a stall
- safe practice requirements
- stall practice and recovery actions
Advanced Turning:
- coordination of pitch and roll in developed turns
- rolling into turns, steady turning, rolling out
- importance of good lookout before, during and after turning
Hill Soaring:
- site assessment, areas of best lift, lift band extent
- the soaring beat, all turns away from the hill
- airmanship, flying with others
Thermal and Wave Soaring:
- brief introduction to flying techniques involved
- dangers (eg turbulence) associated with each form
- practical recognition (from the ground) of their presence.
Top Landings:
- cross-wind tracking method
Examination Subjects
Each topic will require at least one set lecture period of 45 minutes. Such lectures should be carried out under classroom conditions.
- Air law - The appropriate contents of the current edition of the BHPA Pilot Handbook should be covered in detail.
- Meteorology - Students should be introduced to the basic cloud types and their associated weather, the synoptic weather chart - its symbols and interpretation, and the basic meteorology of wave and thermal lift. Dynamic lift (ie hill lift) should be covered in detail. Obtaining a forecast and measuring the wind 'on site' should also be covered.
- Airmanship and Navigation - The IHPA Code of Good Practice, Flying Recommendations and Flying Rules should be examined, and the students introduced to the way clubs operate. The students must also be introduced to Aeronautical Information Charts (Air Maps). (Basic symbol interpretation should be covered under Air law.)
- Principles of Flight - Lift and the factors involved, the various types of drag, their causes and their relationship to airspeed, max glide and min sink, centre of pressure, centre of gravity, revision and fuller understanding of stability and the various features of glider design which play a role in ensuring adequate stability, forces acting on a glider in steady flight.
Practical:
Stage One
- first high flights
- 90° turns
Stage Two
- glider conversion
- prone conversion
- mild stalls
- light wind take offs
- medium wind take offs
IT IS IMPORTANT THAT A HIGH LEVEL OF CONSOLIDATION FLYING IS UNDERTAKEN AT THIS STAGE, PARTICULARLY IN VIEW OF THE FACT THAT TWO NEW ITEMS OF EQUIPMENT ARE BEING INTRODUCED. THE STUDENT SHOULD BE GIVEN AS MANY FLIGHTS AS POSSIBLE USING ONE OF THE NEW ITEMS BEFORE THE OTHER IS INTRODUCED, AND THE SUBSEQUENT CONVERSION SHOULD ONLY TAKE PLACE WHEN THE STUDENT IS CLEARLY COMFORTABLE WITH ALL OTHER FACTORS. FIVE FLIGHTS WILL BE REGARDED AS THE ABSOLUTE MINIMUM TIME BETWEEN CONVERSIONS.
Stage Three
- higher flights
- landings within a designated area
- 180° turns
Stage Four
- Hill Soaring
Tow Training Syllabus - To be issued later
NOTE: Instructors should refer to the Safe Pro 3 (Novice) Pilot Hill Training Syllabus above and ensure that student training covers all the aspects appropriate to this level.
Training Programme
Safe Pro 3 (Novice) Training Programme
Exercise 7
- Objective: For the student to become proficient at turns of 90°
- To Include: Instinctive use of lookout before, during and after turning, co-ordinated control of pitch and roll in developed turns, rolling into turns, steady turning, rolling out.
Exercise 8
- Objective : For the student to gain confidence through exploring the glider's speed range both at higher and lower speeds than trim.
- To Include: Flying for max. glide and min. sink; slow flight appreciation; trim speed.
Exercise 9
- Objective: To develop the student's ability to recognise an impending stall instinctively, and to take the appropriate actions.
- To Include: The five symptoms of a stall, safe practice requirements, stall practice and recovery actions
Exercise 10
- Objective: To develop the student's understanding, proficiency and confidence at making approaches and landings.
- To Include: Base leg and finals; knowledge of constant aspect approach and 'S' turn, nil wind landing, fresh wind landing, landing in a designated area.
Exercise 11
- Objective: For the student to become proficient and confident at nil wind and fresh wind take offs.
- To Include: Nil wind take off, fresh wind (assisted) take off.
Exercise 12
- Objective: For the student to become familiar with advanced equipment and to understand its uses.
- To Include: Parachutes, pod harnesses, helmets, instruments, karabiners, glider maintenance, certification, evolution of glider design.
Exercise 13
- Objective: For the student to become proficient and confident at flying a more advanced (4th or 5th generation) glider.
- To Include: Briefing on handling differences, rigging differences. Glider conversion to at least a 4th generation type (30 - 35% double surface and preformed battens).
Exercise 14
- Objective: For the student to become proficient and confident at flying in the fully prone position.
- To Include: Simulator practice, solo flights demonstrating full conversion to the prone position.
Exercise 15
- Objective: For the student to become proficient and confident at hill soaring.
- To Include: Site assessment, areas of best lift, lift band extent, the soaring beat, all turns away from the hill, airmanship and etiquette, Rules of the Air; flying with others
Exercise 16
- Objective: For the student to become proficient and confident at flying with others.
- To Include: Briefing, characteristics of other aircraft (PGs, models, sailplanes), checking rules of air knowledge, dual flights (if available), manoeuvre glider safely, considerately and in accordance with air traffic rules, lookout.
Exercise 17
- Objective: For the student to become proficient and confident at top landing.
- To Include: Crosswind tracking method, dangers, overshoot, undershoot.
Exercise 18
- Objective: For the student to become proficient at 360° turns and gain greater confidence at manceuvering the glider.
- To Include: Ability to fly coordinated 360° turns in both directions, steep and gentle turns.
Exercise 19
- Objective: To raise the student's understanding of the ground school subjects.
- To Include: Meteorology, Principles of Flight, Airlaw and Navigation, Instrumentation, First Aid.
Exercise 20
- Objective: To provide a basic understanding of Thermal and Wave Soaring phenomena which will allow the student to explore them safely and efficiently.
- To Include: Brief introduction to flying techniques involved, dangers (eg turbulence) associated with each form, practical recognition (from the ground and in the air) of their presence.
Instructor Notes
Hang Gliding Instructors Notes
The purpose of these notes is to augment the information given in the IHPA Student Training Programme, further ensuring that all instructors provide the required common standard of student training.
Heights: Individual clubs may have particular sites where it is not always possible to safely conform to the heights indicated in the Student Training Record particularly in Phase 3 and perhaps in Phase 4. ln such instances the CFI can authorise minor variation (maximum 25% increase.) Where this applies, instructors must ensure that the student has had sufficient additional training at the previous exercises in order to he well prepared and confident to undertake the higher flights.
lnstructors should ensure that students are aware of the dangers and do not turn significantly away from into wind (absolute maximum 45 degrees) when at or below norrnal final approach heights (say 20 m / 75 feet.)
Once it is clearly established that conditions are flyable, instructors may then explain that certain exercises or students may require smoother condrtrons (e.g. take-off) so that waiting for a smooth bit is not viewed as an instructor prepared to recklessly carry on in spite of clearly unsuitable weather. As it is vrtal that students leam to appreciate what is acceptable and what is not in terms of wind and weather, this wind checking should be a natural part of their training.
- Instructor(s) introduction.
- Student introductions.
- Stating that the prime concem is safety.
- Aim of the course: IHPA Safe Pro 1 & 2 (Elementary) rating. What this is / means.
- Asking about health, fitness and medical conditions. (Presumably they have signed a booking forrn saying so.)
- Progress:
- Tiredness or even slight injury increases risk. Stress that if anyone gets tired (or hurt) they must stop, and advise their instructor. No soldiering on.
- Under-confidence: Students must tell their instructor if they are worrred. lnstructors will always take them back a step (or maybe do a tandem) or just wait till another day. Fear causes accidents and we do not want any!
- Over-confidence: Students must tell their instructor if they want to progress. Students should be advised that keenness is good, but that they MUST NOT add elements to any flight. Their instructor will progress them as fast as is safe and no faster!
- Point out that those students who ask questions make the best progress. lf at any stage they do not understand something fully then they must ASK. (How do they know they don’t understand? They may think they understand - instructors must use the question and answer technique.)
- Point out that it is not a race: flexible ending time depending on progress and fitness. There is no point burning out by 3pm! (Most accidents happen in the late afternoon to tired pilots.)
- Weather. Flying will stop if, in the instructor's judgement, conditions become too poor to fly safely Sometimes weather conditions may be such that it is unsafe to fly new students even though more experienced pilots are still in the air. Make it clear that the instructor's decision is final. There should be no arguing or pressure to change the decision.
- Personal Accident Insurance: Training in accordance with a well structured training programme is very safe, but flying can never be 100% risk free. There have been accidents and any sensible pilot should consider personal accident insurance.
- Advise on Clothing / Footwear.
- General rules:
- No booze
- No drugs
- No shouting at airborne pilots.
- No launching without specific permission from an instructor.
- SchooI / site rules: e.g. Dogs / gates / smoking near gliders / litter, etc.
- Outline the programme for the day.
- Toilet facilities (or lack of.)
- Food and drink arrangements (especially on hot days.)
- Transport details.
- Remind students that THEY ARE HERE FOR FUN!
- Check that students have grasped the salient points of your introductory talk - summarise using question / answerback technique.
- Give students a chance to ask questions. Restrict to those dealt with and make it clear that the training scheme will introduce new points appropriately - otherwise there is overkill and no one remembers anything!
These should cover:
- Likely conditions.
- Tasks / aims for the day. (Consult individual Student Training Records.)
- Any theory required?
- Any particular equipment considerations?
Suggestions for explaining this requirement.
- The IAA allows us to self-govern because the association has proved that it can do this effectively.
- The association negotiates 3rd party insurance cover for its members. This means that if you land on or damage a farmer's property then you will be insured against damage caused.
- lt is a condition of our access to most sites that we have this kind of insurance against damage AND that pilots have signed the IHPA waiver of indemnity in favour of the landowner.
- The IHPA produces the handbooks, logbooks and packs that you receive, and publishes Free Flight magazine which contains safety notices, news on sites and competitions etc.
- The IHPA provides a recognised and standardised training scheme both for pilots and instructors that has been proven and retined over many years.
- The IHPA registers and inspects schools (like this) for your safety, and checks that all instructors are competent and qualified.
- Explain the need for dual record signing (Student's & Instructor's logs) to remind both the student and instructor of their progress in training and also to protect both the student and instructor.
- The Student Training Record & Logbook should be kept by the student, while the Instructors Record Sheet remains in the school as a record of progress. lf the student moves to another school the CFI will need to make contact with the previous school to confirm where a student is up to.
- Explain about need for signatures as each exercise is completed.
- When signing off the previous exercise, get your studcnts to read up on the next exercises as part of the preparation . lf you simply push the book under their nose for signing, then they will say so in court when you are trying to use the book to prove that you were a good instructor, and it will have little or no value.
- Make sure they read the opening information box - even read it to them to ensure this has been made clear!
- Point out the certification stickers / panels and explaining them, as well as mentioning the weight range of the wing.
- Ensure that everyone understands the Daily Inspection checks: Students must be taught the logical approach and, of course, what to check.
- Any item that is fitted as a safety device (e.g. emergency parachute) must receive special attention.
- Include the basics of how an aerofoil creates lift. lt may be useful to get out other gliders at this point for them to rig and check themselves.
8. Briefing:
11. Getting Airborne: Introducing a windsock as a target can help prevent bad habits forming such as looking down (or up) and help ensure that the students are focussed on their target area. The purpose of the low hops is to familiarise the student with launch and landings. The range of control movements should be openly discussed with them.
18, 19 and 20. Theory: This may be done at any point during a course, though a large dose of theory before any flying has been achieved may be discouraging for some students. Sessions should be conducted when the students are warm and dry and not too tired. Providing pencils and paper for notes is also a good way to help knowledge be absorbed. Question and answer, relevant anecdotes about personal experiences (not long war stories!) and visual aids all help to make these subjects easier to understand and digest. Avoid unstructured rambles. All schools should have set notes for you to use - stick to them, and that way nothing will be left out.
Phase 6: Consolidation and Conversions
26. Higher Flights / Circuits:
34. Flying With Others: The student should have an idea of his "personal space" that he will not allow anyone to enter. Helping him visualise this comfort zone, and be aware of all the other craft in the air is an important survival tool. Moving the head and scanning is something that many pilots are very poor at in the early stages. Most experienced safe pilots never have to use the anti-collision rules, as they never allow anyone to get close enough. That is the aim of this exercise.
- The limitations of the Safe Pro 2 (Elementary) pilot rating should be mentioned: it is a Novice rating that entitles them to wobble around club sites, whilst they gain experience and progress to the fully qualified Pilot rating. lt does not entitle them to fly XC.
- How to gain the Safe Pro 4 (Intermediate) pilot rating should be discussed, and the fact that they should aim to achieve this within their first or second season. Working through the tasks will give their flying direction, and will ensure that their skills and abilities increase. They should be strongly encouraged to hook up with Club Coaches, and be given instructions on how to contact and join the IHPA and local clubs.
- Do not forget to de-brief the exams. (All incorrect answers should be discussed.)
- The Student Training Record booklet must be kept in good condition and indexed for easy retrieval for at least 6 years after the student has left the school - even if the school closes down! Thereafter, they must be forwarded on to the IHPA Training & Flight Safety Officer for archival purposes.
Pilot Requirements
Safe Pro 3 (Novice) Pilot Rating Tasks and Experience Requirements
Safe Pro 3 (Novice) Pilot Tasks
Tasks 1 to 7 to be completed in any suitable order at the discretion of the Instructor.
1. For hill students:
- Complete 3 consecutive top-to-bottom flights each with at least 100 feet ground
clearance, with unassisted take off runs, smooth 90° left and right turns and finish
with stand-up landings. - Successfully convert to at least a 4th generation type of glider (30- 35% double surface and preformed battens).
1. For tow students :
- Complete 5 consecutive solo flights, each with at least 200 feet ground clearance, with unassisted take-offs, smooth 90° left and right turns and stand up landings.
2. Complete a solo flight demonstrating full conversion to the prone position.
3. Complete 2 mild stall and recoveries from straight and level flight and be able to demonstrate slow flight appreciation. To be executed on at least 4th generation glider.
4. Experience take-offs in light winds not exceeding 5 mph.
5. Experience take-offs in medium winds of between 10 to 15mph.
6. For hill students:
- Complete 3 consecutive top to bottom flights each with at least 200 feet ground clearance, with unassisted take off runs, smooth 90° left and right turns and finish with stand-up landings. These flights must be on at least a 4th generation glider.
6. For tow students :
- Complete 15 towed flights with stand up landings back at the take-off landing zone. These flights to be completed on at least a 4th generation glider.
- Complete a controlled landing within 25 metres of a designated spot.
7. Pass the IHPA Safe Pro 3 (Novice) Pilot written examination paper.
8. Pass an assessment by a Senior Instructor, based on attitude and airmanship.
A tow student may now be awarded the Safe Pro 3 (Novice) Pilot (Tow) rating.
A hill student must complete the following additional tasks, either within the School or with a registered Coaching Club which is prepared to accept the student.
Tasks 9 and 10 may be completed in any order at the discretion of the Instructor/Chief Coach.
9. A distance of not less than 2 km must be flown over a course of not less than 0.5 km between 2 turn points. A controlled landing must be made within 25 metres of a designated spot.
10. Complete 2 separate soaring flights each of at least 5 minutes duration above take off height. To be executed on at least a 4th generation glider.
11. Pass a final assessment based on attitude and airmanship.
Tasks 9, 10 and 11 may be signed off by School Instructors or Chief Coaches only when the other tasks have been signed off by the School.
Exam Study Guide
Safe Pro 3 (Novice) Exam Study Guide
- Know the Rules of the Air - failure on any of these questions results in automatic failure of the whole exam.
- Know the Low-flying rules.
- Understand the way airspace in Ireland is divided.
- Understand the process for notifying ATC for flying sites inside controlled airspace.
- Know the legal definitions of sunset, night and sunrise, and the relevant restrictions relating to them.
- Be able to link basic cloud types and their associated weather.
- Be able to recognise the key symbols on a synoptic weather chart and understand their meaning.
- Understand the basics of hill, thermal and wave lift.
- Know how to obtain a forecast and how to measure the wind on site.
- Be able to identify deteriorating weather conditions.
- Understand the need to keep a flight log book.
- Understand the purpose of a red ribbon on a HG or PG.
- Be familiar with the demands of flying in company with your fellow pilots, both on the ridge and thermalling.
- Be familiar with aeronautical charts (air maps.)
- Understand how a hang glider or paraglider is able to gain height.
- Be able to name the symptoms of an impending stall.
- PGs - Differentiate between symmetric and asymmetric canopy tucks - how they are caused and how to use the controls to effect a recovery.
- PGs - State what action to take in the event of a towline-release failure.
- PGs - Know how to deal with hazardous (tree / water / obstacle) landings.
- Be able to define the terms - Stall, Lift, Centre of Pressure, Drag(in its various forms) Aspect Ratio, etc.
- Understand the relationship between airspeed, lift, drag; know how lift is created and proportioned between the top and bottom wing surfaces, and describe the forces acting on a glider in steady flight.
- Be able to work examples of air-speed, wind-speed, ground-speed and height loss/gain (given minimum-sink rates and airmass ascent rates.)
- Understand terms such as Angle of Attack, L/D Ratio, Glide Ratio and Wing Loading, and be able to assess the effect that pilot weight changes have on paraglider performance.
- Understand the purpose and effect of trim tabs and the factors affecting canopy stability.
-
Be able to define the terms - Stall, Lift, Centre of Pressure, Drag(in its various forms) Aspect Ratio, etc.
-
Understand the relationship between airspeed, lift, drag; know how lift is created and proportioned between the top and bottom wing surfaces, and describe the forces acting on a glider in steady flight.
-
Be able to work examples of air-speed, wind-speed, ground-speed and height loss/gain (given minimum-sink rates and airmass ascent rates.)
-
Understand terms such as Centre of Pressure, Centre of Gravity, Washout, Angle of Attack, L/D Ratio, Glide Ratio, Wing Loading, Maximum Glide and Minimum Sink.
Operating Limitations
Safe Pro 3 (Novice) Operating Limitations
Safe Pro 3 (Novice) Pilot - Airmanship Requirements and Operating Limitations:
- It is incumbent upon the novice pilot to seek advice from the supervising Instructor or Coach about the site, the prevailing conditions and their proposed activities before the start of the day’s training.
- The instructor must be convinced that the novice pilot is able to take care of their own and other’s safety while ground handling, conducting altitude or basic soaring flights, and that they have mastered the knowledge and skill requirements specified for Safe Pro 3 (Novice) before allowing them to sit the written exam.
- Novice pilots must conduct all their training activities under the indirect supervision of a Certified Flying Instructor or their nominated Coach. They are not permitted to attempt or practice any training activities outside of the training school environment.
- Two-way radio communication with the supervising Instructor or Coach is strongly recommended so that the novice pilot may receive instructions or warnings of changing weather conditions. A helmet mounted speaker and microphone with a hand operated Push-To-Talk (PTT) switch is recommended. Pilots should restrict the operation of their 2m-band radios to the frequencies between 143.750MHz and 143.950MHz.
- Novice pilots must always fly with a broad red ribbon to their harness, such that it is visible when ground handling and in flight, to alert other pilots to the fact that they have limited control of their wing and to give the novice pilot plenty of space. The red ribbon may be removed once the novice pilot has been awarded a Safe Pro 2 rating and has accumulated an additional ten hours in the air. Novice and Intermediate pilots are encouraged to continue flying with a red ribbon until they feel confident in the air with other pilots. The red ribbon is for there for their own and other’s safety.
- Novice pilots training towards Safe Pro 3 must fly with, and know how to use, an appropriately sized reserve parachute on all flights.
- Novice pilots training towards Safe Pro 3 must not attempt any advanced soaring flights, as per Safe Pro 4. They are restricted to flying in smooth ridge lift in stable conditions with little or no thermal activity so that they can practice and enjoy soaring flight within safe limitations.
- Novice pilots should be careful not to turn after launching before they are established in a comfortable flying position in their harness, with good speed and direction control.
- Novice pilots should not attempt to return to the lift band if they have flown through or out of it.
- Novice pilots should not attempt to ridge soar in marginal lift, strong or gusting winds, or in turbulence.
- Novice pilots should not attempt any cliff launches or cross-wind launches, or attempt to top land or land onto the hillside.
- Novice pilots must not attempt to launch or fly if the air space is at all crowded by the activities of other gliders in the air.
- Novice pilots are not permitted to attempt or engage in thermal soaring or cross country (XC) flying.
- Novice pilots are not permitted to fly in competitions.
- Novice pilots training towards Safe Pro 3 are restricted to training in winds not exceeding 15mph (15Km/h) blowing within 15° of straight up the hill. Conditions must be smooth and stable at all times with no gusting or thermal influence.
- Novice pilots training towards or applying for a Safe Pro 3 rating must be current members of the IHPA and have a current insurance policy.
- All flights must be written up in the Student’s Training Record and Log Book.
Safe Pro 4
Tasks & Experience Requirements
Safe Pro 4 (Intermediate) Pilot Rating Tasks and Experience Requirements
The Safe Pro 4 (Intermediate) Pilot Tasks:
The hill pilot must complete:
- 3 take offs and 3 landings within 10m of a defined spot. All accomplished in winds of less than 5 mph.
- 2 top landings on each of three different sites.
- Flights from 5 different sites, 3 of which should be inland sites.
- A minimum of 30 flights logged since gaining the Safe Pro 3 (Novice) Pilot rating.
- A minimum of 25 hours logged air time.
- 2 flights out of ridge lift during which the ground clearance exceeds 1000ft for over 10 minutes duration.
The tow pilot must complete:
- 80 tow flights of over 500 feet since attaining the Safe Pro 3 (Novice) Pilot rating.
- 10 flights in each of 4 different wind directions.
- 3 flights from each of 3 different sites.
- 10 flights in thermic conditions.
- 10 flights in winds of at least 15 mph measured at ground level.
- 3 stand-up landings within 10m of a designated spot after a free flight of at least 1 minute duration.
- A distance of at least 2km over a course of not less than 0.5km between two turn points.
- A controlled landing must be made within 25m of a designated spot.
All pilots must:
- Complete 5 flights of not less than 5 minutes duration, each followed by controlled landings within 25m of a designated spot.
- Fly co-ordinated 360° turns in both directions.
- Manoeuvre the glider safely, considerately, and in accordance with the Rules of the Air.
- Achieve a height gain of at least 2,000 feet (barographs are not necessary).
- Pass the Safe Pro 4 (Intermediate) Pilot written examination paper.
- Pass a final assessment on airmanship.
Exam Study Guide
Flight Theory & Instruments
Intermediate Pilot Exam Notes - Flight Theory and Instruments
CONTENTS:
- HOW LIFT IS PRODUCED
- Bernoulli and Venturi
- The Airfoil
- Angle of Attack
- Vortices
- AERONAUTICAL TERMS
- AERODYNAMICS OF A STALL
- STABILITY
- HANG GLIDER
- Pitch Stability
- Roll stability
- Yaw stability
- PARAGLIDER
- Pendulum stability
- Washout
- HANG GLIDER
- GLIDE ANGLE
- BALLAST
- FORCES ON A GLIDER
- DRAG
- Induced
- Parasitic
- Form drag
- Profile drag
- Interference drag
- TOTAL DRAG
- POLAR CURVES
- INSTRUMENTS
- ALTIMETERS
- Aneriod
- Electronic
- VARIOMETERS
- Electronic
- Flask
- Total energy
- Airmass (Netto)
- Speed to fly
- MacReady ring
- ALTIMETERS
- REFERENCES AND ACKNOWLEDGEMENTS
HOW LIFT IS PRODUCED
Bernoulli and Venturi
Lift is the major force that keeps us up in the air. It is produced by the wing moving through the air. In simple terms, Bernoulli’s law explains the lift, or upward force that permits airfoils to generate lift. The upper surface of a wing is more curved than the lower; air, travelling across the wing is made to travel faster and thus its pressure on the upper surface is reduced. This effect is seen in such areas as car carburettors or atomisers and makes use of a thing called the venturi effect.

The structure of the wing best demonstrates the principle of airfoil lift. In the 19th century a scientist named Bernoulli discovered that the internal pressure of a fluid (liquid or gas) reduces the faster the fluid flows. If you take a tube, and make the tube smaller in diameter in the middle, this creates a "necked-down" section called a venturi. When air is forced through the pipe, as much air has to come out the exit as goes in the tube entrance. The air in the venturi section must travel faster to get through. Bernoulli found that the pressure at the venturi section was less than at the two ends of the pipe. This is because the speed of the air through the venturi section is travelling faster than at the ends of the tube.
The Airfoil
The shape of a wing is called an AIRFOIL. Usually the bottom of the wing is flat or nearly flat. The top of the wing is curved, with the wing being thicker at the front edge of the wing, and tapering to a thin surface at the trailing edge of the wing.

When a wing airfoil surface passes through the atmosphere, the atoms of the air on the top of the airfoil (shown as minus) must travel faster than their cousins (shown as plus) passing along the lower and flatter surface. This occurs because the distance the air must pass over the curved top of the wing is longer than the distance along the lower surface. According to the Bernoulli Principle, the pressure above the wing is less than the pressure of air below it. Consequently, a pressure difference between the lower and upper surfaces exist. This results in LIFT being produced. The amount of lift depends on the airfoil design and the speed of the air over its surfaces.
Lift is a force generated at 90’ to the angle of the undisturbed airflow or relative wind
About 2/3rds of the lift results from the reduced pressure above the wing and 1/3rd from the increased pressure below it. The majority of the lift being in the front top surface of the wing. The lift is proportional to the angle at which the airflow meets the wind, the angle of attack.
The chord of a wing is an imaginary line from the leading edge to the trailing edge of the wing. The term is used in the definition of "Angle of Incidence" and "Angle of Attack"
Angle Of Attack
As the aircraft passes through the air it traverses a particular line of flight. The air passing by the surfaces of the aircraft in the opposite direction of travel is called the Relative Wind. The angle which the wing 1chord makes with this Relative Wind is called Angle of Attack. An increase in angle of attack increases both lift and drag. If the angle becomes to great, it will pass the Critical Angle of Attack. This is a point where the airflow over the wing becomes so disturbed that the wing ceases to produce lift. The wing then enters into a Stalled condition.
The amount of lift generated is proportional to the speed at which the airflow meets the wing and sufficient lift can be generated by high airspeeds with low angle of attack or low airspeed with high angle of attack.
Vortices
When the wing is started flying it produces a starting vortex which is left spinning gently behind as you fly off. The standing tubular vortex your wing carries wherever it flies is created as the wing flies through the air molecules. At the wing tips, there is no wing to keep the vortex captive so it rolls of the tips in two spinning tubes which extend outwards and downwards. These vortices are a source of drag which will be described later. Keeping the standing vortex trapped at high angles of attack is the problem, because the molecules are accelerated more fiercely and the vortex becomes unstable. Finally at the stalling angle, the vortex leaves the wing and forms the end vortex which dies away. The following which is taken from a back issue of skywings may explain it a little better.

Unfortunately the process of generation of lift cannot be accomplished without the generation of drag and the measure of the efficiency of the wing can be expressed as the lift generated (good) against the drag generated (bad). Dividing the lift by the drag gives a number, the bigger the number for us, the better.
AERONAUTICAL TERMS
Some useful aeronautical terms.
Angle of attack - The measured angle between the airfoil chord and the direction of the undisturbed air in front of the airfoil.
Aspect ratio - This is the ratio of the span of the wing divided by the chord. The glider wings are usually high aspect ratio wings - the reason for this is that for a given amount of lift produced by a wing, the lower aspect ratio wing disturbs a shorter width of air, but it must deflect it more vigorously. As a result, the tip area experiences larger losses in the form of swirls at the tip.
SPAN SPAN2
ASPECT_ RATIO = --------- = --------
CHORD AREA
Centre of Pressure - Even though the lift of an airfoil is distributed along its surface, the resultant force of all the lift forces can be considered to be at single point along the wing known as the Centre of Pressure. Centre of pressure can move depending on the angle of attack.
Centre of gravity - The resultant forces of all the weight can be considered to be at the centre of gravity. Centre of gravity can move by the point weight shifting. The C of G is where the aircraft would balance. It can also be called the centre of mass.
Chord - The straight line drawn from the furthest forward point on the airfoil to the furthest rearward point on the airfoil.
Dihedral - When you stand in front of an aircraft, looking toward the tail, the wings are usually higher at the wing tips than at the wing root (where the wing attaches to the fuselage). This upward angle from wing root to tip is called DIHEDRAL. On an aircraft with dihedral, when one wing drops, it will produce slightly greater lift than the other wing. The aircraft tends to return to a level status providing lateral stability to the aircraft.
Washout - A lowering of the angle of attack of the wing as it progresses from root to tip. Hang gliders have washout and the tips are held up by tip rods or other means.
Washin - An increase in the angle of attack from root to tip.
AERODYNAMICS OF A STALL
A stall occurs because of the air’s inability to make sudden changes in velocity. The air has mass. Therefore it wants to continue in its initial direction due to inertia.

Figure 4 - Stall effects
The air can no longer make sudden changes to flow smoothly over the upper surface. It breaks away at the rear and creates turbulence. The further the nose is raised, the more the break away point moves forward.
At the stall the drag increases and the lift decreases.
STABILITY
Stability is a tendency for a glider to return to normal level of flight after disturbance.
- Neutral - A glider is given a nudge and it stays where it is.
- Stable - A glider is given a nudge and it returns to its trim point.
- Unstable - A glider is given a nudge and it gets even worse.
For a glider this means that it must return to level flight after disturbances to the pitch, roll or yaw axes.

A stable glider near stall will want to speed up, a stable glider flat out will want to slow down. An unstable glider near stall will want to slow up and an unstable glider flat out will want to go faster. (Not a very nice glider to fly).
The standard airfoil, if the angle of attack is increased (i.e. near the stall) then the centre of pressure moves forward with increasing angle of attack. The C of P also moves to the back of the airfoil as the A of A decreases. This is not a stable situation.
Unfortunately, all airfoils have the unwanted trait of instability so we have to do something to overcome the problem. Stability is a fine line for the designer between an overly unstable glider which would be a handful to say the least to fly and an overly stable glider which would not turn or be a real pig to fly.
Hang Glider
Hang glider stability is accomplished by several methods.
Pitch Stability
Pitch stability is the stability in the lateral axis.
Reflex
Reflex is the upward curving of the rear of the wing and is most often carried out by luff lines attached from the kingpost to the trailing edge of the sail. Topless gliders have some internal bracing to keep the reflex trailing edge in place.
What the luff lines do is destroy the lift at high speed so that the nose of the aircraft wants to pull up and slow down.
Luff lines are out of play during normal flight. With a VG system, the lines have to be loosened as the sail is tightened or they kick in too soon. Thus some gliders (Kiss for example) have VG compensators for the luff lines.
Sweepback
If the lifting surfaces are designed so that the lifting surface behind the C of G lose lift quicker than those areas ahead of the C of G, then more lift will be forward at high speeds to pull the nose up and more lift at the rear to force the nose down at low speeds. In other words, if we pull on speed, the tips unload more than the centre and thus the Centre of pressure moves forward to pull the nose up. If we push out, the tips lift more and tend to move the C of P back to pull the nose down . This is accomplished by a mixture of sweepback and washout. Sweepback is the V-shape given to the plan view of the wing and puts the tips behind the C of G.
Washout
Washout is the change in twist from the root to the tip. Washout is in one direction and washin is in the other direction. Moving from root to tip,, washout decreases the A of A. All hang gliders have washout. This combines with the sweepback and gives static pitch stability to hang gliders. Another advantage of washout combined with sweepback is the effect in a stall. As the glider stalls, the tips are at a lower angle of attack than the nose, and they tend to keep flying longer than the nose. In a shallow stall, if the nose is stalled and the tips flying, then the glider keeps on an even keel and the nose dips to pick up speed. This effect also helps during landing as the glider is flared, the tips stall last and help stop a wing dropping.
Roll stability
Stability along the longitudinal axis.
Dihedral/Anhedral
Dihedral is an upward tilting of the wings.

If a roll occurs, the lower wing will produce more lift and the higher wing will produce less lift. This will tend to counteract the roll effect and thus introduce stability.
Although dihedral assists roll stability, slight anhedral gives instability to assist turns. The amount of anhedral used is slight and since the leading edge is supported by the flying wires at about mid distance, during flight, the outboard sections would bend up and produce a small amount of dihedral. The original Kiss used an anhedral airframe but a relatively loose sail which when loaded assumes a dihedral shape, outboard of the flying wires. This mix of anhedral and dihedral is called a cathedral wing with the cathedral area being the part outboard of the flying wires.
Yaw stability
Stability in the vertical axis.
Sweepback
Yaw stability on a hang glider comes mainly from sweepback. As the glider yaws, one leading edge will present a larger frontal surface to the wind and therefore the amount of drag generated by this wing will be greater, similarly, the other wing will present a smaller frontal surface to the wind and the drag will be less. This effect will create a turning moment about the vertical axis which will tend to bring the glider back on course.
Yaw stability may also be helped by the addition of winglets on some gliders.
Paraglider
Stability for a paraglider is not such an issue since a paraglider is not a tail-less aircraft as a hang glider is.
Pendulum stability
Most of the stability comes from the pendulum effect. The weight of the pilot is great compared to the weight of the canopy. The lift comes from the canopy and the weight from the pilot. This effect means it is extremely difficult to dislodge the pendulum stability that a paraglider has.
Roll stability and pitch stability come mainly from the pendulum effect.
Pitch stability can be influenced by the aerodynamic section used, some are more pitch stable than others. The curve of the glider (viewed from the front) also affects the roll stability due to the direction the lift is acting in relation to the position of the pilot.
Washout
Paragliders can have a twist built in the wing as do hang gliders. Standard paragliders are built for stability and washin is often built in the tips. This has the effect of increasing the lift in this part of the wing and hence increase the tension in the sail across the span i.e. makes the wing feel more solid. It also tends to reduce the tendency for tip deflations. Advanced paragliders can have neutral or washout built in to increase the performance. This can also make the tips “loose” in turbulence.
GLIDE ANGLE
Glide angle is not actually an angle but expressed as a ratio i.e. 8 to 1 glide angle. This means for every 8 units of length travelled across the ground, then 1 unit of length is descended. Obviously the greater the number, the better the glide angle.

Glide angle also is the same is the LD ration (lift/drag). Glide angle is increased by increasing the lift (difficult) or reducing the drag (easier). Since as we will see on the section on drag, drag increases with airspeed, then at high speed, the reduction of drag is an important factor in glider performance. Sailplanes go to great lengths to reduce drag and have very smooth GRP surfaces and streamlining to reduce drag. For hang gliders, the reduction of drag has given rise to the topless glider. For paragliders, the number of lines has been reduced together with the introduction of microlines. The relationship between sink rate, glide ratio and flying speed is now explained. Some reference may be needed to the section titled “Forces on a glider”.
In the diagrams, L is the lift vector and is always at 90’ to the direction of flight vector V. D is drag and is always opposite to V. L and D combine to give the resultant R which is opposite and equal to the weight W.
V has been split into 2 vectors, Vh (horizontal speed) and Vv (vertical speed). For clarity the airfoil has been removed.
The diagram shows the forces acting on an airfoil. The wing is moving right to left in the direction of the arrow V. V is opposite in direction to the wind hitting the wing. The wing is flying with little drag. 
The direction of travel is further down the wing is pointed in more of a dive.

The wing is travelling further in a dive. Note that the drag is always opposite to the travel and that the resultant R is the sum of the lift and the drag and counterbalances the weight.
The sink rate can be identified with the component of velocity Vv. Vv To minimise the sink rate we must minimise Vv. The glide ratio is equal to Vh/Vv. This is simple the distance travelled divided by the distance fallen.
To maximise glide ratio we need to maximise Vh and minimise Vv.
By applying geometry rules we can find that the triangle of sides R,L and D (when D is shifted) is similar to the triangle defined by V, Vh and Vv.
Therefore L/D equals Vh/Vv which is of course the glide ratio. 
BALLAST
Ballast is another name for additional weight carried by the pilot. All gliders are certified to fly within a certain weight range. At the top of the weight range, the behaviour of a glider is different if weighted at the low end. As mentioned before, the design of a glider is a compromise, increase performance in 1 area such as glide angle and another area may suffer, such as sink rate.
Ballast can be used to increase the weight of the aircraft and thus increase the "wing loading” (total payload weight (pilot+harness etc) divided by the surface area of the wing) on the glider. This means that the aircraft will fly faster down the glide slope. The sink rate is increased slightly but the max glide ratio is not affected. The top speed of the glider is increased which may be helpful if flying on strong days in a paraglider. Performance and general handling of the glider may be better when flying at a certain weight. Performance paragliders seem to benefit from being well weighted.
Remember if you intend to take ballast that can be jettisoned in flight, then ballast is only allowed in the form of water or fine sand. Also, remember never to exceed the design weights of your glider.
FORCES ON A GLIDER
Already touched on in an earlier section. There a 4 forces on the glider wing.

One difference between a powered wind such as a light aircraft and a glider wing. All flying objects without power get their energy from gravity. A glider converts some of its downward falling motion to forward motion shown as “V”. Once airspeed is established, the lifting forces build up to couple with the downward pull of gravity and lift the nose until equilibrium is reached.
The force of gravity is shown by “W”.
This is always balanced in steady flight by the sum of forces of lift “L” and drag “D” called the resultant “R”. If W is not balanced by R the glider will accelerate until both the lift and drag increase to a point of reinstating the equilibrium. i.e. if a take off run is too slow, the lift generated will not support the weight. The nose will dip and the glider pick up airspeed until enough lift is produced for the two to equalise. Hopefully this happens above ground.
The resultant force R always acts through the centre of pressure
The weight always acts through the centre of gravity.
Both the C of P and the C of G can move. The centre of pressure by changing the angle of attack and the centre of gravity by weight shifting. That’s how we can control the glider.
If a pilot pulls the bar in to gain speed, the lift decreases. This means that R is reduced and there the wing picks up speed until the lift is increased (and the drag) to match the weight.
The flying speed varies only with angle of attack for a given glider and flying weight.
DRAG
Drag is result of us flying in a fluid (air) and cannot be totally removed. There are several types of drag. Refer to Figure 9 - Total drag.
Induced
Induced drag is a by product of lift. The majority of induced is formed at the wingtips where the wingtip vortices are shed, as the area of low pressure above the wing and the high pressure below the wing slide off the wingtip and mix in a swirling trailing tip vortex.
The important thing is that induced drag reduced with angle of attack and hence airspeed. High aspect ratio wings reduce induced drag. Winglets on 747’s reduce induced drag at slow speed. Condors have extended feathers at the tips that do funny things with tip vortices and they all help reduce induced drag.
Parasitic
Parasitic drag is a friction drag and varies with the square of the speed. i.e. doubling your speed quadruples your parasitic drag. There are a few types of parasitic drag
Form drag
Caused by solid non-lifting items in the airstream. i.e. You, wires, kingpost etc.
Profile drag
Caused by the lifting surfaces. It consists of skin friction drag and leading edge form drag. The more streamlined the airfoil shape, the less profile drag.
Interference drag
Interference drag is when the airflow around the aircraft interfere with each other. Not a big problem on hang gliders or paragliders.
Total drag
Add all the drag components up to get the total drag. Different parts of the drag are important at different speeds. We can plot a graph as below.

The best glide occurs at minimum drag.
POLAR CURVES
Polar curves are graphical representations of the performance of our wing. They can be used to determine what speed we should fly at for any given conditions to maximise our glide over the ground. They are drawn with airspeed along the x axis and sink rate along the y axis.

The curve is a series of plots taken for a particular aircraft and for a series of airspeeds. At each airspeed the sink rate is taken and then it is possible to plot the polar curve. The sharp increase in sink rate at slow speeds is the point just before the stall.
Min sink is the highest point on the graph.
Max glide in still air is obtained by drawing a tangent to the graph from the origin . The point of intersection can be read off in sink rate and airspeed. The graph can also be used in head winds and tailwinds and rising and sinking air for the same purpose.
If we want to find out the speed to fly at in say a head wind of say 10mph. Instead of taking our tangent line from the origin, we take it from the 10mph point on the headwind side of the line. The tangent touches the polar at a faster speed which can be read off at point A. Similarly if we are flying in a tailwind, the polar will tell us to fly slower.

Figure 11 - Polar curve with headwind

Figure 12 - Polar curve with thermal
The final example shows a combination of flying an a 8mph headwind and a 150fpm sink area. The fast speed is shown at A
 Figure 13 - Polar curve with both a headwind and thermal
=========================================================
From the above we can deduce that we should speed up in sink and a headwind
and slow down in thermals and a tailwind.
=======================================================================
INSTRUMENTS
We all fly with instruments. The altimeter measures height above a reference. The variometer measures our rate of change of altitude. The Air speed indicator measures airspeed. The 2 or 3 are usually combined in 1 instrument.
Altimeters
Altimeters measure height against a reference. Most commonly they use the fact that air pressure reduces by 1mb for every 30ft we rise and the relationship is linear (at the levels we fly at). There are other means of measuring height (satellite navigation) but these are not as accurate for the amount of money we can afford.
Aneriod
The aneroid altimeter uses a small sealed capsule containing air. As the instrument goes up, the air pressure in the capsule increases and by the design of the capsule, it is allowed to expand in a certain direction. This expansion is coupled by mechanical linkages to a dial display. The dial can be adjusted by a knob to read say height above sea level (QNH) or height above the field (QFE). This altimeter is mechanical.
Electronic
The majority of altimeters are electronic. They use semiconductor materials to sense changes in air pressure. Once you have the sensor, then its relatively straightforward to design electronics around it to convert the signal to a display. Modern altimeters also have the ability to have temperature compensation and data links built in.
Variometers
Variometers also sense changes in air pressure, but in a different way. They display the rate of change of air pressure outside rather than the absolute air pressure. The faster the ascent, the faster the rate of change of air pressure.
Electronic
Once the pressure sensor is in the box of electronics, it can also be used to measure and display the rate of change of pressure.
Flask
A flask vario is more commonly found in sailplanes and is an early from of vario. It looks like below:

As the instrument rises, the air in the flask will try and rush out of the openings since it will be at a higher pressure than the surroundings. As it rushes past the pith balls, one is forced upwards in the draft. The same thing happens in descent but the other ball is forced upwards.
Total energy
False readings may be obtained by flying fast and converting this speed to height. This may be converted into an imaginary thermal as the vario senses the increase in height. This is called a “stick thermal” It is of course not a real thermal. Varios which take the airspeed into account when determining the air around are called total energy varios. Very important for sailplanes which have a lot of energy retention and can convert speed to a lot of height.
The solution to avoid false readings is to use a total energy vario. By total energy we mean the sum of the kinetic (moving) and potential (due to height) energy. They work since the dynamic pressure of the air increases with the square of the velocity. Our sink rate increases pretty much with the square of our flying speed. In we have some device to measure the airs dynamic pressure, and tie this into our varios detection circuits, we can compensate for the altitude change due to glider speed. The metal tube on LR3 varios is the total energy probe.
Airmass(Netto)
As we fly at different speeds, our glider has different sink rates. We have to mentally compensate for this when working out what the air is doing. Netto varios work this out for us and always indicate the airs “net” lift or sink.
Speed to fly
Speed to fly is a complicated area of theory, covered recently by Gordon Rigg in an excellent article in Skywings. Suffice to say for the exam, speed to fly is a theory that for every condition of lift/sink and headwind/tailwind, in order to achieve the greatest distance over the ground, then there is one specific airspeed to fly at. It can also be used to determine the speed to fly at to achieve the fasted speed to goal. It’s a lecture in itself.
MacReady ring
A MacReady ring is a scale which fits round the vario display (assume its an old type vario with analogue display). The ring rotates round the vario display and as you fly at a certain vario reading. The MacReady ring tells you to fly at a certain speed. As you fly at this speed, the vario needle will no doubt move to a new reading and you have to readjust your speed. Do this until the vario needle points to the speed you are flying at and that’s it. Modern varios have facilities to link to GPS’s to work out your ground speed compared with your air speed and work out headwind/ tailwind components. The vario readings are all fed into the electronics which displays the speed to fly.
REFERENCES AND ACKNOWLEDGEMENTS
- Performance Flying by Dennis Pagen
- Paragliding flight by Dennis Pagen
- BHGA Pilot handbook
- Touching cloudbase by Ian Currer
Meteorology
Intermediate Pilot Exam Notes - Meteorology
CONTENTS:
- BUYS BALLOTS’S LAW
- FRONTS
- WARM FRONT
- Cross section
- WARM SECTOR
- COLD FRONT
- Cross section
- OCCLUDED FRONT
- Cross section
- WARM FRONT
- CLOUDS
- HIGH
- MEDIUM
- LOW
- FORMATION OF CLOUDS
- Convection
- Orographic uplift
- Cloud formed by turbulence and mixing
- Cloud formed by widespread lifting
- CLOUDBASE
- CONVECTION
- THERMAL PRODUCTION
- THE “REAL ATMOSPHERE”
- Inversion
- STABILITY AND INSTABILITY
- CUMULUS CLOUD FORMATION
- METEOROLOGICAL TERMS
- PRESSURE SYSTEMS
- LOW PRESSURE
- Formation of a low
- Associated weather
- HIGH PRESSURE
- Associated weather
- LOW PRESSURE
- WINDS AND THINGS
- VALLEY WINDS
- SEA BREEZES
- SEA BREEZE FRONTS
- WAVE LIFT
- FOG
- Radiation fog
- Advection fog
- Sea fog
- Hill Fog
- SYNOPTIC CHART
- CLOUDS AND RAIN
- ACKNOWLEDGEMENTS
BUYS BALLOT'S LAW
Very Simply, this states that in the Northern Hemisphere, if you stand with your back to the wind, the area of low pressure is on your left hand side. In the Southern Hemisphere, it is on your right hand side.
FRONTS
A front is a boundary between 2 different air masses of different density. Air masses don’t like to mix and the boundary between the two (the front) is where active weather can take place. Fronts are very common in depressions. I recommend Derek Piggots book “Understanding Flying Weather” to see the birth and life of a depression. Although not in the syllabus, a depression starts along the jet stream. The jet stream is an area of very fast moving air circulating West to east (in the Northern Hemisphere). The jet stream is like the traffic on a motorway, it sometimes bunches and sometimes eases off. Where it bunches, the high altitude pressure increases causing a downward flow of air - the start of an anticyclone (high pressure system) where it eases, it speeds up and due to Bernoulli’s principle, it causes a reduction in pressure - the start of a low. More details later. As the low pressure “winds up”, it twists the air masses and causes the characteristic low with fronts. The formation of a low with its frontal systems will be explained in the section on Pressure systems.
For this section, the typical low with frontal zones is shown below:

Figure 1 Low pressure system
Since the vast majority of low pressure systems move from West to East, the first frontal system to make its effect on the UK will be the warm front.
A warm front is where warm air overrides cooler air. Shown on maps as:

Figure 2 Warm front symbol
A warm front is where an area of warm air catches up with an area of cold air and overrides it (due to the less density). The normal warm front has a shallow slope with the air rising gradually over many hundreds of miles. This lifting produces the gradually thickening layer of cloud which eventually results in the steady rain near the frontal zone.
Cross section
The cross section of a warm front is shown below:

Figure 3 Warm front cross-section
The normal warm front has a shallow slope as the warm airmass overrides the cooler air. The slope is typically 1:50 to 1:400 and the frontal zone effect may extend 500 miles ahead of the frontal transition on the ground. This means that the forthcoming warm front may be seen in advance. High cloud such as Cirrus and cirro stratus will shut off the solar activity usually cutting off thermals. Then the cloudbase will lower with Alto stratus and Nimbo stratus giving drizzle as the front approaches. Rain possibly beginning 5-10 hrs before the passage of the front. The winds may strengthen and back (winds change direction ANTI CLOCKWISE.) At the front, the rain eases off, the wind will veer 50 degrees or so and the temperature and humidity will rise. We are now in the warm sector.
Warm Sector
The warm sector is the area between the leading warm front and its following cold front. The air is warm and produces the right conditions for wave flights. Following the warm sector is the cold front.

Figure 3a - Warm Sector
A cold front is where colder denser air undercuts warmer air. It is shown on maps as below:

Figure 4 Cold front symbol
When a mass of cold air meets a mass of warm air, it tries to undercut it. The cold air pushes under the warm air acting as a wedge. The slope of the wedge is steep, about 1 in 30 to 1 in 100. They move quickly about 20mph. and strong updraughts can be produced about 100 miles ahead of a front.
Cross section
The cross section is shown below:

Figure 5 Cold front cross-section
The warm sector gets its name from the fact that the cold front usually follows a warm front. See the section on pressure systems later.
The cold front is often dramatic with heavy showers. At the front, the temperatures drop, the air is drier and the wind veers (winds change direction CLOCKWISE) often to the North West direction. Behind the cold front, there is often a complete clearance of cloud but this very quickly gives way to high Cumulus and shower clouds. Good days for soaring are found after cold fronts have gone through and the pressure starts to rise again. The rising pressure raises cloudbase, and the cooler air means a ready supply of thermals.
For information and probably not likely for the exam. Bradbury indicates the 2 types of cold front - the katafront and the anafront. You should know about katabatic winds (flow downslope and are KATASTROPHIC for taking off and Anabatic winds which flow upslope).
The same thing happens at fronts where the frontal zone approaches, the wind upstream of the front can flow down the slope (katafront) or up the front (anafront).

Figure 6 Anafront
Above shows an anafront. The air preceding the cold front is rising above the frontal zone and creating very active clouds such as Cunimb’s. The frontal zone is very steep. The Katafront is shown below:

Figure 7 Katafront
The air preceding the frontal zone is flowing down slope and dampens the activity.
Occluded Front
An occluded front is where a cold front has caught up with a warm front. It is shown on maps as below:

Figure 8 Occluded front symbol
As the depression deepens, the cold front with its weather systems catches up with the warm front and the 2 types of weather become mixed.
Cross section

Figure 9 Occluded front cross-section
The occlusions can have some of the characteristics of a warm front or a cold front but on a milder scale. The weather produced by a occlusion can range from that of the 2 frontal types to prolonged periods of rain.
CLOUDS
The amount of moisture that air can hold depends on its temperature, with warmer air holding more air than cold.
Cloud form whenever the air is cooled to a point where the temperature to which a particular mass of air must be cooled for saturation to occur is called the Dew Point.
Sometimes the amount of moisture in the air is measured as relative humidity. The Relative humidity (RH) is:
RH = amount of water vapour in the air / amount of water vapour required to saturate it (at that temperature). This is expressed as a percentage.
i.e. dry air has a RH of 0%. Air about to form cloud has a RH of nearly 100%.
Clouds are classified as high, medium or low according to the height of their base. There are 10 basic types. See the diagram below:

Figure 10 Cloud types
High
Altitude range is 15 to 40,000ft. These are composed mainly of ice crystals and are known as cirro types.
- 1. Cirrus (Ci) is the wispy high cloud
- 2. Cirrocumulus (Cc) is a high cloud with a cell pattern.
- 3. Cirro stratus (Cs) is the thin veil type cloud
Medium
Altitude range is 6,500 to 23,000ft. The are known as alto clouds.
- 4. Alto cumulus (Ac) is a medium layer with a cell pattern. In an unstable atmosphere, Ac may produce virga or precipitation which does not reach the ground.
- 5. Alto stratus (As) is an even layer of cloud at medium height
Low
Altitude range is 0 to 8,000ft.
- 6. Nimbostratus (Ns) is a deep layer of rain cloud.
- 7. Strato cumulus (Sc) is a greyish/whitish cloud consisting of rolls or cells. The weather is light rain, drizzle or snow.
- 8. Stratus (St) is a low lying layer of cloud. May give drizzle
- 9. Cumulus (Cu) these are individual heaped clouds with a cauliflower top. Large Cu may give showers.
- 10. Cumulonimbus (Cb) are heavy shower clouds or thunderstorm clouds. The tops of these can reach past 30,000ft. Weather is rain, hail and heavy showers.
There are other clouds which are not listed above:
- Castellanus such as Altocumulus castellanus are excellent indicators (especially in the Alps) or upper atmosphere instability. These in the morning may indicate Cbs later in the day.
- Lenticular - These lens shaped clouds indicate the presence of wave activity and may be stacked, one above the other in certain cases. They show the top of the wave.
Formation of clouds
Clouds may be formed in several ways but all rely on the fact that the air is cooled to a point where it cannot hold its moisture.
Convection
The action of the sun will heat the ground. This in turn heats the air layer closest to the ground which will become warmer and thus less dense. It may rise and is it does so, it will cool. Eventually it may reach a point where its temperature reaches the dew point and the water vapour condenses to form cloud. Cumulus cloud is formed in this way.
Orographic uplift
Air may be flowing along and be forced to rise upwards when it reaches an obstruction such as a mountain chain. As it rises it will cool and it may be cooled past its dewpoint temperature. It will condense and orographic cloud will form on the windward side of hills.
Cloud formed by turbulence and mixing
As air flows over the surface of the earth, frictional effects cause variations in local wind strengths. Eddies are set up which cause the lower level air to mix. The more friction and the stringer the wind, the more mixing. As the air mixes, it may rise and if it cools enough, layer cloud above the friction area may result.

Figure 11 Clouds formed by turbulence
Cloud formed by widespread lifting
When 2 air masses meet, such as in a warm front, then great areas of air may flow over the cooler air and rise as it does so. High stratus cloud will result. See the section on fronts for more details.
Cloudbase
Cloudbase is the term given to indicate the height that the base of the cloud is ASL. It can be calculated from the dew point and the ground temperature.
i.e. Temp of 23 deg with dew point of 12 give a cloudbase of 4,400ft.
CONVECTION
One of the main topics in the Met course is to describe thermal growth and activity. By understanding this and the reasons for thermals, we can also understand many other parts of the atmosphere and cover such things as, Inversions, Stability and instability, Cb’s and cloud base.
With increasing altitude, the following decrease
- Temperature
- Pressure
- Density
As altitude rises, temperature generally decreases. This change in temperature with height is called the Lapse Rate.
The standard atmospheric rate of change has been defined by Scientists as the standard atmosphere and it has the following conditions:
Environmental Lapse rate (ELR) = 2’C/1000ft
Pressure change = 1mb per 30ft
The ELR can be represented on a graph but it is important to know that this is only a “measuring stick”. the real ELR may be a lot different.

Figure 12 Standard ELR
Thermal production
As the sun heats the ground, the ground in turn heats up a layer of air close to the ground. A bubble of warm air starts to form and is less dense than the surrounds since it is warmer. It may unstick from the ground and start to rise through the atmosphere. As the density and the pressure of the surrounding air decreases with altitude, the thermal will expand adiabatically (a process where no heat is lost or gained from the surroundings) and hence it cools. As air expands it cools. The thermal will cool at a known rate and its rate of cooling or lapse rate is the Dry Adiabatic Lapse rate or DALR. The word dry refers to the moisture in the thermal being retained as vapour and not condensing.
Dry adiabatic lapse rate (DALR) = 3’C / 1000ft
If we plot the course of a thermal leaving the ground with a temperature of 25’C, after 5,000ft the thermal has cooled to 10’C and has reached equilibrium with the surroundings. i.e. it stops rising.

Figure 13 ELR and DALR
The “Real Atmosphere”
In real life, the atmospheric conditions do not look exactly like the above. Overlaying warm fronts could mean warm air aloft. High pressure systems could warm the upper air due to compression of the upper air. Air close to the ground may be chilled on a clear night. When the air temperature does not fall with height, but rises, then this condition is called an inversion.
Inversion
An inversion is a warming of the air at height increases and can be in 2 types.
- High level - caused by a high pressure system warming the upper air
- Low level - caused by air chilled in contact with a cold ground which has lost heat by convection
These may be shown on a lapse rate graph as before:

Figure 14 Inversions
Inversions may puts a lid on our max. altitude possible by thermals.
Stability and instability
We often hear the terms stability and instability with the latter being our preference. Using the lapse rate graphs we can understand the terms. Thermals will rise to a point where they are in equilibrium with the surrounding. If the ELR is such that the equilibrium is never reached, then the thermals will keep rising indefinitely. i.e. the 2 lines diverge. This is unstable.
If the 2 lines converge, then the day will be relatively stable.
Unstable ELR > DALR (3’C/1000ft)
Stable ELR < DALR (3’C/1000ft)
Cumulus cloud formation
A thermal rising will may contain moisture. As they rise, they cool and may rise to a point where they reach the dew point. At that, the water vapour condenses to form cloud. We have reached cloudbase.
As the water condenses, something else happens. Latent heat will be released. The latent heat is the extra energy required when a substance changes state, i.e. from water to water vapour, extra heat is required to effect the change of state. This extra heat is stored and released when the water vapour condenses back into a liquid. This in effect gives a “boost” to the thermal and acts as a source of heat, hence the lapse rate in clouds will be lower than in a dry thermal. The lapse rate in clouds is known as the Saturated (or moist) adiabatic lapse rate) SALR.
This has a range of values depending on the moisture content but is typically:
Saturated Adiabatic lapse rate (SALR) 1.1 - 2.8’C/1000ft
The thermal in a cloud will keep rising until an inversion is reached or the cloud runs out of moisture. This determines the cloud top height. If the airmass is very unstable and there is a constant supply of warm moist air and powerful thermal development, then the situation may turn be right for the formation of Cunimbs.
The trigger temp is the temperature on the ground at and beyond which thermals will rise past the inversion layer.
Different ground types absorb solar energy better than others as far as thermal production is caused. The thermal is caused by the sun heating the ground (not the air itself), then the ground will warm up the bottom layer of the air to warm a “warm bubble” which wants to rise up. Dark surfaces such as ploughed fields, areas of dark tarmac are better than lakes etc, for the production of a thermal. The exam will expect you to be able to plot the life of a thermal.
Lets look at a typical thermal growth on a lapse rate graph.

Figure 15 Convective cloud formation
On the day above, clouds have formed with the cloudbase at dew point and the cloud tops limited by a lack of moisture, or if there is an abundant supply of moisture, then the inversion above. Note that if the dew point had been lower, then the thermal would have risen as a blue thermal (no cloud) and could have possible been cut off lower. The SALR has a steeper gradient and thus is very unstable.
Knowledge of ELR, DALR and SALR and the effect on thermals together with dewpoint and the effect on clouds is required for the exam (hint). One other term to know is the Isothermal layer. This is an area of the atmosphere where the temperature does not change with height.
Lets take an example question.
A table showing air temperature against height is below. Dewpoint at ground is 14’C and decreases by 0.5’C per 1,000ft. SALR is 1.5’C per 1,000ft. Describe what happens.

Figure 16 Sample question ELR


If the air is very moist and the SALR is less than 1.5, then the possibility exists of the moist air rising at a steeper gradient and therefore escaping the effects of the inversion and high Cu’s or Cb’s may result.
METEOROLOGICAL TERMS
- Adiabatic - A thermodynamic process where no heat leaves or enters the system
- Advection - transfer of air mass properties by motion.
- Air mass - huge body of air in which horizontal changes in temp are small.
- Anabatic wind - Wind blowing upslope.
- Anafront - a front where warm air is ascending over cold air.
- Anticyclone - area of high pressure
- Backing - winds changes direction anti clockwise
- Convection - transfer of heat by motion of a substantial volume of air.
- Dew point - temperature at which air must be cooled to become saturated with water vapour.
- DALR - Dry Adiabatic lapse rate, about 3’C per 1000ft
- ELR - Environmental lapse rate. This is 2’C per 1000ft for the ISA.
- Inversion - a layer of air where the temperature increases with height.
- Iso - equal
- Iso therm - a line of constant temperature
- Katabatic wind - wind that flows downslope
- Katafront - a front where the warm air sinks down above the frontal surface which will eventually weaken and destroy the front.
- SALR - Saturated adiabatic lapse rate, about 1.5’C per 1000ft
- Stability - the tendency of the atmosphere to stay as it is. Unstable air, where the ELR is greater than the DALR means that a thermal will diverge from the atmospheric temperature lapse rate.
- Standard atmosphere (ISA) - has a ELR of 2’C per 1000ft
- Super adiabatic lapse rate - A lapse rate greater than 3’C per 1000ft
- Tephigram - a aerological diagram with the x.y co-ordinates Temperature and entropy. The diagram is used for plotting the values of temp and humidity at specific pressure levels obtained from upper air soundings.
- Veering - wind which changes direction clockwise.
PRESSURE SYSTEMS
As the earth is covered by atmosphere, this atmosphere exerts a pressure on us all. This pressure is measured in Bars and the pressure is about 1 bar. A bar is too large for any detail so it is divided into millibars and represented as 1000mb. The unit hectopascal may also be used and is the same as a millibar.
Low pressure
Low pressure systems are the source of a great deal of active weather in the UK. The majority of our weather systems form out in the Atlantic along the frontal boundary between the arctic airmass and the warmer tropical maritime air to the south.
Formation of a low
When 2 masses of air of different density lie side by side they induce a strong current of air to flow along the cold side of the front at very high altitudes. This jet is formed due the extreme pressure differences at altitude causing a close bunching if high altitude isobars. The jet is several miles deep and travels at speeds of about 100 to 200 mph. Disturbances cause the jet to snake around and results in areas of divergence and convergence.

Figure 19 Formation of low pressure
The area of convergence will cause downward flowing air. This results in an increase in pressure at ground level and a downward movement of air. Similarly, at the area of divergence, the surface pressure will fall and an area of low pressure will start to form.
1. The jet stream divergence will cause an area of low pressure to start to form along the frontal zone.
The low pressure will draw the 2 edges of the front together, effectively increasing the temperature and pressure differentials thus aiding the formation of the low.
.gif)
Figure 20 Formation of low (1)
As the air rises it is given a twist by the Coriolis force. This coriolis force is exactly the same as the force which causes the water going down the plughole to spin. The force is zero at the equator and is the reason behind low pressure spinning anti-clockwise in the Northern hemisphere and the reverse in the southern hemisphere.
.gif)
Figure 21 Formation of low (2)
.gif)
Figure 22 Formation of low (3)
As the air in continually extracted at the top of the system, so the surface pressure drops increasing the circulation and the winds speeds. The anticlockwise circulation is gradually spread up to the upper levels and the upward movement of ward moist air will eventually cause condensation and the release of latent heat to further power the process.
The cold front moves faster than the warm front and catches it up. With an occlusion forming where the cold front has caught the warm front The spiralling air in the depression further twists the fronts round to give the classic “hook” shape of the depression.
Associated weather
The weather associated with a depression is usually poor. Associated frontal systems can bring rain and cloud. A depression may arrive at our shores at any stage of development and it may or may not have frontal systems. It may have a weak warm front and an active cold front or vice versa. A system with an active cold and an active warm front is very rare. It may have a decaying occlusion, but the general outlook is worsening weather.
High pressure
High pressure systems are formed in a similar way to lows, and areas of high pressure can mean areas where there aren’t any lows. In an anticyclone, the air is descending and being warmed by compression as it descends. Since warmer air can hold more moisture, then clouds are less willing to form.
This results in clear skies at night and little tendency for any over-development.
Associated weather
In summer, a high pressure system always means an improvement with lighter winds and less cloud. In winter a high pressure can mean persistent fog and low cloud or it may lead to clear skies, depending on the source and track of the airmass at low level.
High pressures move slowly and can lead to the production of inversions due to the warmed upper air. The atmosphere becomes stable (cooler air at the bottom) and leads to poor thermal production. Inversions can lead to poor air quality with pollen, dust etc. being trapped in the inversion layer. Highs can persist for days and then they become blocking highs which will often divert the path of a low pressure system around the UK.
WINDS AND THINGS
This section is concerned with the assorted bits and pieces which don’t fit anywhere else.
Valley winds
Mountains tend to form a barrier to winds at low level. The air tends to flow up and down the valley Imagine a valley with hills on both sides. In the morning, the effect of the sun is to heat up the mountains first since the valley will be cooler and still in shade:
.gif)
Figure 23 Valley winds (morning)
As time reaches midday, both slopes are in sun and powerful anabatic winds are produced up both slopes
.gif)
Figure 24 Valley winds (midday)
This causes the winds at low level to rush up the valley to replace the air flowing up the slopes. The valley wind flows into the valley in the afternoon and evening. As the sun goes down and the slopes start to cool off with the altitude, katabatic winds flow downslope.
.gif)
Figure 25 Valley winds (evening)
In the evening, as the wind turns katabatic on the slopes, it can rush down the hill and force upwards, over the valley centre, great areas of lifting air. This is the evening restitution lift or magic lift and can give easy soaring for quite a while in huge areas of lifting air. As time goes on, the valley winds will slow down from travelling up the valley and then turn to the evening and night time valley winds where they flow down the valley.
Sea breezes
In summer, the land tends to warm up quickly, but the sea remains much at the same temperature. Thermal activity may result in a general lessening of the pressure over the land with the results that air flows in from the sea to replace the lifting air over the land. This is a sea breeze. It can kill convection and shut off any thermals near the coast so avoid sea breezes.
In winter, the sea temperatures are relatively stable and warmer than the cold land. The sea breeze is reversed and sometimes leads to Cumulus formation over the sea as cold land air is blown over the sea, to have its base warmed by the sea to produce unstable conditions over water.
Sea breeze fronts
When a sea breeze sets up, it could be in opposition to the normal wind. In this case, a sea breeze front may be formed. This front works its way inland and can penetrate as far inland as Sheffield. This is characterised by a hanging curtain of cloud and a stepped cloud base. This is due to the moist sea air having a lower cloudbase. It needs a fairly light wind, warm day and some instability to set up the sea breeze front. The evidence of a front may also be apparent even with no surface geostrophic wind (wind set up parallel to isobars. The “normal” wind.) The cool moist air flowing inland will meet the warm dry land airmass and this is also a cold front of sorts.

Figure 26 Sea breeze front
Sea breeze fronts rarely occur between October and April.
Wave lift
Another type of lift is the wave lift. The requirements for wave are:
- Wind to be in a fairly constant direction
- Wind to be increasing with height
- A shallow unstable layer with a stable layer above it works well
- An obstruction upwind such as a range of hills is needed to start the waves off
Fog
Fog is cloud on ground level and there are several types
Radiation fog
Conditions suitable for radiation fog are;
- A cloudless night, allowing the earth to cool and thereby causing the air in contact with it to become cool
- Moist air that requires little cooling to reach dew point
- Light winds to reduce mixing
Advection fog
A warm moist air mass flowing across a significant colder surface will be cooled from below. If its temperature is reduced to the dew point, then fog will form. Advection fog can persist in stronger winds than radiation fog.

Figure 27 Advection fog
Sea fog
Sea fog is advection fog and may be caused by:
- An air flow off a warm land moving over a cold sea.
- Warm tropical air moving over a cold ocean or meting a cold air mass
Hill Fog
Hill fog is caused when moist air is uplifted over a hill and cools as it is forced upwards. As it cools it condenses to form hill fog or orographic cloud.
SYNOPTIC CHART
The exam requires you to understand the symbols, isobars, pressure systems and associated weather that you could expect when checking a synoptic chart.
A typical chart is shown below.

Figure 28 Synoptic chart
Pick out features such as:
- Areas of high pressure and low pressure
- Isobars
- Frontal systems
Remember about the Coriolis force and its effect on both high and low pressure systems The Coriolis force means that in the Northern Hemisphere, the geostrophic wind circulates anticlockwise round a low and clockwise round a anticlyclone (high pressure). The winds rotate in the same direction as the isobars, but this is only true for winds at altitude (over about 1,000ft). The effect of the ground causes friction which slows down the surface winds.

Figure 29 Rotation around pressure systems

Figure 30 Surface wind around a low
The surface wind around a low pressure points to the low pressure by about 30’ over land due to the friction. This effect is less over the sea where the friction is less.
The surface wind around a high pressure points away from the high pressure area by again about 30’ due to the friction. The wind speed also decreases in both cases

Figure 31 Surface wind around a high
Think of the affects on the atmosphere such as wind speed and direction, temperature, precipitation, cloud cover and visibility.
By the way, the above chart was taken in Jan 96 when we were in the depths of the icy winter. Winds were from the East (Siberia) and as the base of the winds warmed up slightly over the North Sea, this resulted in instability with snow showers over the eastern coast and hills. The high pressure fended off any frontal system and allowed the temperatures to plummet during the evenings. Blocking highs like this can (and did) last for several days. The chart was taken as the cold weather was dying off. The frontal systems in the Atlantic did eventually make their way in and the winds switched direction to the West or South West raising the temperatures and bringing the normal weather of showers, winds etc.
CLOUDS AND RAIN
Rain or precipitation can consist of different types of precipitation. It may be rain, fine drizzle, snow or hail.
Continuous rain or snow is associated with Nimbo stratus and alto stratus clouds and intermittent rain or snow with altostratus or strato cumulus.
Rain and snow showers are associated with cumiliform clouds such as cumulonimbus, cumulus and alto cumulus, with the very heavy showers coming from the cumulonimbus’s
Fine drizzle and snow is associated with stratus and strato cumulus.
REFERENCES AND ACKNOWLEDGEMENTS
- Understanding flying weather - Derek Piggott.
- Air pilots manual volume 2.
- Meteorology and flight - Tom Bradbury.
- Instant weather forecasting - Alan Watts.
Air Law
Intermediate Pilot Exam Notes - Airlaw
[Yet to be updated to include the new Air Navigation Order]
CONTENTS:
- IRISH AVIATION LAW DOCUMENTS AND PROMULGATION METHODS
- THE POWER OF THE IRISH AVIATION AUTHORITY TO MAKE ORDERS
- THE RELATIONSHIP BETWEEN IAA REGULATORY REQUIREMENTS AND THE REQUIREMENTS OF OTHER BODIES
- GLIDER RADIOS
- Airband radio
- 2m Amateur radio
- The Phonetic Alphabet
- AIRSPACE CLASSIFICATIONS
- IRISH MILITARY AIRSPACE
- Restricted Airspace (EIR)
- Prohibited Airspace (EIP)
- Dangerous Airspace (EID)
- Military Operating Areas (MOA)
- Military Frequencies
- SUMMARY OF UTILISED AIRSPACE IN IRELAND
- AERONAUTICAL CHARTS
- AERODROME TRAFFIC ZONES (ATZ)
- ALTIMETER SETTINGS
- QNH - Questionable Nautical Height
- QFE - Questionable Field Elevation
- QNE
- FLIGHT LEVEL
- RULES OF THE AIR AND COLLISION AVOIDANCE
- VMC and VFR
- COMMON AERONAUTICAL ABBREVIATIONS AND INITIALS
Irish aviation law documents and promulgation methods
The Irish Aviation Authority Act, 1993, as amended, provides for the establishment of the Irish Aviation Authority, to provide certain services in relation to civil aviation, to define its functions and to provide for the conferral on it of certain functions of the Minister for Transport under the Air Navigation and Transport Acts, 1936 to 1988, and the Air Navigation (EUROCONTROL) Acts, 1963 to 1983. The IAA, through their website www.iaa.ie, publish the following information for aviators:
- The Integrated Aeronautical Information Package (IAIP) comprises:
- The current Aeronautical Information Publication (AIP)
- AIP Supplements
- Aeronautical Information Circulars (AIC).
- Notices to Airmen (NOTAM) - These contain information on any aeronautical facility, hazard etc. which might be of use to pilots. They are available to be read on-line at www.iaa.ie.
The Power of Irish Aviation Authority to make Orders
The Irish Aviation Authority (IAA) is a commercial state-sponsored company which was established on 1 January 1994 to provide air navigation services in Irish-controlled airspace, and to regulate safety standards within the Irish civil aviation industry. Under Section 58 (1) of the Irish Aviation Authority Act 1993 the Authority has the power to make orders and regulations as necessary or expedient for the purpose of giving effect to the Annexes to the Chicago Convention.
The Relationship between IAA Regulatory Requirements and the Requirements of Other Bodies
The Irish Aviation Authority specifies its requirements for licences, certificates, approvals, permits and matters of that nature. These equirements must be met in order to obtain and/or continue to exercise the privileges of the licence or other form of approval issued by the Authority. In many cases other legislation, including legislation which is not specifically directed at aviation, also applies to the activity and Government departments or other statutory bodies have responsibilities in the area. It is the duty of the regulated party to ensure that it acquaints itself with all requirements affecting its activities and to ensure that it complies with those requirements. The Authority wishes to stress that any licence or other decision of the Irish Aviation Authority does not remove the obligation on regulated persons to comply with other legal requirements relating to the activity.
Glider radios
There are 2 types commonly in use in hang gliding and paragliding:
- Airband radio - The airband radio is AM and has 720 channels, of which gliders are allocated 5. The airband radio must be type approved. This means that the maker must have submitted a radio of the same type to the IAA who have then taken it to bits and said its OK to use. Without taking a RT test, glider pilots are limited to 5 frequencies (129.9, 129.975, 130.1, 130.125, 130.4 and the International Distress frequency of 121.5). The British Gliding Association recommend that certain frequencies be allocated certain tasks such as ground to air etc. Radios used by glider pilots in this way must be type approved and lockable to those frequencies only. Recently the UK's CAA approved the allocation of 118.675 for exclusively our use. This is Ok for our use anywhere in the UK FIR up to 5,000ft asl. Approval for the radio type must be sought and a licence held for the radio.
- 2m Amateur radio - In Ireland Radio Amateurs have use of many frequency bands including 144 to 146 MHz on FM. All of this band is in use. A lot of pilots use the frequencies just below this range for flying use - 143.750MHz to 143.950MHz. It is illegal to use a 2m set from the air, whether you are a licensed amateur or not.
- The Phonetic Alphabet - The commonly used radio-code for letter abbreviations:
|
|
|
|
|
|
|
|
|
|
|
|
|
|
|
|
|
|
|
|
|
|
|
|
|
|
|
Airspace Classifications
- Class A - IFR flights only are permitted. All flights are subject to air traffic control and are separated from each other
Airspace Classification A comprises:- Shannon Oceanic Transition Area (SOTA) and Northern Oceanic Transition Area (NOTA) at and above FL55 to Unlimited
- Class B - Not utilised in Ireland
- Class C - IFR and VFR flights are permitted. All flights are subjest to air traffic control service and IFR flights are separated from other IFR flights and from VFR flights. VFR flights are separated from IFR flights and receive traffic information in respect of other VFR flights
Airspace Classification C comprises:- Shannon UTA FL245 - FL660
- Shannon CTA at and below FL245
- Dublin CTA at and below FL245
- CTRs Cork, Dublin and Shannon
- CTRs Connaught, Donegal, Galway, Kerry, Sligo and Waterford during the promulgated hours of activation
- Class D - Not utilised in Ireland
- Class E - Not utilised in Ireland
- Class F - Not utilised in Ireland
- Class G - IFR and VFR flights are permitted, and receive flight information if requested
Airspace Classification G comprises:- all airspace within Shannon FIR, excluding airspace classified C as described above
Irish Military Airspace
A restricted area is defined airspace in which flight is restricted according to certain conditions. Penetration possible by civil aircraft provided prior permission has been obtained from, and subject to compliance with any conditions and instructions issued by Military ATS, Casement Aerodrome. Aircraft must be operational Mode C transponder equipped.
- EIR15 - Within Dublin CTR Class C airspace
- Winter Period - Mon-Fri 0900-1700UTC
- Summer Period - Mon-Fri 0800-1600UTC
- At other times as notified to Dublin and Shannon ATC
- See AIP ENR 5.1-1
- EIR16 - Within Dublin CTR Class C airspace
- Winter Period - Mon-Fri 0900-1700UTC
- Summer Period - Mon-Fri 0800-1600UTC
- At other times as notified to Dublin and Shannon ATC
- See AIP ENR 5.1-1
- EIR22 - Circle 1NM radius 542932N 0081440W
- Operational 24hrs/day
- See AIP ENR 5.1-2
- EIR23 - Within Dublin CTR Class C airspace
- Circle 1NM radius 531800N 0062652W
- Operational 24hrs/day
- See AIP ENR 5.1-2
A prohibited area is defined airspace in which flight is prohibited. These include military camps, prisons and certain other facilities. In Ireland they usually extend from the ground up to 5000ft AMSL. EIPs are deliniated by a solid red boundary filled with thin red hatch lines.
These include military weapons ranges for guns, missiles and rockets. Entry into some danger areas is prohibited by military bye-law. A crossing service may be available but will involve the use of radio. A danger area is defined airspace in which activities dangerous to flight may occur. They are shown as a dashed red outline filled with thin red hatch lines.
- MOA3
- Winter Period - Mon-Fri 0900-1700UTC
- Summer Period - Mon-Fri 0800-1600UTC
- At other times as notified to Dublin and Shannon ATC
-
See AIP ENR 5.2-1
- MOA4 - as above.
- MOA5 - as above.
- Baldonnell Tower - 123.5MHz
Summary of Utilised Airspace in Ireland
| Class |
Type |
Separation Provided |
Service provided |
VMC visibility and distance from cloud minima |
Speed Limitations |
Radio
Communication
requirement
|
Subject to ATC clearance |
| A | IFR only |
All aircraft |
Air traffic control service |
Not applicable | N/A |
Continuous two-way |
YES |
| C | IFR |
All |
Air traffic control service |
Not applicable |
N/A |
Continuous two-way |
YES |
| VFR | VFR from IFR |
Air traffic control service for separation from IFR. Traffic information and traffic avoidance advice on request. |
At and above FL100: 8km visibility, 1500m horozontal and 1000ft vertical from cloud. Below FL100: 5km visibility, 1500m horozontal and 1000ft vertical from cloud. |
250kts IAS below FL100 |
Continuous two-way |
YES | |
| G | IFR | Not provided |
Flight information service if requested | Not applicable |
N/A |
Not Required |
Not Required |
| VFR | Not provided |
Flight information service if requested. |
At and above FL100: 8km visibility, 1500m horozontal and 1000ft vertical from cloud. Below FL100: 5km visibility, 1500m horozontal and 1000ft vertical from cloud. OR At and below 3000ft AMSL or 1000ft above terrain (whichever is greater): 5km (3km for flight at IAS 140kts or less) visibility. Clear of cloud, in sight of surface. Helicopters may be flown below 300m (1000ft) above terrain in flight visibility not less than 1000m if manoeuvred at a speed which would give the pilot in command adequate opportunity to observe other traffic or obstacles in good time to avoid collision. |
250kts IAS below FL100 |
Not Required |
Not required |
Aeronautical Charts
- 1:500,000 VFR Chart - The Irish Aviation Authority visual flight rules (VFR) aeronautical chart has been produced in both laminate and paper versions. The chart is intended for VFR navigation within the boundaries of the Shannon FIR. This chart is most suitable for planning hang gliding and paragliding flights in Ireland.
- 1:250,000 VFR Chart - The Irish Aviation Authority visual flight rules (VFR) aeronautical charts have been produced in both laminate and paper versions. The purchaser can buy either version but will get four charts on two sheets of paper covering the Shannon FIR in one plastic wallet. The chart is intended for VFR navigation within the boundaries of the Shannon FIR
Make sure you know the symbols and the airspace markings on this map
Aerodrome Traffic Zones (ATZ)
The airspace surrounding most aerodromes listed in Ireland is designated an ATZ. The dimensions are:
- from ground level to 2,000ft above aerodrome level
- within the area bounded by a circle of radius:
- 2nm, where the length of the longest runway is 1850m or less
- 2.5nm where the length of the longest runway is 1850m or longer

Figure 1 - ATZ Dimensions
The number alongside the symbol on the chart shows the aerodrome height above sea level.
Flying inside the ATZ requires radio contact with the responsible party and so in the main we cannot go there, unless we have our RT pass and a radio and know what to do.
Altimeter settings
Vertical distance (altitude) is hard to measure accurately. Most altimeters work by measuring the change in air pressure as you gain height. Pressure reduces about 1 millibar (1mb) per 30ft of height gained. At higher levels this relationship is not linear but good enough for us. Note that millibar is the same as hectopascal. Hectopascal might be used in more metricated countries - it means the same - but in Ireland, the millibar is used for the moment.
There are 3 ways of height representation.
- QNH - Questionable Nautical Height - QNH is given by Air traffic control as a pressure reading that the pilot sets on his expensive altimeter. The altimeter then displays his height above Sea level. The ATC will broadcast the regional QNH to aircraft to take account of pressure changes caused by atmospheric conditions to make sure the pilot does not crash into a hill unexpectedly.
- Imagine a deep low over the UK and the pilot is flying from the outside of the low (where the pressure is higher) to the inside of the low (where the pressure is lowest), If the pilot keeps to the same displayed altitude on his altimeter as he flies into the low what happens. As the pressure outside the aircraft falls, the altimeter will show a higher altitude (lower pressure = higher altitude) and so the pilot will descend the keep the displayed altitude the same. The pilot does not know he is descending since he is watching his altimeter and its reading the same. Unfortunately for him, he is descending!!
- So QNH is a pressure setting given by ATC and is the current pressure reading at Mean Sea Level.
- QFE - Questionable Field Elevation - If our pilot is landing at a small airfield with not many facilities, then QNH might not be accurate enough for him to land without hitting some houses maybe. The pilot needs the pressure setting for the airfield. ATC might say "QNH is 1015mb, QFE is 1000mb". I.e. the air pressure at this airfield is 1000mb. So by setting the altimeter to this, we get the height above the airfield.
- So QFE is a pressure setting by ATC and is the current pressure reading at the airfield now.
- In general hang gliding and paragliding, when we say QNH it is the height above sea level, and when we say QFE is it the height above "the field", maybe takeoff or landing - its up to you
- QNE - This one is the strange one. QNE refers to the height indicated on a pressure altimeter when the aircraft is on the ground at an aerodrome and the pressure setting of 1013.2mb (remember this) is set on the sub scale. i.e. it is the height of the 1013.2mb pressure level. Note that this is the only reference which is a height, the others are pressure settings.
Flight level
Shown on charts as FL something. FL65 is flight level 65 which is 6,500ft... but what is it for?
Airlines flying everywhere would have to keep adjusting their altimeter every 10 minutes to make sure that the height they should be at is the height that are indeed at and not at the height displayed by their altimeter which has drifted out of alignment in the last 5 minutes due to rapidly changing air pressure outside the cabin. Since all aircraft, once they are high enough can forget about the ground - its more important to keep away from each other so they all use the same pressure setting on their altimeters. The International Standard Atmosphere (ISA) sea level pressure of 1013.2mb is used and then vertical position is called flight level.
As an aircraft climbs away from the airport, once past the transition altitude, he retunes his altimeter to 1013.2mb and so everyone else who does the same can keep accurate relative distances apart. In the UK the transition altitude is 3,000ft.
It is worth remembering that flight levels go up in regions of high pressure and the reverse in regions of low pressure. Thus in a deep depression, Buxton (first stop after Shining Tor) which is in Daventry Control Area, Class A airspace starts at flight level 45, could have its airspace lower limit reduced to 3,500 ft - worth knowing.
Rules of the Aid and Collision Avoidance
The rules of the air as they pertain to hang gliding and paragliding in Ireland are set out in detail on the IHPA website Flight Safety page:
All pilots are required to know these collision avoidance rules by heart and to always fly with consideration for other pilots in the air.
VMC and VFR
VMC = Visual Meteorological flying conditions. This refers to the amount of visual observance it is possible to keep. In these conditions we fly under VFR or Visual Flight Rules.
A quick note on these. In Ireland an aircraft shall always be flown in accordance with either VFR or IFR. When you are in VMC you are flying under VFR (Commercial pilots may elect to still fly IFR even if there is sufficient VMC) and responsible for avoiding collisions with other aircraft using the principle of see and avoid. You are flying in IMC when you cannot comply with any of the VMC cases.
Note the different types of visibility that are in different types of airspace. Refer to the Summary of Utilised Airspace in Ireland above. You have to know what conditions are like when you enter a specific type of airspace, usually the nearer to "A" the airspace, the more stringent the visual conditions become. The most stringent is full VMC which is 8km flight visibility, 1500m horizontal/1000ft vertical clearance from cloud. This is in class A airspace that we might be allowed to enter (i.e. crossing airways). The least VMC or VFR minima is 1500m flight visibility, clear of cloud and in sight of the surface, which is at under 3,000ft in class F and G airspace.
Common abbreviations and initials
ACAS - Airborne Collision Avoidance System
AGL - Above ground Level
AIAA - Area of Intense Aerial Activity
AIP - Aeronautical Information Publication
AIS -Aeronautical Information Service
AMSL - Above mean Sea Level
ASR - Altimeter setting Region
ATC - Air traffic Control
ATM - Air Traffic Management
ATS - Air Traffic Services
ATZ - Aerodrome Traffic Zone
CTA - Control Area
CTR - Control Zone
DME - Distance Measuring Equipment
EATMP - European Air Traffic Management Programme
FIR - Flight Information Region
FL - Flight Level
FUA - Flexible Use of Airspace
GA - General Aviation
GAT - General Air Traffic
GBAS - Ground Based Augmentation System
GNSS - Global Navigation Satellite System
HF - High Frequency
HIRTA - High Intensity Radio Transmission Area
IAA - Irish Aviation Authority
IAC - Irish Air Corps
ICAO - International Civil Aviation Organisation
IFR - Instrument Flight Rules
ILS - Instrument Landing System
IMC - Instrument Meteorological conditions
ITU - International Telecommunications Union
LFS - Low Flying Services including SAR
MATZ - Military Air traffic Zone
NDB - Non-Directional Beacon
OAT - Operational Air Traffic
QFE - Query Field Elevation
QNH - Query Nautical Height
SAR - Search and Rescue
SRA - Special Rules Area
SRZ - Special Rules Zone
TMA - Terminal Manoeuvring Area
TRA - Temporary Restriction Area
UHF - Ultra High Frequency
UIR - Upper Information Region
VHF - Very High Frequency
VFR - Visual Flight Rules
VMC - Visual meteorological Conditions
Operating Limitations
Safe Pro 4 (Intermediate) Operating Limitations
Having been awarded a Safe Pro 4 (Intermediate) pilot rating, the pilot is advised to observe the following operating limitations until such time as they have attained a Safe Pro 5 (Advanced) pilot rating:
- An Intermediate Pilot with a Safe Pro 4 rating is no longer dependent on having an Instructor or Coach on the hill to advise them each time they wish to fly. It is incumbent on the Intermediate Pilot to seek the advice of other, more senior, pilots who are flying a site.
- Responsible pilots never fly alone. If they are not flying with other pilots, then they stay in contact, by two way radio, with someone on the ground who can look out for them and retrieve them should they fly cross country or get into difficulties.
- Pilots progressing towards Safe Pro 5 must fly with a 2m-band two-way radio.
- Pilots progressing towards Safe Pro 5 must fly with, and know how to use, an appropriately sized reserve parachute on all flights.
- Pilots progressing towards or applying for a Safe Pro 5 rating must be current members of the IHPA and have a current insurance policy.
- Pilots progressing towards Safe Pro 5 are advised not to fly in winds exceeding 15mph (25Km/h) blowing within 30° of straight up the hill.
- All flights must be written up in the Pilot’s Log Book.
Safe Pro 5
Tasks & Experience Requirements
Safe Pro 5 (Advanced) Pilot Rating Tasks and Experience Requirements
The Safe Pro 5 (Advanced) Pilot Tasks:
The pilot must:
1. Complete the appropriate log book entries.
2. Display an ability to fly competently and safely in the company of others; maintaining a good look-out, complying with the Rules of the Air and exhibiting good airmanship.
3. Pass the Safe Pro 5 (Advanced) written examination paper.
NOTE : This rating is roughly equivalent to the BHPA Advanced Pilot Rating.
Para Pro 5 (Advanced) pilots are encouraged to work towards and apply for the FAI Eagle Award badges.
Experience Requirements: Intermediate Pilots wishing to apply for a Safe Pro 5 (Advanced) Pilot Rating must:
- Log a minimum of one hundred hours airtime
- Successfully complete at least five cross country flights, in various lift, of no less than five miles, or seven kilometres, each. Ridge soaring flights or flying along the same ridge, only, is not acceptable. (i.e. A run down the Blackstairs Mts. does not count!)
Exam Study Guide
Flight Theory & Instruments
Intermediate Pilot Exam Notes - Flight Theory and Instruments
CONTENTS:
- HOW LIFT IS PRODUCED
- Bernoulli and Venturi
- The Airfoil
- Angle of Attack
- Vortices
- AERONAUTICAL TERMS
- AERODYNAMICS OF A STALL
- STABILITY
- HANG GLIDER
- Pitch Stability
- Roll stability
- Yaw stability
- PARAGLIDER
- Pendulum stability
- Washout
- HANG GLIDER
- GLIDE ANGLE
- BALLAST
- FORCES ON A GLIDER
- DRAG
- Induced
- Parasitic
- Form drag
- Profile drag
- Interference drag
- TOTAL DRAG
- POLAR CURVES
- INSTRUMENTS
- ALTIMETERS
- Aneriod
- Electronic
- VARIOMETERS
- Electronic
- Flask
- Total energy
- Airmass (Netto)
- Speed to fly
- MacReady ring
- ALTIMETERS
- REFERENCES AND ACKNOWLEDGEMENTS
HOW LIFT IS PRODUCED
Bernoulli and Venturi
Lift is the major force that keeps us up in the air. It is produced by the wing moving through the air. In simple terms, Bernoulli’s law explains the lift, or upward force that permits airfoils to generate lift. The upper surface of a wing is more curved than the lower; air, travelling across the wing is made to travel faster and thus its pressure on the upper surface is reduced. This effect is seen in such areas as car carburettors or atomisers and makes use of a thing called the venturi effect.
The structure of the wing best demonstrates the principle of airfoil lift. In the 19th century a scientist named Bernoulli discovered that the internal pressure of a fluid (liquid or gas) reduces the faster the fluid flows. If you take a tube, and make the tube smaller in diameter in the middle, this creates a "necked-down" section called a venturi. When air is forced through the pipe, as much air has to come out the exit as goes in the tube entrance. The air in the venturi section must travel faster to get through. Bernoulli found that the pressure at the venturi section was less than at the two ends of the pipe. This is because the speed of the air through the venturi section is travelling faster than at the ends of the tube.
The Airfoil
The shape of a wing is called an AIRFOIL. Usually the bottom of the wing is flat or nearly flat. The top of the wing is curved, with the wing being thicker at the front edge of the wing, and tapering to a thin surface at the trailing edge of the wing.
When a wing airfoil surface passes through the atmosphere, the atoms of the air on the top of the airfoil (shown as minus) must travel faster than their cousins (shown as plus) passing along the lower and flatter surface. This occurs because the distance the air must pass over the curved top of the wing is longer than the distance along the lower surface. According to the Bernoulli Principle, the pressure above the wing is less than the pressure of air below it. Consequently, a pressure difference between the lower and upper surfaces exist. This results in LIFT being produced. The amount of lift depends on the airfoil design and the speed of the air over its surfaces.
Lift is a force generated at 90’ to the angle of the undisturbed airflow or relative wind
About 2/3rds of the lift results from the reduced pressure above the wing and 1/3rd from the increased pressure below it. The majority of the lift being in the front top surface of the wing. The lift is proportional to the angle at which the airflow meets the wind, the angle of attack.
The chord of a wing is an imaginary line from the leading edge to the trailing edge of the wing. The term is used in the definition of "Angle of Incidence" and "Angle of Attack"
Angle Of Attack
As the aircraft passes through the air it traverses a particular line of flight. The air passing by the surfaces of the aircraft in the opposite direction of travel is called the Relative Wind. The angle which the wing 1chord makes with this Relative Wind is called Angle of Attack. An increase in angle of attack increases both lift and drag. If the angle becomes to great, it will pass the Critical Angle of Attack. This is a point where the airflow over the wing becomes so disturbed that the wing ceases to produce lift. The wing then enters into a Stalled condition.
The amount of lift generated is proportional to the speed at which the airflow meets the wing and sufficient lift can be generated by high airspeeds with low angle of attack or low airspeed with high angle of attack.
Vortices
When the wing is started flying it produces a starting vortex which is left spinning gently behind as you fly off. The standing tubular vortex your wing carries wherever it flies is created as the wing flies through the air molecules. At the wing tips, there is no wing to keep the vortex captive so it rolls of the tips in two spinning tubes which extend outwards and downwards. These vortices are a source of drag which will be described later. Keeping the standing vortex trapped at high angles of attack is the problem, because the molecules are accelerated more fiercely and the vortex becomes unstable. Finally at the stalling angle, the vortex leaves the wing and forms the end vortex which dies away. The following which is taken from a back issue of skywings may explain it a little better.
Unfortunately the process of generation of lift cannot be accomplished without the generation of drag and the measure of the efficiency of the wing can be expressed as the lift generated (good) against the drag generated (bad). Dividing the lift by the drag gives a number, the bigger the number for us, the better.
AERONAUTICAL TERMS
Some useful aeronautical terms.
Angle of attack - The measured angle between the airfoil chord and the direction of the undisturbed air in front of the airfoil.
Aspect ratio - This is the ratio of the span of the wing divided by the chord. The glider wings are usually high aspect ratio wings - the reason for this is that for a given amount of lift produced by a wing, the lower aspect ratio wing disturbs a shorter width of air, but it must deflect it more vigorously. As a result, the tip area experiences larger losses in the form of swirls at the tip.
SPAN SPAN2
ASPECT_ RATIO = --------- = --------
CHORD AREA
Centre of Pressure - Even though the lift of an airfoil is distributed along its surface, the resultant force of all the lift forces can be considered to be at single point along the wing known as the Centre of Pressure. Centre of pressure can move depending on the angle of attack.
Centre of gravity - The resultant forces of all the weight can be considered to be at the centre of gravity. Centre of gravity can move by the point weight shifting. The C of G is where the aircraft would balance. It can also be called the centre of mass.
Chord - The straight line drawn from the furthest forward point on the airfoil to the furthest rearward point on the airfoil.
Dihedral - When you stand in front of an aircraft, looking toward the tail, the wings are usually higher at the wing tips than at the wing root (where the wing attaches to the fuselage). This upward angle from wing root to tip is called DIHEDRAL. On an aircraft with dihedral, when one wing drops, it will produce slightly greater lift than the other wing. The aircraft tends to return to a level status providing lateral stability to the aircraft.
Washout - A lowering of the angle of attack of the wing as it progresses from root to tip. Hang gliders have washout and the tips are held up by tip rods or other means.
Washin - An increase in the angle of attack from root to tip.
AERODYNAMICS OF A STALL
A stall occurs because of the air’s inability to make sudden changes in velocity. The air has mass. Therefore it wants to continue in its initial direction due to inertia.
Figure 4 - Stall effects
The air can no longer make sudden changes to flow smoothly over the upper surface. It breaks away at the rear and creates turbulence. The further the nose is raised, the more the break away point moves forward.
At the stall the drag increases and the lift decreases.
STABILITY
Stability is a tendency for a glider to return to normal level of flight after disturbance.
- Neutral - A glider is given a nudge and it stays where it is.
- Stable - A glider is given a nudge and it returns to its trim point.
- Unstable - A glider is given a nudge and it gets even worse.
For a glider this means that it must return to level flight after disturbances to the pitch, roll or yaw axes.
A stable glider near stall will want to speed up, a stable glider flat out will want to slow down. An unstable glider near stall will want to slow up and an unstable glider flat out will want to go faster. (Not a very nice glider to fly).
The standard airfoil, if the angle of attack is increased (i.e. near the stall) then the centre of pressure moves forward with increasing angle of attack. The C of P also moves to the back of the airfoil as the A of A decreases. This is not a stable situation.
Unfortunately, all airfoils have the unwanted trait of instability so we have to do something to overcome the problem. Stability is a fine line for the designer between an overly unstable glider which would be a handful to say the least to fly and an overly stable glider which would not turn or be a real pig to fly.
Hang Glider
Hang glider stability is accomplished by several methods.
Pitch Stability
Pitch stability is the stability in the lateral axis.
Reflex
Reflex is the upward curving of the rear of the wing and is most often carried out by luff lines attached from the kingpost to the trailing edge of the sail. Topless gliders have some internal bracing to keep the reflex trailing edge in place.
What the luff lines do is destroy the lift at high speed so that the nose of the aircraft wants to pull up and slow down.
Luff lines are out of play during normal flight. With a VG system, the lines have to be loosened as the sail is tightened or they kick in too soon. Thus some gliders (Kiss for example) have VG compensators for the luff lines.
Sweepback
If the lifting surfaces are designed so that the lifting surface behind the C of G lose lift quicker than those areas ahead of the C of G, then more lift will be forward at high speeds to pull the nose up and more lift at the rear to force the nose down at low speeds. In other words, if we pull on speed, the tips unload more than the centre and thus the Centre of pressure moves forward to pull the nose up. If we push out, the tips lift more and tend to move the C of P back to pull the nose down . This is accomplished by a mixture of sweepback and washout. Sweepback is the V-shape given to the plan view of the wing and puts the tips behind the C of G.
Washout
Washout is the change in twist from the root to the tip. Washout is in one direction and washin is in the other direction. Moving from root to tip,, washout decreases the A of A. All hang gliders have washout. This combines with the sweepback and gives static pitch stability to hang gliders. Another advantage of washout combined with sweepback is the effect in a stall. As the glider stalls, the tips are at a lower angle of attack than the nose, and they tend to keep flying longer than the nose. In a shallow stall, if the nose is stalled and the tips flying, then the glider keeps on an even keel and the nose dips to pick up speed. This effect also helps during landing as the glider is flared, the tips stall last and help stop a wing dropping.
Roll stability
Stability along the longitudinal axis.
Dihedral/Anhedral
Dihedral is an upward tilting of the wings.
If a roll occurs, the lower wing will produce more lift and the higher wing will produce less lift. This will tend to counteract the roll effect and thus introduce stability.
Although dihedral assists roll stability, slight anhedral gives instability to assist turns. The amount of anhedral used is slight and since the leading edge is supported by the flying wires at about mid distance, during flight, the outboard sections would bend up and produce a small amount of dihedral. The original Kiss used an anhedral airframe but a relatively loose sail which when loaded assumes a dihedral shape, outboard of the flying wires. This mix of anhedral and dihedral is called a cathedral wing with the cathedral area being the part outboard of the flying wires.
Yaw stability
Stability in the vertical axis.
Sweepback
Yaw stability on a hang glider comes mainly from sweepback. As the glider yaws, one leading edge will present a larger frontal surface to the wind and therefore the amount of drag generated by this wing will be greater, similarly, the other wing will present a smaller frontal surface to the wind and the drag will be less. This effect will create a turning moment about the vertical axis which will tend to bring the glider back on course.
Yaw stability may also be helped by the addition of winglets on some gliders.
Paraglider
Stability for a paraglider is not such an issue since a paraglider is not a tail-less aircraft as a hang glider is.
Pendulum stability
Most of the stability comes from the pendulum effect. The weight of the pilot is great compared to the weight of the canopy. The lift comes from the canopy and the weight from the pilot. This effect means it is extremely difficult to dislodge the pendulum stability that a paraglider has.
Roll stability and pitch stability come mainly from the pendulum effect.
Pitch stability can be influenced by the aerodynamic section used, some are more pitch stable than others. The curve of the glider (viewed from the front) also affects the roll stability due to the direction the lift is acting in relation to the position of the pilot.
Washout
Paragliders can have a twist built in the wing as do hang gliders. Standard paragliders are built for stability and washin is often built in the tips. This has the effect of increasing the lift in this part of the wing and hence increase the tension in the sail across the span i.e. makes the wing feel more solid. It also tends to reduce the tendency for tip deflations. Advanced paragliders can have neutral or washout built in to increase the performance. This can also make the tips “loose” in turbulence.
GLIDE ANGLE
Glide angle is not actually an angle but expressed as a ratio i.e. 8 to 1 glide angle. This means for every 8 units of length travelled across the ground, then 1 unit of length is descended. Obviously the greater the number, the better the glide angle.
Glide angle also is the same is the LD ration (lift/drag). Glide angle is increased by increasing the lift (difficult) or reducing the drag (easier). Since as we will see on the section on drag, drag increases with airspeed, then at high speed, the reduction of drag is an important factor in glider performance. Sailplanes go to great lengths to reduce drag and have very smooth GRP surfaces and streamlining to reduce drag. For hang gliders, the reduction of drag has given rise to the topless glider. For paragliders, the number of lines has been reduced together with the introduction of microlines. The relationship between sink rate, glide ratio and flying speed is now explained. Some reference may be needed to the section titled “Forces on a glider”.
In the diagrams, L is the lift vector and is always at 90’ to the direction of flight vector V. D is drag and is always opposite to V. L and D combine to give the resultant R which is opposite and equal to the weight W.
V has been split into 2 vectors, Vh (horizontal speed) and Vv (vertical speed). For clarity the airfoil has been removed.
The diagram shows the forces acting on an airfoil. The wing is moving right to left in the direction of the arrow V. V is opposite in direction to the wind hitting the wing. The wing is flying with little drag.
The direction of travel is further down the wing is pointed in more of a dive.
The wing is travelling further in a dive. Note that the drag is always opposite to the travel and that the resultant R is the sum of the lift and the drag and counterbalances the weight.
The sink rate can be identified with the component of velocity Vv. Vv To minimise the sink rate we must minimise Vv. The glide ratio is equal to Vh/Vv. This is simple the distance travelled divided by the distance fallen.
To maximise glide ratio we need to maximise Vh and minimise Vv.
By applying geometry rules we can find that the triangle of sides R,L and D (when D is shifted) is similar to the triangle defined by V, Vh and Vv.
Therefore L/D equals Vh/Vv which is of course the glide ratio.
BALLAST
Ballast is another name for additional weight carried by the pilot. All gliders are certified to fly within a certain weight range. At the top of the weight range, the behaviour of a glider is different if weighted at the low end. As mentioned before, the design of a glider is a compromise, increase performance in 1 area such as glide angle and another area may suffer, such as sink rate.
Ballast can be used to increase the weight of the aircraft and thus increase the "wing loading” (total payload weight (pilot+harness etc) divided by the surface area of the wing) on the glider. This means that the aircraft will fly faster down the glide slope. The sink rate is increased slightly but the max glide ratio is not affected. The top speed of the glider is increased which may be helpful if flying on strong days in a paraglider. Performance and general handling of the glider may be better when flying at a certain weight. Performance paragliders seem to benefit from being well weighted.
Remember if you intend to take ballast that can be jettisoned in flight, then ballast is only allowed in the form of water or fine sand. Also, remember never to exceed the design weights of your glider.
FORCES ON A GLIDER
Already touched on in an earlier section. There a 4 forces on the glider wing.
One difference between a powered wind such as a light aircraft and a glider wing. All flying objects without power get their energy from gravity. A glider converts some of its downward falling motion to forward motion shown as “V”. Once airspeed is established, the lifting forces build up to couple with the downward pull of gravity and lift the nose until equilibrium is reached.
The force of gravity is shown by “W”.
This is always balanced in steady flight by the sum of forces of lift “L” and drag “D” called the resultant “R”. If W is not balanced by R the glider will accelerate until both the lift and drag increase to a point of reinstating the equilibrium. i.e. if a take off run is too slow, the lift generated will not support the weight. The nose will dip and the glider pick up airspeed until enough lift is produced for the two to equalise. Hopefully this happens above ground.
The resultant force R always acts through the centre of pressure
The weight always acts through the centre of gravity.
Both the C of P and the C of G can move. The centre of pressure by changing the angle of attack and the centre of gravity by weight shifting. That’s how we can control the glider.
If a pilot pulls the bar in to gain speed, the lift decreases. This means that R is reduced and there the wing picks up speed until the lift is increased (and the drag) to match the weight.
The flying speed varies only with angle of attack for a given glider and flying weight.
DRAG
Drag is result of us flying in a fluid (air) and cannot be totally removed. There are several types of drag. Refer to Figure 9 - Total drag.
Induced
Induced drag is a by product of lift. The majority of induced is formed at the wingtips where the wingtip vortices are shed, as the area of low pressure above the wing and the high pressure below the wing slide off the wingtip and mix in a swirling trailing tip vortex.
The important thing is that induced drag reduced with angle of attack and hence airspeed. High aspect ratio wings reduce induced drag. Winglets on 747’s reduce induced drag at slow speed. Condors have extended feathers at the tips that do funny things with tip vortices and they all help reduce induced drag.
Parasitic
Parasitic drag is a friction drag and varies with the square of the speed. i.e. doubling your speed quadruples your parasitic drag. There are a few types of parasitic drag
Form drag
Caused by solid non-lifting items in the airstream. i.e. You, wires, kingpost etc.
Profile drag
Caused by the lifting surfaces. It consists of skin friction drag and leading edge form drag. The more streamlined the airfoil shape, the less profile drag.
Interference drag
Interference drag is when the airflow around the aircraft interfere with each other. Not a big problem on hang gliders or paragliders.
Total drag
Add all the drag components up to get the total drag. Different parts of the drag are important at different speeds. We can plot a graph as below.
The best glide occurs at minimum drag.
POLAR CURVES
Polar curves are graphical representations of the performance of our wing. They can be used to determine what speed we should fly at for any given conditions to maximise our glide over the ground. They are drawn with airspeed along the x axis and sink rate along the y axis.
The curve is a series of plots taken for a particular aircraft and for a series of airspeeds. At each airspeed the sink rate is taken and then it is possible to plot the polar curve. The sharp increase in sink rate at slow speeds is the point just before the stall.
Min sink is the highest point on the graph.
Max glide in still air is obtained by drawing a tangent to the graph from the origin . The point of intersection can be read off in sink rate and airspeed. The graph can also be used in head winds and tailwinds and rising and sinking air for the same purpose.
If we want to find out the speed to fly at in say a head wind of say 10mph. Instead of taking our tangent line from the origin, we take it from the 10mph point on the headwind side of the line. The tangent touches the polar at a faster speed which can be read off at point A. Similarly if we are flying in a tailwind, the polar will tell us to fly slower.
Figure 11 - Polar curve with headwind
Figure 12 - Polar curve with thermal
The final example shows a combination of flying an a 8mph headwind and a 150fpm sink area. The fast speed is shown at A
Figure 13 - Polar curve with both a headwind and thermal
=========================================================
From the above we can deduce that we should speed up in sink and a headwind
and slow down in thermals and a tailwind.
=======================================================================
INSTRUMENTS
We all fly with instruments. The altimeter measures height above a reference. The variometer measures our rate of change of altitude. The Air speed indicator measures airspeed. The 2 or 3 are usually combined in 1 instrument.
Altimeters
Altimeters measure height against a reference. Most commonly they use the fact that air pressure reduces by 1mb for every 30ft we rise and the relationship is linear (at the levels we fly at). There are other means of measuring height (satellite navigation) but these are not as accurate for the amount of money we can afford.
Aneriod
The aneroid altimeter uses a small sealed capsule containing air. As the instrument goes up, the air pressure in the capsule increases and by the design of the capsule, it is allowed to expand in a certain direction. This expansion is coupled by mechanical linkages to a dial display. The dial can be adjusted by a knob to read say height above sea level (QNH) or height above the field (QFE). This altimeter is mechanical.
Electronic
The majority of altimeters are electronic. They use semiconductor materials to sense changes in air pressure. Once you have the sensor, then its relatively straightforward to design electronics around it to convert the signal to a display. Modern altimeters also have the ability to have temperature compensation and data links built in.
Variometers
Variometers also sense changes in air pressure, but in a different way. They display the rate of change of air pressure outside rather than the absolute air pressure. The faster the ascent, the faster the rate of change of air pressure.
Electronic
Once the pressure sensor is in the box of electronics, it can also be used to measure and display the rate of change of pressure.
Flask
A flask vario is more commonly found in sailplanes and is an early from of vario. It looks like below:
As the instrument rises, the air in the flask will try and rush out of the openings since it will be at a higher pressure than the surroundings. As it rushes past the pith balls, one is forced upwards in the draft. The same thing happens in descent but the other ball is forced upwards.
Total energy
False readings may be obtained by flying fast and converting this speed to height. This may be converted into an imaginary thermal as the vario senses the increase in height. This is called a “stick thermal” It is of course not a real thermal. Varios which take the airspeed into account when determining the air around are called total energy varios. Very important for sailplanes which have a lot of energy retention and can convert speed to a lot of height.
The solution to avoid false readings is to use a total energy vario. By total energy we mean the sum of the kinetic (moving) and potential (due to height) energy. They work since the dynamic pressure of the air increases with the square of the velocity. Our sink rate increases pretty much with the square of our flying speed. In we have some device to measure the airs dynamic pressure, and tie this into our varios detection circuits, we can compensate for the altitude change due to glider speed. The metal tube on LR3 varios is the total energy probe.
Airmass(Netto)
As we fly at different speeds, our glider has different sink rates. We have to mentally compensate for this when working out what the air is doing. Netto varios work this out for us and always indicate the airs “net” lift or sink.
Speed to fly
Speed to fly is a complicated area of theory, covered recently by Gordon Rigg in an excellent article in Skywings. Suffice to say for the exam, speed to fly is a theory that for every condition of lift/sink and headwind/tailwind, in order to achieve the greatest distance over the ground, then there is one specific airspeed to fly at. It can also be used to determine the speed to fly at to achieve the fasted speed to goal. It’s a lecture in itself.
MacReady ring
A MacReady ring is a scale which fits round the vario display (assume its an old type vario with analogue display). The ring rotates round the vario display and as you fly at a certain vario reading. The MacReady ring tells you to fly at a certain speed. As you fly at this speed, the vario needle will no doubt move to a new reading and you have to readjust your speed. Do this until the vario needle points to the speed you are flying at and that’s it. Modern varios have facilities to link to GPS’s to work out your ground speed compared with your air speed and work out headwind/ tailwind components. The vario readings are all fed into the electronics which displays the speed to fly.
REFERENCES AND ACKNOWLEDGEMENTS
- Performance Flying by Dennis Pagen
- Paragliding flight by Dennis Pagen
- BHGA Pilot handbook
- Touching cloudbase by Ian Currer
Meteorology
Intermediate Pilot Exam Notes - Meteorology
CONTENTS:
- BUYS BALLOTS’S LAW
- FRONTS
- WARM FRONT
- Cross section
- WARM SECTOR
- COLD FRONT
- Cross section
- OCCLUDED FRONT
- Cross section
- WARM FRONT
- CLOUDS
- HIGH
- MEDIUM
- LOW
- FORMATION OF CLOUDS
- Convection
- Orographic uplift
- Cloud formed by turbulence and mixing
- Cloud formed by widespread lifting
- CLOUDBASE
- CONVECTION
- THERMAL PRODUCTION
- THE “REAL ATMOSPHERE”
- Inversion
- STABILITY AND INSTABILITY
- CUMULUS CLOUD FORMATION
- METEOROLOGICAL TERMS
- PRESSURE SYSTEMS
- LOW PRESSURE
- Formation of a low
- Associated weather
- HIGH PRESSURE
- Associated weather
- LOW PRESSURE
- WINDS AND THINGS
- VALLEY WINDS
- SEA BREEZES
- SEA BREEZE FRONTS
- WAVE LIFT
- FOG
- Radiation fog
- Advection fog
- Sea fog
- Hill Fog
- SYNOPTIC CHART
- CLOUDS AND RAIN
- ACKNOWLEDGEMENTS
BUYS BALLOT'S LAW
Very Simply, this states that in the Northern Hemisphere, if you stand with your back to the wind, the area of low pressure is on your left hand side. In the Southern Hemisphere, it is on your right hand side.
FRONTS
A front is a boundary between 2 different air masses of different density. Air masses don’t like to mix and the boundary between the two (the front) is where active weather can take place. Fronts are very common in depressions. I recommend Derek Piggots book “Understanding Flying Weather” to see the birth and life of a depression. Although not in the syllabus, a depression starts along the jet stream. The jet stream is an area of very fast moving air circulating West to east (in the Northern Hemisphere). The jet stream is like the traffic on a motorway, it sometimes bunches and sometimes eases off. Where it bunches, the high altitude pressure increases causing a downward flow of air - the start of an anticyclone (high pressure system) where it eases, it speeds up and due to Bernoulli’s principle, it causes a reduction in pressure - the start of a low. More details later. As the low pressure “winds up”, it twists the air masses and causes the characteristic low with fronts. The formation of a low with its frontal systems will be explained in the section on Pressure systems.
For this section, the typical low with frontal zones is shown below:
Figure 1 Low pressure system
Since the vast majority of low pressure systems move from West to East, the first frontal system to make its effect on the UK will be the warm front.
A warm front is where warm air overrides cooler air. Shown on maps as:
Figure 2 Warm front symbol
A warm front is where an area of warm air catches up with an area of cold air and overrides it (due to the less density). The normal warm front has a shallow slope with the air rising gradually over many hundreds of miles. This lifting produces the gradually thickening layer of cloud which eventually results in the steady rain near the frontal zone.
Cross section
The cross section of a warm front is shown below:
Figure 3 Warm front cross-section
The normal warm front has a shallow slope as the warm airmass overrides the cooler air. The slope is typically 1:50 to 1:400 and the frontal zone effect may extend 500 miles ahead of the frontal transition on the ground. This means that the forthcoming warm front may be seen in advance. High cloud such as Cirrus and cirro stratus will shut off the solar activity usually cutting off thermals. Then the cloudbase will lower with Alto stratus and Nimbo stratus giving drizzle as the front approaches. Rain possibly beginning 5-10 hrs before the passage of the front. The winds may strengthen and back (winds change direction ANTI CLOCKWISE.) At the front, the rain eases off, the wind will veer 50 degrees or so and the temperature and humidity will rise. We are now in the warm sector.
Warm Sector
The warm sector is the area between the leading warm front and its following cold front. The air is warm and produces the right conditions for wave flights. Following the warm sector is the cold front.
Figure 3a - Warm Sector
A cold front is where colder denser air undercuts warmer air. It is shown on maps as below:
Figure 4 Cold front symbol
When a mass of cold air meets a mass of warm air, it tries to undercut it. The cold air pushes under the warm air acting as a wedge. The slope of the wedge is steep, about 1 in 30 to 1 in 100. They move quickly about 20mph. and strong updraughts can be produced about 100 miles ahead of a front.
Cross section
The cross section is shown below:
Figure 5 Cold front cross-section
The warm sector gets its name from the fact that the cold front usually follows a warm front. See the section on pressure systems later.
The cold front is often dramatic with heavy showers. At the front, the temperatures drop, the air is drier and the wind veers (winds change direction CLOCKWISE) often to the North West direction. Behind the cold front, there is often a complete clearance of cloud but this very quickly gives way to high Cumulus and shower clouds. Good days for soaring are found after cold fronts have gone through and the pressure starts to rise again. The rising pressure raises cloudbase, and the cooler air means a ready supply of thermals.
For information and probably not likely for the exam. Bradbury indicates the 2 types of cold front - the katafront and the anafront. You should know about katabatic winds (flow downslope and are KATASTROPHIC for taking off and Anabatic winds which flow upslope).
The same thing happens at fronts where the frontal zone approaches, the wind upstream of the front can flow down the slope (katafront) or up the front (anafront).
Figure 6 Anafront
Above shows an anafront. The air preceding the cold front is rising above the frontal zone and creating very active clouds such as Cunimb’s. The frontal zone is very steep. The Katafront is shown below:
Figure 7 Katafront
The air preceding the frontal zone is flowing down slope and dampens the activity.
Occluded Front
An occluded front is where a cold front has caught up with a warm front. It is shown on maps as below:
Figure 8 Occluded front symbol
As the depression deepens, the cold front with its weather systems catches up with the warm front and the 2 types of weather become mixed.
Cross section
Figure 9 Occluded front cross-section
The occlusions can have some of the characteristics of a warm front or a cold front but on a milder scale. The weather produced by a occlusion can range from that of the 2 frontal types to prolonged periods of rain.
CLOUDS
The amount of moisture that air can hold depends on its temperature, with warmer air holding more air than cold.
Cloud form whenever the air is cooled to a point where the temperature to which a particular mass of air must be cooled for saturation to occur is called the Dew Point.
Sometimes the amount of moisture in the air is measured as relative humidity. The Relative humidity (RH) is:
RH = amount of water vapour in the air / amount of water vapour required to saturate it (at that temperature). This is expressed as a percentage.
i.e. dry air has a RH of 0%. Air about to form cloud has a RH of nearly 100%.
Clouds are classified as high, medium or low according to the height of their base. There are 10 basic types. See the diagram below:
Figure 10 Cloud types
High
Altitude range is 15 to 40,000ft. These are composed mainly of ice crystals and are known as cirro types.
- 1. Cirrus (Ci) is the wispy high cloud
- 2. Cirrocumulus (Cc) is a high cloud with a cell pattern.
- 3. Cirro stratus (Cs) is the thin veil type cloud
Medium
Altitude range is 6,500 to 23,000ft. The are known as alto clouds.
- 4. Alto cumulus (Ac) is a medium layer with a cell pattern. In an unstable atmosphere, Ac may produce virga or precipitation which does not reach the ground.
- 5. Alto stratus (As) is an even layer of cloud at medium height
Low
Altitude range is 0 to 8,000ft.
- 6. Nimbostratus (Ns) is a deep layer of rain cloud.
- 7. Strato cumulus (Sc) is a greyish/whitish cloud consisting of rolls or cells. The weather is light rain, drizzle or snow.
- 8. Stratus (St) is a low lying layer of cloud. May give drizzle
- 9. Cumulus (Cu) these are individual heaped clouds with a cauliflower top. Large Cu may give showers.
- 10. Cumulonimbus (Cb) are heavy shower clouds or thunderstorm clouds. The tops of these can reach past 30,000ft. Weather is rain, hail and heavy showers.
There are other clouds which are not listed above:
- Castellanus such as Altocumulus castellanus are excellent indicators (especially in the Alps) or upper atmosphere instability. These in the morning may indicate Cbs later in the day.
- Lenticular - These lens shaped clouds indicate the presence of wave activity and may be stacked, one above the other in certain cases. They show the top of the wave.
Formation of clouds
Clouds may be formed in several ways but all rely on the fact that the air is cooled to a point where it cannot hold its moisture.
Convection
The action of the sun will heat the ground. This in turn heats the air layer closest to the ground which will become warmer and thus less dense. It may rise and is it does so, it will cool. Eventually it may reach a point where its temperature reaches the dew point and the water vapour condenses to form cloud. Cumulus cloud is formed in this way.
Orographic uplift
Air may be flowing along and be forced to rise upwards when it reaches an obstruction such as a mountain chain. As it rises it will cool and it may be cooled past its dewpoint temperature. It will condense and orographic cloud will form on the windward side of hills.
Cloud formed by turbulence and mixing
As air flows over the surface of the earth, frictional effects cause variations in local wind strengths. Eddies are set up which cause the lower level air to mix. The more friction and the stringer the wind, the more mixing. As the air mixes, it may rise and if it cools enough, layer cloud above the friction area may result.
Figure 11 Clouds formed by turbulence
Cloud formed by widespread lifting
When 2 air masses meet, such as in a warm front, then great areas of air may flow over the cooler air and rise as it does so. High stratus cloud will result. See the section on fronts for more details.
Cloudbase
Cloudbase is the term given to indicate the height that the base of the cloud is ASL. It can be calculated from the dew point and the ground temperature.
i.e. Temp of 23 deg with dew point of 12 give a cloudbase of 4,400ft.
CONVECTION
One of the main topics in the Met course is to describe thermal growth and activity. By understanding this and the reasons for thermals, we can also understand many other parts of the atmosphere and cover such things as, Inversions, Stability and instability, Cb’s and cloud base.
With increasing altitude, the following decrease
- Temperature
- Pressure
- Density
As altitude rises, temperature generally decreases. This change in temperature with height is called the Lapse Rate.
The standard atmospheric rate of change has been defined by Scientists as the standard atmosphere and it has the following conditions:
Environmental Lapse rate (ELR) = 2’C/1000ft
Pressure change = 1mb per 30ft
The ELR can be represented on a graph but it is important to know that this is only a “measuring stick”. the real ELR may be a lot different.
Figure 12 Standard ELR
Thermal production
As the sun heats the ground, the ground in turn heats up a layer of air close to the ground. A bubble of warm air starts to form and is less dense than the surrounds since it is warmer. It may unstick from the ground and start to rise through the atmosphere. As the density and the pressure of the surrounding air decreases with altitude, the thermal will expand adiabatically (a process where no heat is lost or gained from the surroundings) and hence it cools. As air expands it cools. The thermal will cool at a known rate and its rate of cooling or lapse rate is the Dry Adiabatic Lapse rate or DALR. The word dry refers to the moisture in the thermal being retained as vapour and not condensing.
Dry adiabatic lapse rate (DALR) = 3’C / 1000ft
If we plot the course of a thermal leaving the ground with a temperature of 25’C, after 5,000ft the thermal has cooled to 10’C and has reached equilibrium with the surroundings. i.e. it stops rising.
Figure 13 ELR and DALR
The “Real Atmosphere”
In real life, the atmospheric conditions do not look exactly like the above. Overlaying warm fronts could mean warm air aloft. High pressure systems could warm the upper air due to compression of the upper air. Air close to the ground may be chilled on a clear night. When the air temperature does not fall with height, but rises, then this condition is called an inversion.
Inversion
An inversion is a warming of the air at height increases and can be in 2 types.
- High level - caused by a high pressure system warming the upper air
- Low level - caused by air chilled in contact with a cold ground which has lost heat by convection
These may be shown on a lapse rate graph as before:
Figure 14 Inversions
Inversions may puts a lid on our max. altitude possible by thermals.
Stability and instability
We often hear the terms stability and instability with the latter being our preference. Using the lapse rate graphs we can understand the terms. Thermals will rise to a point where they are in equilibrium with the surrounding. If the ELR is such that the equilibrium is never reached, then the thermals will keep rising indefinitely. i.e. the 2 lines diverge. This is unstable.
If the 2 lines converge, then the day will be relatively stable.
Unstable ELR > DALR (3’C/1000ft)
Stable ELR < DALR (3’C/1000ft)
Cumulus cloud formation
A thermal rising will may contain moisture. As they rise, they cool and may rise to a point where they reach the dew point. At that, the water vapour condenses to form cloud. We have reached cloudbase.
As the water condenses, something else happens. Latent heat will be released. The latent heat is the extra energy required when a substance changes state, i.e. from water to water vapour, extra heat is required to effect the change of state. This extra heat is stored and released when the water vapour condenses back into a liquid. This in effect gives a “boost” to the thermal and acts as a source of heat, hence the lapse rate in clouds will be lower than in a dry thermal. The lapse rate in clouds is known as the Saturated (or moist) adiabatic lapse rate) SALR.
This has a range of values depending on the moisture content but is typically:
Saturated Adiabatic lapse rate (SALR) 1.1 - 2.8’C/1000ft
The thermal in a cloud will keep rising until an inversion is reached or the cloud runs out of moisture. This determines the cloud top height. If the airmass is very unstable and there is a constant supply of warm moist air and powerful thermal development, then the situation may turn be right for the formation of Cunimbs.
The trigger temp is the temperature on the ground at and beyond which thermals will rise past the inversion layer.
Different ground types absorb solar energy better than others as far as thermal production is caused. The thermal is caused by the sun heating the ground (not the air itself), then the ground will warm up the bottom layer of the air to warm a “warm bubble” which wants to rise up. Dark surfaces such as ploughed fields, areas of dark tarmac are better than lakes etc, for the production of a thermal. The exam will expect you to be able to plot the life of a thermal.
Lets look at a typical thermal growth on a lapse rate graph.
Figure 15 Convective cloud formation
On the day above, clouds have formed with the cloudbase at dew point and the cloud tops limited by a lack of moisture, or if there is an abundant supply of moisture, then the inversion above. Note that if the dew point had been lower, then the thermal would have risen as a blue thermal (no cloud) and could have possible been cut off lower. The SALR has a steeper gradient and thus is very unstable.
Knowledge of ELR, DALR and SALR and the effect on thermals together with dewpoint and the effect on clouds is required for the exam (hint). One other term to know is the Isothermal layer. This is an area of the atmosphere where the temperature does not change with height.
Lets take an example question.
A table showing air temperature against height is below. Dewpoint at ground is 14’C and decreases by 0.5’C per 1,000ft. SALR is 1.5’C per 1,000ft. Describe what happens.
Figure 16 Sample question ELR
If the air is very moist and the SALR is less than 1.5, then the possibility exists of the moist air rising at a steeper gradient and therefore escaping the effects of the inversion and high Cu’s or Cb’s may result.
METEOROLOGICAL TERMS
- Adiabatic - A thermodynamic process where no heat leaves or enters the system
- Advection - transfer of air mass properties by motion.
- Air mass - huge body of air in which horizontal changes in temp are small.
- Anabatic wind - Wind blowing upslope.
- Anafront - a front where warm air is ascending over cold air.
- Anticyclone - area of high pressure
- Backing - winds changes direction anti clockwise
- Convection - transfer of heat by motion of a substantial volume of air.
- Dew point - temperature at which air must be cooled to become saturated with water vapour.
- DALR - Dry Adiabatic lapse rate, about 3’C per 1000ft
- ELR - Environmental lapse rate. This is 2’C per 1000ft for the ISA.
- Inversion - a layer of air where the temperature increases with height.
- Iso - equal
- Iso therm - a line of constant temperature
- Katabatic wind - wind that flows downslope
- Katafront - a front where the warm air sinks down above the frontal surface which will eventually weaken and destroy the front.
- SALR - Saturated adiabatic lapse rate, about 1.5’C per 1000ft
- Stability - the tendency of the atmosphere to stay as it is. Unstable air, where the ELR is greater than the DALR means that a thermal will diverge from the atmospheric temperature lapse rate.
- Standard atmosphere (ISA) - has a ELR of 2’C per 1000ft
- Super adiabatic lapse rate - A lapse rate greater than 3’C per 1000ft
- Tephigram - a aerological diagram with the x.y co-ordinates Temperature and entropy. The diagram is used for plotting the values of temp and humidity at specific pressure levels obtained from upper air soundings.
- Veering - wind which changes direction clockwise.
PRESSURE SYSTEMS
As the earth is covered by atmosphere, this atmosphere exerts a pressure on us all. This pressure is measured in Bars and the pressure is about 1 bar. A bar is too large for any detail so it is divided into millibars and represented as 1000mb. The unit hectopascal may also be used and is the same as a millibar.
Low pressure
Low pressure systems are the source of a great deal of active weather in the UK. The majority of our weather systems form out in the Atlantic along the frontal boundary between the arctic airmass and the warmer tropical maritime air to the south.
Formation of a low
When 2 masses of air of different density lie side by side they induce a strong current of air to flow along the cold side of the front at very high altitudes. This jet is formed due the extreme pressure differences at altitude causing a close bunching if high altitude isobars. The jet is several miles deep and travels at speeds of about 100 to 200 mph. Disturbances cause the jet to snake around and results in areas of divergence and convergence.
Figure 19 Formation of low pressure
The area of convergence will cause downward flowing air. This results in an increase in pressure at ground level and a downward movement of air. Similarly, at the area of divergence, the surface pressure will fall and an area of low pressure will start to form.
1. The jet stream divergence will cause an area of low pressure to start to form along the frontal zone.
The low pressure will draw the 2 edges of the front together, effectively increasing the temperature and pressure differentials thus aiding the formation of the low.
Figure 20 Formation of low (1)
As the air rises it is given a twist by the Coriolis force. This coriolis force is exactly the same as the force which causes the water going down the plughole to spin. The force is zero at the equator and is the reason behind low pressure spinning anti-clockwise in the Northern hemisphere and the reverse in the southern hemisphere.
Figure 21 Formation of low (2)
Figure 22 Formation of low (3)
As the air in continually extracted at the top of the system, so the surface pressure drops increasing the circulation and the winds speeds. The anticlockwise circulation is gradually spread up to the upper levels and the upward movement of ward moist air will eventually cause condensation and the release of latent heat to further power the process.
The cold front moves faster than the warm front and catches it up. With an occlusion forming where the cold front has caught the warm front The spiralling air in the depression further twists the fronts round to give the classic “hook” shape of the depression.
Associated weather
The weather associated with a depression is usually poor. Associated frontal systems can bring rain and cloud. A depression may arrive at our shores at any stage of development and it may or may not have frontal systems. It may have a weak warm front and an active cold front or vice versa. A system with an active cold and an active warm front is very rare. It may have a decaying occlusion, but the general outlook is worsening weather.
High pressure
High pressure systems are formed in a similar way to lows, and areas of high pressure can mean areas where there aren’t any lows. In an anticyclone, the air is descending and being warmed by compression as it descends. Since warmer air can hold more moisture, then clouds are less willing to form.
This results in clear skies at night and little tendency for any over-development.
Associated weather
In summer, a high pressure system always means an improvement with lighter winds and less cloud. In winter a high pressure can mean persistent fog and low cloud or it may lead to clear skies, depending on the source and track of the airmass at low level.
High pressures move slowly and can lead to the production of inversions due to the warmed upper air. The atmosphere becomes stable (cooler air at the bottom) and leads to poor thermal production. Inversions can lead to poor air quality with pollen, dust etc. being trapped in the inversion layer. Highs can persist for days and then they become blocking highs which will often divert the path of a low pressure system around the UK.
WINDS AND THINGS
This section is concerned with the assorted bits and pieces which don’t fit anywhere else.
Valley winds
Mountains tend to form a barrier to winds at low level. The air tends to flow up and down the valley Imagine a valley with hills on both sides. In the morning, the effect of the sun is to heat up the mountains first since the valley will be cooler and still in shade:
Figure 23 Valley winds (morning)
As time reaches midday, both slopes are in sun and powerful anabatic winds are produced up both slopes
Figure 24 Valley winds (midday)
This causes the winds at low level to rush up the valley to replace the air flowing up the slopes. The valley wind flows into the valley in the afternoon and evening. As the sun goes down and the slopes start to cool off with the altitude, katabatic winds flow downslope.
Figure 25 Valley winds (evening)
In the evening, as the wind turns katabatic on the slopes, it can rush down the hill and force upwards, over the valley centre, great areas of lifting air. This is the evening restitution lift or magic lift and can give easy soaring for quite a while in huge areas of lifting air. As time goes on, the valley winds will slow down from travelling up the valley and then turn to the evening and night time valley winds where they flow down the valley.
Sea breezes
In summer, the land tends to warm up quickly, but the sea remains much at the same temperature. Thermal activity may result in a general lessening of the pressure over the land with the results that air flows in from the sea to replace the lifting air over the land. This is a sea breeze. It can kill convection and shut off any thermals near the coast so avoid sea breezes.
In winter, the sea temperatures are relatively stable and warmer than the cold land. The sea breeze is reversed and sometimes leads to Cumulus formation over the sea as cold land air is blown over the sea, to have its base warmed by the sea to produce unstable conditions over water.
Sea breeze fronts
When a sea breeze sets up, it could be in opposition to the normal wind. In this case, a sea breeze front may be formed. This front works its way inland and can penetrate as far inland as Sheffield. This is characterised by a hanging curtain of cloud and a stepped cloud base. This is due to the moist sea air having a lower cloudbase. It needs a fairly light wind, warm day and some instability to set up the sea breeze front. The evidence of a front may also be apparent even with no surface geostrophic wind (wind set up parallel to isobars. The “normal” wind.) The cool moist air flowing inland will meet the warm dry land airmass and this is also a cold front of sorts.
Figure 26 Sea breeze front
Sea breeze fronts rarely occur between October and April.
Wave lift
Another type of lift is the wave lift. The requirements for wave are:
- Wind to be in a fairly constant direction
- Wind to be increasing with height
- A shallow unstable layer with a stable layer above it works well
- An obstruction upwind such as a range of hills is needed to start the waves off
Fog
Fog is cloud on ground level and there are several types
Radiation fog
Conditions suitable for radiation fog are;
- A cloudless night, allowing the earth to cool and thereby causing the air in contact with it to become cool
- Moist air that requires little cooling to reach dew point
- Light winds to reduce mixing
Advection fog
A warm moist air mass flowing across a significant colder surface will be cooled from below. If its temperature is reduced to the dew point, then fog will form. Advection fog can persist in stronger winds than radiation fog.
Figure 27 Advection fog
Sea fog
Sea fog is advection fog and may be caused by:
- An air flow off a warm land moving over a cold sea.
- Warm tropical air moving over a cold ocean or meting a cold air mass
Hill Fog
Hill fog is caused when moist air is uplifted over a hill and cools as it is forced upwards. As it cools it condenses to form hill fog or orographic cloud.
SYNOPTIC CHART
The exam requires you to understand the symbols, isobars, pressure systems and associated weather that you could expect when checking a synoptic chart.
A typical chart is shown below.
Figure 28 Synoptic chart
Pick out features such as:
- Areas of high pressure and low pressure
- Isobars
- Frontal systems
Remember about the Coriolis force and its effect on both high and low pressure systems The Coriolis force means that in the Northern Hemisphere, the geostrophic wind circulates anticlockwise round a low and clockwise round a anticlyclone (high pressure). The winds rotate in the same direction as the isobars, but this is only true for winds at altitude (over about 1,000ft). The effect of the ground causes friction which slows down the surface winds.
Figure 29 Rotation around pressure systems
Figure 30 Surface wind around a low
The surface wind around a low pressure points to the low pressure by about 30’ over land due to the friction. This effect is less over the sea where the friction is less.
The surface wind around a high pressure points away from the high pressure area by again about 30’ due to the friction. The wind speed also decreases in both cases
Figure 31 Surface wind around a high
Think of the affects on the atmosphere such as wind speed and direction, temperature, precipitation, cloud cover and visibility.
By the way, the above chart was taken in Jan 96 when we were in the depths of the icy winter. Winds were from the East (Siberia) and as the base of the winds warmed up slightly over the North Sea, this resulted in instability with snow showers over the eastern coast and hills. The high pressure fended off any frontal system and allowed the temperatures to plummet during the evenings. Blocking highs like this can (and did) last for several days. The chart was taken as the cold weather was dying off. The frontal systems in the Atlantic did eventually make their way in and the winds switched direction to the West or South West raising the temperatures and bringing the normal weather of showers, winds etc.
CLOUDS AND RAIN
Rain or precipitation can consist of different types of precipitation. It may be rain, fine drizzle, snow or hail.
Continuous rain or snow is associated with Nimbo stratus and alto stratus clouds and intermittent rain or snow with altostratus or strato cumulus.
Rain and snow showers are associated with cumiliform clouds such as cumulonimbus, cumulus and alto cumulus, with the very heavy showers coming from the cumulonimbus’s
Fine drizzle and snow is associated with stratus and strato cumulus.
REFERENCES AND ACKNOWLEDGEMENTS
- Understanding flying weather - Derek Piggott.
- Air pilots manual volume 2.
- Meteorology and flight - Tom Bradbury.
- Instant weather forecasting - Alan Watts.
Air Law
Intermediate Pilot Exam Notes - Airlaw
[Yet to be updated to include the new Air Navigation Order]
CONTENTS:
- IRISH AVIATION LAW DOCUMENTS AND PROMULGATION METHODS
- THE POWER OF THE IRISH AVIATION AUTHORITY TO MAKE ORDERS
- THE RELATIONSHIP BETWEEN IAA REGULATORY REQUIREMENTS AND THE REQUIREMENTS OF OTHER BODIES
- GLIDER RADIOS
- Airband radio
- 2m Amateur radio
- The Phonetic Alphabet
- AIRSPACE CLASSIFICATIONS
- IRISH MILITARY AIRSPACE
- Restricted Airspace (EIR)
- Prohibited Airspace (EIP)
- Dangerous Airspace (EID)
- Military Operating Areas (MOA)
- Military Frequencies
- SUMMARY OF UTILISED AIRSPACE IN IRELAND
- AERONAUTICAL CHARTS
- AERODROME TRAFFIC ZONES (ATZ)
- ALTIMETER SETTINGS
- QNH - Questionable Nautical Height
- QFE - Questionable Field Elevation
- QNE
- FLIGHT LEVEL
- RULES OF THE AIR AND COLLISION AVOIDANCE
- VMC and VFR
- COMMON AERONAUTICAL ABBREVIATIONS AND INITIALS
Irish aviation law documents and promulgation methods
The Irish Aviation Authority Act, 1993, as amended, provides for the establishment of the Irish Aviation Authority, to provide certain services in relation to civil aviation, to define its functions and to provide for the conferral on it of certain functions of the Minister for Transport under the Air Navigation and Transport Acts, 1936 to 1988, and the Air Navigation (EUROCONTROL) Acts, 1963 to 1983. The IAA, through their website www.iaa.ie, publish the following information for aviators:
- The Integrated Aeronautical Information Package (IAIP) comprises:
- The current Aeronautical Information Publication (AIP)
- AIP Supplements
- Aeronautical Information Circulars (AIC).
- Notices to Airmen (NOTAM) - These contain information on any aeronautical facility, hazard etc. which might be of use to pilots. They are available to be read on-line at www.iaa.ie.
The Power of Irish Aviation Authority to make Orders
The Irish Aviation Authority (IAA) is a commercial state-sponsored company which was established on 1 January 1994 to provide air navigation services in Irish-controlled airspace, and to regulate safety standards within the Irish civil aviation industry. Under Section 58 (1) of the Irish Aviation Authority Act 1993 the Authority has the power to make orders and regulations as necessary or expedient for the purpose of giving effect to the Annexes to the Chicago Convention.
The Relationship between IAA Regulatory Requirements and the Requirements of Other Bodies
The Irish Aviation Authority specifies its requirements for licences, certificates, approvals, permits and matters of that nature. These equirements must be met in order to obtain and/or continue to exercise the privileges of the licence or other form of approval issued by the Authority. In many cases other legislation, including legislation which is not specifically directed at aviation, also applies to the activity and Government departments or other statutory bodies have responsibilities in the area. It is the duty of the regulated party to ensure that it acquaints itself with all requirements affecting its activities and to ensure that it complies with those requirements. The Authority wishes to stress that any licence or other decision of the Irish Aviation Authority does not remove the obligation on regulated persons to comply with other legal requirements relating to the activity.
Glider radios
There are 2 types commonly in use in hang gliding and paragliding:
- Airband radio - The airband radio is AM and has 720 channels, of which gliders are allocated 5. The airband radio must be type approved. This means that the maker must have submitted a radio of the same type to the IAA who have then taken it to bits and said its OK to use. Without taking a RT test, glider pilots are limited to 5 frequencies (129.9, 129.975, 130.1, 130.125, 130.4 and the International Distress frequency of 121.5). The British Gliding Association recommend that certain frequencies be allocated certain tasks such as ground to air etc. Radios used by glider pilots in this way must be type approved and lockable to those frequencies only. Recently the UK's CAA approved the allocation of 118.675 for exclusively our use. This is Ok for our use anywhere in the UK FIR up to 5,000ft asl. Approval for the radio type must be sought and a licence held for the radio.
- 2m Amateur radio - In Ireland Radio Amateurs have use of many frequency bands including 144 to 146 MHz on FM. All of this band is in use. A lot of pilots use the frequencies just below this range for flying use - 143.750MHz to 143.950MHz. It is illegal to use a 2m set from the air, whether you are a licensed amateur or not.
- The Phonetic Alphabet - The commonly used radio-code for letter abbreviations:
|
|
|
|
|
|
|
|
|
|
|
|
|
|
|
|
|
|
|
|
|
|
|
|
|
|
|
Airspace Classifications
- Class A - IFR flights only are permitted. All flights are subject to air traffic control and are separated from each other
Airspace Classification A comprises:- Shannon Oceanic Transition Area (SOTA) and Northern Oceanic Transition Area (NOTA) at and above FL55 to Unlimited
- Class B - Not utilised in Ireland
- Class C - IFR and VFR flights are permitted. All flights are subjest to air traffic control service and IFR flights are separated from other IFR flights and from VFR flights. VFR flights are separated from IFR flights and receive traffic information in respect of other VFR flights
Airspace Classification C comprises:- Shannon UTA FL245 - FL660
- Shannon CTA at and below FL245
- Dublin CTA at and below FL245
- CTRs Cork, Dublin and Shannon
- CTRs Connaught, Donegal, Galway, Kerry, Sligo and Waterford during the promulgated hours of activation
- Class D - Not utilised in Ireland
- Class E - Not utilised in Ireland
- Class F - Not utilised in Ireland
- Class G - IFR and VFR flights are permitted, and receive flight information if requested
Airspace Classification G comprises:- all airspace within Shannon FIR, excluding airspace classified C as described above
Irish Military Airspace
A restricted area is defined airspace in which flight is restricted according to certain conditions. Penetration possible by civil aircraft provided prior permission has been obtained from, and subject to compliance with any conditions and instructions issued by Military ATS, Casement Aerodrome. Aircraft must be operational Mode C transponder equipped.
- EIR15 - Within Dublin CTR Class C airspace
- Winter Period - Mon-Fri 0900-1700UTC
- Summer Period - Mon-Fri 0800-1600UTC
- At other times as notified to Dublin and Shannon ATC
- See AIP ENR 5.1-1
- EIR16 - Within Dublin CTR Class C airspace
- Winter Period - Mon-Fri 0900-1700UTC
- Summer Period - Mon-Fri 0800-1600UTC
- At other times as notified to Dublin and Shannon ATC
- See AIP ENR 5.1-1
- EIR22 - Circle 1NM radius 542932N 0081440W
- Operational 24hrs/day
- See AIP ENR 5.1-2
- EIR23 - Within Dublin CTR Class C airspace
- Circle 1NM radius 531800N 0062652W
- Operational 24hrs/day
- See AIP ENR 5.1-2
A prohibited area is defined airspace in which flight is prohibited. These include military camps, prisons and certain other facilities. In Ireland they usually extend from the ground up to 5000ft AMSL. EIPs are deliniated by a solid red boundary filled with thin red hatch lines.
These include military weapons ranges for guns, missiles and rockets. Entry into some danger areas is prohibited by military bye-law. A crossing service may be available but will involve the use of radio. A danger area is defined airspace in which activities dangerous to flight may occur. They are shown as a dashed red outline filled with thin red hatch lines.
- MOA3
- Winter Period - Mon-Fri 0900-1700UTC
- Summer Period - Mon-Fri 0800-1600UTC
- At other times as notified to Dublin and Shannon ATC
-
See AIP ENR 5.2-1
- MOA4 - as above.
- MOA5 - as above.
- Baldonnell Tower - 123.5MHz
Summary of Utilised Airspace in Ireland
| Class |
Type |
Separation Provided |
Service provided |
VMC visibility and distance from cloud minima |
Speed Limitations |
Radio
Communication
requirement
|
Subject to ATC clearance |
| A | IFR only |
All aircraft |
Air traffic control service |
Not applicable | N/A |
Continuous two-way |
YES |
| C | IFR |
All |
Air traffic control service |
Not applicable |
N/A |
Continuous two-way |
YES |
| VFR | VFR from IFR |
Air traffic control service for separation from IFR. Traffic information and traffic avoidance advice on request. |
At and above FL100: 8km visibility, 1500m horozontal and 1000ft vertical from cloud. Below FL100: 5km visibility, 1500m horozontal and 1000ft vertical from cloud. |
250kts IAS below FL100 |
Continuous two-way |
YES | |
| G | IFR | Not provided |
Flight information service if requested | Not applicable |
N/A |
Not Required |
Not Required |
| VFR | Not provided |
Flight information service if requested. |
At and above FL100: 8km visibility, 1500m horozontal and 1000ft vertical from cloud. Below FL100: 5km visibility, 1500m horozontal and 1000ft vertical from cloud. OR At and below 3000ft AMSL or 1000ft above terrain (whichever is greater): 5km (3km for flight at IAS 140kts or less) visibility. Clear of cloud, in sight of surface. Helicopters may be flown below 300m (1000ft) above terrain in flight visibility not less than 1000m if manoeuvred at a speed which would give the pilot in command adequate opportunity to observe other traffic or obstacles in good time to avoid collision. |
250kts IAS below FL100 |
Not Required |
Not required |
Aeronautical Charts
- 1:500,000 VFR Chart - The Irish Aviation Authority visual flight rules (VFR) aeronautical chart has been produced in both laminate and paper versions. The chart is intended for VFR navigation within the boundaries of the Shannon FIR. This chart is most suitable for planning hang gliding and paragliding flights in Ireland.
- 1:250,000 VFR Chart - The Irish Aviation Authority visual flight rules (VFR) aeronautical charts have been produced in both laminate and paper versions. The purchaser can buy either version but will get four charts on two sheets of paper covering the Shannon FIR in one plastic wallet. The chart is intended for VFR navigation within the boundaries of the Shannon FIR
Make sure you know the symbols and the airspace markings on this map
Aerodrome Traffic Zones (ATZ)
The airspace surrounding most aerodromes listed in Ireland is designated an ATZ. The dimensions are:
- from ground level to 2,000ft above aerodrome level
- within the area bounded by a circle of radius:
- 2nm, where the length of the longest runway is 1850m or less
- 2.5nm where the length of the longest runway is 1850m or longer
Figure 1 - ATZ Dimensions
The number alongside the symbol on the chart shows the aerodrome height above sea level.
Flying inside the ATZ requires radio contact with the responsible party and so in the main we cannot go there, unless we have our RT pass and a radio and know what to do.
Altimeter settings
Vertical distance (altitude) is hard to measure accurately. Most altimeters work by measuring the change in air pressure as you gain height. Pressure reduces about 1 millibar (1mb) per 30ft of height gained. At higher levels this relationship is not linear but good enough for us. Note that millibar is the same as hectopascal. Hectopascal might be used in more metricated countries - it means the same - but in Ireland, the millibar is used for the moment.
There are 3 ways of height representation.
- QNH - Questionable Nautical Height - QNH is given by Air traffic control as a pressure reading that the pilot sets on his expensive altimeter. The altimeter then displays his height above Sea level. The ATC will broadcast the regional QNH to aircraft to take account of pressure changes caused by atmospheric conditions to make sure the pilot does not crash into a hill unexpectedly.
- Imagine a deep low over the UK and the pilot is flying from the outside of the low (where the pressure is higher) to the inside of the low (where the pressure is lowest), If the pilot keeps to the same displayed altitude on his altimeter as he flies into the low what happens. As the pressure outside the aircraft falls, the altimeter will show a higher altitude (lower pressure = higher altitude) and so the pilot will descend the keep the displayed altitude the same. The pilot does not know he is descending since he is watching his altimeter and its reading the same. Unfortunately for him, he is descending!!
- So QNH is a pressure setting given by ATC and is the current pressure reading at Mean Sea Level.
- QFE - Questionable Field Elevation - If our pilot is landing at a small airfield with not many facilities, then QNH might not be accurate enough for him to land without hitting some houses maybe. The pilot needs the pressure setting for the airfield. ATC might say "QNH is 1015mb, QFE is 1000mb". I.e. the air pressure at this airfield is 1000mb. So by setting the altimeter to this, we get the height above the airfield.
- So QFE is a pressure setting by ATC and is the current pressure reading at the airfield now.
- In general hang gliding and paragliding, when we say QNH it is the height above sea level, and when we say QFE is it the height above "the field", maybe takeoff or landing - its up to you
- QNE - This one is the strange one. QNE refers to the height indicated on a pressure altimeter when the aircraft is on the ground at an aerodrome and the pressure setting of 1013.2mb (remember this) is set on the sub scale. i.e. it is the height of the 1013.2mb pressure level. Note that this is the only reference which is a height, the others are pressure settings.
Flight level
Shown on charts as FL something. FL65 is flight level 65 which is 6,500ft... but what is it for?
Airlines flying everywhere would have to keep adjusting their altimeter every 10 minutes to make sure that the height they should be at is the height that are indeed at and not at the height displayed by their altimeter which has drifted out of alignment in the last 5 minutes due to rapidly changing air pressure outside the cabin. Since all aircraft, once they are high enough can forget about the ground - its more important to keep away from each other so they all use the same pressure setting on their altimeters. The International Standard Atmosphere (ISA) sea level pressure of 1013.2mb is used and then vertical position is called flight level.
As an aircraft climbs away from the airport, once past the transition altitude, he retunes his altimeter to 1013.2mb and so everyone else who does the same can keep accurate relative distances apart. In the UK the transition altitude is 3,000ft.
It is worth remembering that flight levels go up in regions of high pressure and the reverse in regions of low pressure. Thus in a deep depression, Buxton (first stop after Shining Tor) which is in Daventry Control Area, Class A airspace starts at flight level 45, could have its airspace lower limit reduced to 3,500 ft - worth knowing.
Rules of the Aid and Collision Avoidance
The rules of the air as they pertain to hang gliding and paragliding in Ireland are set out in detail on the IHPA website Flight Safety page:
All pilots are required to know these collision avoidance rules by heart and to always fly with consideration for other pilots in the air.
VMC and VFR
VMC = Visual Meteorological flying conditions. This refers to the amount of visual observance it is possible to keep. In these conditions we fly under VFR or Visual Flight Rules.
A quick note on these. In Ireland an aircraft shall always be flown in accordance with either VFR or IFR. When you are in VMC you are flying under VFR (Commercial pilots may elect to still fly IFR even if there is sufficient VMC) and responsible for avoiding collisions with other aircraft using the principle of see and avoid. You are flying in IMC when you cannot comply with any of the VMC cases.
Note the different types of visibility that are in different types of airspace. Refer to the Summary of Utilised Airspace in Ireland above. You have to know what conditions are like when you enter a specific type of airspace, usually the nearer to "A" the airspace, the more stringent the visual conditions become. The most stringent is full VMC which is 8km flight visibility, 1500m horizontal/1000ft vertical clearance from cloud. This is in class A airspace that we might be allowed to enter (i.e. crossing airways). The least VMC or VFR minima is 1500m flight visibility, clear of cloud and in sight of the surface, which is at under 3,000ft in class F and G airspace.
Common abbreviations and initials
ACAS - Airborne Collision Avoidance System
AGL - Above ground Level
AIAA - Area of Intense Aerial Activity
AIP - Aeronautical Information Publication
AIS -Aeronautical Information Service
AMSL - Above mean Sea Level
ASR - Altimeter setting Region
ATC - Air traffic Control
ATM - Air Traffic Management
ATS - Air Traffic Services
ATZ - Aerodrome Traffic Zone
CTA - Control Area
CTR - Control Zone
DME - Distance Measuring Equipment
EATMP - European Air Traffic Management Programme
FIR - Flight Information Region
FL - Flight Level
FUA - Flexible Use of Airspace
GA - General Aviation
GAT - General Air Traffic
GBAS - Ground Based Augmentation System
GNSS - Global Navigation Satellite System
HF - High Frequency
HIRTA - High Intensity Radio Transmission Area
IAA - Irish Aviation Authority
IAC - Irish Air Corps
ICAO - International Civil Aviation Organisation
IFR - Instrument Flight Rules
ILS - Instrument Landing System
IMC - Instrument Meteorological conditions
ITU - International Telecommunications Union
LFS - Low Flying Services including SAR
MATZ - Military Air traffic Zone
NDB - Non-Directional Beacon
OAT - Operational Air Traffic
QFE - Query Field Elevation
QNH - Query Nautical Height
SAR - Search and Rescue
SRA - Special Rules Area
SRZ - Special Rules Zone
TMA - Terminal Manoeuvring Area
TRA - Temporary Restriction Area
UHF - Ultra High Frequency
UIR - Upper Information Region
VHF - Very High Frequency
VFR - Visual Flight Rules
VMC - Visual meteorological Conditions
Operating Limitations
Safe Pro 5 (Advanced) Operating Limitations
Having been awarded a Safe Pro 5 (Advanced) pilot rating, the pilot is advised to observe the following operating limitations until such time as they have gained many more hours of flying experience in diverse conditions. It can not be over emphasised that every pilot must remain mindful of their personal skill and experience limitations and that they should set and not be tempted to fly in stronger conditions than they (and their equipment) can safely handle.
- Responsible pilots never fly alone. If they are not flying with other pilots, then they stay in contact with someone on the ground who can look out for them and retrieve them should they fly cross country or get into difficulties.
- Pilots training towards Safe Pro 5 must fly with a 2m-band two-way radio.
- Pilots training towards Safe Pro 5 must fly with, and know how to use, an appropriately sized reserve parachute on all flights.
- Pilots training towards or applying for a Safe Pro 5 rating must be current members of the IHPA and have a current insurance policy.
- Pilots training towards Safe Pro 5 are advised not to fly in winds exceeding 20mph (32Km/h) blowing within 45° of straight up the hill.
- All flights must be written up in the Pilot’s Log Book.
Skill Endorsements
Introduction
Hang Gliding Skill Endorsements - Introduction
Note: There are no endorsement courses for converting between main disciplines (HG<>PG). The following conversion information relates only to alternative launch method courses.
Where a candidate has less than the required entry qualification the endorsement course cannot be attempted. A suitably qualified instructor always has the option of putting the candidate through the training programme leading to a ‘rating’ in the desired launch method.
Skill Endorsements
Pilot rating endorsements are available to those pilots who gain additional skills by attending relevant conversion courses in their particular flight discipline. Pilot rating endorsements are available for the following disciplines:
- Hill: All pilots are required to be able to hill-launch in Ireland. Pilots who trained using a winch or aerotow system are required to complete a Hill Conversion Course before they may fly in Ireland.
- Winch: This endorsement is available to all pilots.
- Tow: This endorsement is available to Hill and Aerotow pilots.
- Aerotow: This endorsement is available to Hill and Tow pilots.
- Tandem: This endorsement is available to all pilots.
- Power (PHG): This endorsement is available to all pilots holding a Safe Pro 3 (Novice) pilot rating or above.
For details of Conversion Courses see the 'Training & Endorsements' section of the IHPA Operations Manual.
Hill Launch
Hang Gliding Skill Endorsements - Hill
Hang Glider (Tow) to Hang Glider (Hill) - The ‘Hill Endorsement’
- Course run by: Instructor (Hill)
- Pilot Entry Qualification: Safe Pro 3 (Tow)
- General: Suitably sized wheels must be fitted to the glider base bar. Avoid nil wind conditions for first flights.
Course Syllabus:
- At training slope master ground handling and take-off techniques.
- Ridge soaring theory. To include site assessment (including hazards, turbulence and rotor), weather assessment (including wind gradient on slope face, the effects of the wind being slightly off the hill, venturi effect), flight planning (including the importance of making all turns away from the hill, building in options). Rules of the air / ridge protocols and the need to keep a good look out.
- At large easy ridge site master higher launches, ridge soaring practical, top landings, flying with others.
- Pass an assessment by the supervising Instructor (Hill).
Endorsement Issue Procedure
On successful completion of the endorsement course the pilot must send a completed Endorsement Registration Form to the IHPA Training & Flight Safety Officer.
Providing the procedure above has been followed, the pilot may act in the role of Endorsed pilot whilst awaiting an updated membership card from the IHPA.
Tow Launch
Hang Gliding Skill Endorsements - Tow
Hang Gliding (Hill or Aerotow) to Hang Gliding (Tow) - The ‘Tow Endorsement’
- Course run by: A Senior Tow Coach or Instructor (Tow).
- Pilot Entry Qualification: Safe Pro 3 (Hill) + 10 hours soaring on hang gliders. or Safe Pro 3 (Aerotow) + signed off by an Aerotow Instructor as competent at foot take offs and landings.
- General: Suitably sized wheels must be fitted to the glider base bar. Avoid nil wind conditions for first flights.
Course Syllabus:
- Basic training in environment / technique / equipment differences / signals.
- The correct rigging and attachment of tow bridles.
- Glider launch and control on tow.
- Release and emergency drills.
- 10 flights (min) including at least 2 launches to over 600ft and at least 4 launches using a ‘chest release’.
Pass an assessment by the supervising Instructor (Tow) or Senior Tow Coach.
Endorsement Issue Procedure
On successful completion of the endorsement course the pilot must send a completed Endorsement Registration Form to the IHPA Training & Flight Safety Officer.
Providing the procedure above has been followed, the pilot may act in the role of Endorsed pilot whilst awaiting an updated membership card from the IHPA.
Tandem Pilot
Tandem Pilot Endorsements
The term ‘Tandem Pilot’ means any pilot duly qualified and endorsed to carry another person on a tandem paraglider or hang glider designed and duly certified for the purpose.
- Tandem Pilot Paraglider (Tow)
- Tandem Pilot Paraglider (Hill)
- Tandem Pilot Hang Glider (Tow)
- Tandem Pilot Hang Glider (Hill)
- Tandem Pilot Hang Glider (Aerotow)
- Operate safely in accordance with the Tandem Pilot Operational Requirements (below) and the tandem flying advice given in the IHPA Operating Procedures for Tandem Pilots.
- Improve their own skills and knowledge in various ways, including studying the IHPA Operations Manual, the BHPA Pilot Handbook, articles in Skywings (especially the Safety Matters Page) and Incident Summaries and Safety Notices.
Pre-requisites: Before commencing the ‘Tandem Pilot Training Programme’ the potential Tandem Pilot must first:
- Be a member of the IHPA
- Be aged 18 years or over
- Hold Safe Pro 4 / Para Pro 4 (Intermediate) pilot rating (or endorsement) minimum in the relevant discipline
- Have logged (solo) 100 flying hours (Hill) or 250 flights (Tow).
- Have completed 20 launches in the preceding 12 months, using the launch method and in the discipline for which the Tandem Endorsement is being sought
- Produce a letter of support or recommendation from his Club Chairman or CFI.
These training requirements may be carried out in any order subject to experience. Under training a potential Tandem Pilot must complete the appropriate training detailed below flying only with an endorsed Tandem Pilot:
- Care and briefing of the passenger
- Complete a minimum of two launches in the passenger role and position
- Complete a minimum of ten launches as Pilot in Charge
- Demonstrate a high standard of ground handling and inflation ability
- Care and briefing of the passenger
- Complete a minimum of one launch in the passenger role and position
- Wheeled / stand up landings
- Complete a minimum of four launches as Pilot in Charge
Plus for Tow or Aerotow launch - Setting up and checking bridles and equipment
- Trolley/wheeled launches
- Be familiar with the Operating Procedures for Tandem Pilots.
After completing training the potential Tandem Pilot must pass an Assessment.
Where a Tandem Pilot endorsement is held in one discipline (e.g. PG Tow), if a tandem pilot endorsement extension is sought for an alternative launch method (e.g. PG Hill) then pre-requisite requiring 100 hours / 250 flights / 50 flights may be reduced by 50% at the discretion of the CFI supervising the conversion. All other requirements must be met in full, the Training Programme must be completed in full in each case, and the candidate must pass an Assessment. There is no reduction for tandem pilots extending from paragliding to hang gliding or vice versa.
A Tandem Pilot must comply with the following requirements:
To carry another person for ‘valuable consideration’ the endorsed Tandem Pilot must also be a qualified Instructor or Air Experience Instructor (Tandem), must operate within a registered IHPA School, and the tandem flight must have a clear training content. Tandem Pilots who are not endorsed Instructors/AEI’s are not permitted to accept ‘valuable consideration’. (These rules are framed carefully to comply with the BHPA’s interpretation of UK Air law.)
All persons flown within a school must be registered as members of the IHPA. For reasons of practicality a dispensation exists whereby persons flown outside a school are encouraged to take out IHPA membership, but this is not mandatory. - IAA may require ALL passengers to be 'Day Members' of the IHPA, requiring them to fill in the membership form and sign the waiver BEFORE flying. No fee need be paid but the AEI will need to return the completed forms to the Training & Flight Safety Officer for permanent record.
Outside a school AEI’s and Instructor’s may not teach. However, if the AEI or Instructor is also an Endorsed Tandem Pilot then, when outside the school they may tandem fly solely in accordance with the role and responsibilities of an Endorsed Tandem Pilot. Persons flown by them outside a school are encouraged to take out IHPA membership, but this is not mandatory. [must be an Annual Member or a Day Member?] However, in the event of a claim for injury being brought against the tandem pilot by a non-member passenger, it will be the burden of the tandem pilot to prove that the flight in question was in no way connected to the school. Use of school equipment, sites and participation of a student at the school would amount to such a connection. As above, valuable consideration cannot be accepted for dual flights outside school.
Passenger Age Limits
There is no upper age limit but the general health and fitness of the person must be taken into consideration.
Tandem Pilots have a legal responsibility to give their passenger a pre-flight safety briefing. This should be part of the normal passenger briefing – see the Operating Procedures for Tandem Pilots.
Power Pilot (PHG)
Hang Gliding Skill Endorsements - PHG
Powered Hang Gliding (PHG) is only available as a Skill Endorsement to an existing Safe Pro 3 (Novice) pilot rating.
The IAA is in the process of developing a licencing system for the operation of Paramotors and Powered Hang Gliders but, until this has been finalised, the IAA require all FLPA pilots to apply for an Exemption (to the licencing system). The current rules for applying for an Exemption are summarised below. However, until the details of the FLPA Licence is finalised, pilots wishing to fly with a power unit should contact the IAA directly to confirm the requirements of the Exemption and their obligations.
The main rules governing Paramotoring in Ireland are summarised here:
1. Pilots must hold a valid Class 2 medical at the time of any flight.
2. All Flights must be conducted in daylight Visual Meteorological Conditions (VMC) under Visual Flight Rules (VFR) and in Class “G” airspace below 5,000ft above Mean Sea Level (AMSL).
3. No flight may be made at any height over:
a. Any town, City or built-up area.
b. Any area of commercial, residential or recreational use.
c. Any open air assembly of persons, whether gathered in connection with an event of public entertainment or otherwise.
4. No passenger may be carried on any flight. (unless instructor)
5. No flight shall be made for hire or reward or for any valuable consideration.
6. The pilot shall maintain a record of all flights made under this exemption in a suitable log book.
7. The pilots log book and Exemption shall be made available within a reasonable period to:
a. An authorised Officer of the Authority.
b. A member of the Garda Siochana.
c. An officer of the Customs and Excise.
8. Any accident involving substantial injury or death of any person or substantial damage to the equipment being used for flying shall be reported in writing to the Authority, irrespective of any liability to report the same information to the Air Accident Unit of the Department of Transport.
9. Any flight made under the exemption shall be in compliance with the requirements of the airworthiness Standards Department of the Authority.
10. The exemption shall only be valid while the insurance cover is active.
11. The current exemptions are valid for one year only.
These rules may soon be amended when a license system is put in place.
Paraliding
Para Pro 1 & 2
Syllabus
Para Pro 2 (Elementary) Hill and Tow Training Syllabus
Para Pro 2 (Elementary) Hill Training Syllabus
Introduction
It is important that all schools should cover all aspects of this syllabus during the Para Pro 2 (Elementary) course.
Theory:
- Introduction to the paraglider - using a paraglider, name its parts and explain its aerodynamic qualities.
- Inspecting the equipment - explain the difference between Daily Inspections and Pre-Flight Checks; what to look for in each.
- Basic principles of flight - how an aerofoil creates lift; application to an inflatable wing; angle of attack and the stall; lift and drag; the importance of airspeed; how a paraglider turns; pendulum stability.
- Brief introduction to air flow over hills; venturi effect; wind gradient and shear; air turbulence - causes and effects on paragliding flight.
- The relationship between wind speed, airspeed and ground speed.
- Brief introduction to Air Law - the need for Air Law; Rules of the Air; Collision avoidance.
- Brief explanation of the sport, the IHPA and the Pilot Training and Rating Scheme.
- Introduction to flight planning - site suitability; take-off point selection; landing point selection - what to look for in each.
- Approaches and landings - avoiding low/late turns; assessing drift; obstacle avoidance; PLF v 'standup' decisions.
Practical:
- PLF practice.
- Helmet and harness fitting - adjustments.
- Pre-flight checks - riser position; suspension line check; steering control check.
- Simulation exercises - inflation; steering control; cell reflation; finding the stall point; nodding dog technique v. Inflate and launch the paraglider.
- Basic techniques - launch and in flight control; airspeed control; slow flight control and appreciation; landings and landing point selection.
NOTE : The first flights should be low level, straight ahead flights to allow the student to master the take-off and landing techniques. - Turns - stable 90° left and right.
- Continually demonstrate good airmanship.
Para Pro 2 (Elementary) Tow Training Syllabus
Introduction
It is important that all schools should cover all aspects of this syllabus during the Para Pro 2 (Elementary) course.
Theory:
- Introduction to the paraglider - using a paraglider, name its parts and explain its aerodynamic qualities.
- Inspecting the equipment - explain the difference between Daily Inspections and Pre-Flight Checks; what to look for in each.
- Basic principles of flight - how an aerofoil creates lift; application to an inflatable wing; angle of attack and the stall; lift and drag; the importance of airspeed; how a paraglider turns; pendulum stability.
- Brief introduction to wind gradient and shear; air turbulence - causes and effects on paragliding flight.
- The relationship between wind speed, airspeed, ground speed.
- Basic Air Law - the need for Air Law; Rules of the Air; Collision avoidance; the Law and tow launching; conduct on an 'airfield'.
- Brief explanation of the sport, the IHPA and the Pilot Training and Rating Scheme.
- Introduction to flight planning - site selection; course on tow; release point selection; rale of turn; landing point selection.
- Approaches and landings - avoiding low/late turns; assessing drift; obstacle avoidance; PLF v "standup' decisions.
- PLF practice.
Practical:
- Help to inflate and launch the paraglider; wing tipping, tensiometer reading, vehicle look-out.
- Helmet and harness fitting - adjustments.
- Pre-flight checks - riser position; suspension line check; steering control check; tow yoke and quick release functional check; tow line connected check.
- Simulation exercises - inflation; steering control; cell reflation; finding the stall point; nodding dog technique.
- Basic techniques - launch and in flight control; correcting for drift on tow; airspeed control after release; slow flight control and appreciation; landings and landing point selection.
NOTE: The first flights should be low level, straight ahead flights to allow the student to master the take-off and landing techniques. - Turns - stable 90° left and right.
Training Programme
Para Pro 2 (Elementary) Training Programme
This pilot training programme must be used in conjunction with the advice given in the IHPA Operations Manual - Operating Procedures (General) - Instruction in Schools.
Instructors should ensure that their tuition is informed by the following required texts:
- Touching Cloudbase by Ian Currer
- Understanding the Sky by Denis Pagen
- BHPA Pilot Handbook by Mark Dale
This is especially the case where little or no detail is offered in these notes. Instructors should ensure that all student pilots own a copy of both of these books before proceeding with any training.
General Notes:
Heights: Individual clubs may have particular sites where it is not always possible to safely conform to the heights indicated in the Student Training Record particularly in Phase 3 and perhaps in Phase 4. In such instances the CFI can authorise minor variation (maximum 25% increase); where this applies, instructors must ensure that the student has had sufficient additional training at the previous exercises in order to be well prepared and confident to undertake the higher flrghts.
Turns: Various exercises (14, 15, 22) introduce the student to turns and indicate the number of degrees to be turned. These should be interpreted as the change of track over the ground. (When completing soaring beats in a soarable breeze, track will change by 180° or so at the end of each beat, whilst the glider's heading may only change by say 90°. That is exactly what is intended: it would not be safe or desirable to have students change heading by 180° in such circumstances.)
Instructors should ensure that students are aware of the dangers and do not turn significantly away from into wind (absolute maximum 45°) when at or below normal final approach heights (say 100 Ieet.)
Interruptions in Training: It is not uncommon for students to have interruptions in their training. With gaps of just a week or two it is usual to have to take the student back a few stages to refresh. With gaps measured in months this refresher training needs to be much more comprehensive, and should include refreshing PLFs.
Oven-confident Students: Some students may wish to make high flights very quickly. Explaining that the flying is easy and that it is the launch and landing that needs practice can be a helpful tool to make sure they understand that it is for their benefit. Stick to the programme. (Watch out for students who are noisy and/or pushy, students advising others, students copying more advanced pilots nearby, and stop it happening.)
Under-confident Students: Look for quietness, hanging back, repeating simple tasks even when completed satisfactorily, constant chatter. Approach privately to check feelings.
Weather Limitations: The weather is either "Good" or "No good." Prevaricating about possibly “iffy" weather is poor for student confidence. Schools are recommended to use specific wind condition criteria: clearly there will be some variation depending on the site profile, but setting a specific limit and telling the students what it is beforehand is good practice.
Once it is clearly established that conditions are flyable, instructors may then explain that certain exercises or students may require smoother conditions (eg take-off) so that waiting for a smooth bit is not viewed as an instructor prepared to recklessly carry on in spite of clearly unsuitable weather. As it is vital that students learn to appreciate what is acceptable and what is not in terms of wind and weather, this wind checking should be a natural part of their training.
Practical Skill Requirements: Students must be able to demonstrate that they have mastered and can perform each practical skill, with repeatable accuracy, before the instructor may sign them off on a task. It is left to the instructor’s discretion as to how many times each task must be performed flawlessly before they are satisfied. Suffice it to say that this is the most important stage in a student’s progression, and it is here that good or bad habits are formed and where sloppy technique must be overcome before they can safely progress.
During this stage students will, in a safe environment, learn the basic skills of how to ground handle their wing, and run with it, while controlling it in both roll and pitch, and how to safely stop or abort a launch run by stalling the wing. When choosing a slope suitable for initial training, the instructor should give thought first to the size of the landing area, which should be free from obstructions, and then to the take off area, which should be suitable for running down with clear areas on either side and should not be too steep. Cliff launches are not to be used. In order to prioritise these two most important points, ground clearance may vary on first flights and the instructor should choose the most suitable sites available.
Para Pro 1 & 2 (Elementary)Training Exercises:
Phase 1:
Ground Training.Objective: The student should have a basic understanding of the sport and its risks, a basic understanding of the equipment and the training site environment, and understand how to avoid / minimise injury as a result of mishap. The student must also complete all the mandatory administration steps
1. Introductory Talk: This will usually take about 20 - 40 minutes, and should include the following topics. Stress that careful attention should be paid to the introductory information, in spite of eagerness to fly.
- Introductions - Instructor and any assistants - qualifications and experience.
- Student introductions.
- State that the prime concern is safety.
- Aim of the course: IHPA Para Pro 2 (Elementary) or Para Pro 3 (Novice) pilot rating. What this is / means - what the student pilot will be able to do on receiving this pilot rating, and what are the restrictions and obligations constraining their flying activities until they achieve a full Para Pro 3 (Novice) pilot rating.
- Asking about health, fitness and medical conditions. Presumably they have signed a booking form saying so.
- Progress:
- Tiredness or even slight injury increases risk. Stress that if anyone gets tired (or hurt) they must stop, and advise their instructor. No soldiering on.
- Under confidence: Students must tell their instructor if they are worried.Instructors will always take them back a step (or maybe do a tandem flight with them) or just wait till another day. Fear causes accidents and we do not want any!
- Over-confidence. Students must tell their instructor if they want to progress. Students should be advised that keenness is good, but that they MUST NOT add elements to any flight.Their instructor will progress them as fast as is safe, and no faster!
- Point out that those students who ask questions make the best progress. If at any stage they do not understand something fully then they must ASK. (How do they know they don’t understand? They may think they understand - instructors must use the question and answer technique.)
- Point out that it is not a race: flexible ending time depending on progress and fitness. There is no point burning out by 3pm! (Most accidents happen in the late afternoon to tired pilots.)
- Weather: Flying will stop if, in the instructor's judgement, conditions become too poor to fly safely. Sometimes weather conditions may be such that it is unsafe to fly new students even though more experienced pilots are still tn the air. Make it clear that the instructor's decision is final. There should be no arguing or pressure to change the decision.
- Personal Accident Insurance: Training in accordance with a well-structured training programme is very safe, but flying can never be 100% risk-free. There have been accidents and any sensible pilot should consider personal accident insurance.
- Advise on Clothing / Footwear.
- General rules:
- No booze.
- No drugs.
- No shouting at airborne pilots.
- No launching without specific permission from an instructor.
- School / site rules. e.g. Dogs / gates / smoking near gliders / litter / etc.
- Outline the programme for the day.
- Toilet facilities (or lack of.)
- Food and drink arrangements (especially on hot days.)
- Transport details.
- Remind students that THEY ARE HERE FOR FUN!
- Check that students have grasped the salient points of your introductory talk - summarise using questioning / answer-back technique.
- Give students a chance to ask questions. Restrict discussion to the topic in hand and make it clear that the training scheme will introduce new points appropriately - otherwise there students will suffer from information overload and no one remembers anything!
Daily Briefings for Continuation Students.
These should cover:
- Likely weather conditions for the day.
- Tasks / aims for the day (consult individual Student Training Record Sheets or the student's personal Training Record Book.)
- Any theory required?
- Any particular equipment considerations?
- First Aid kit and emergency procedures.
- Signal bats, Wind-socks and Radios.
IHPA Membership - suggestions for explaining this requirement:
- The IHPA (explain the acronym) is the National Governing Body for the sport in the Republic of Ireland.
- The IHPA is an Association of pilots who have come together with the common goal of guiding and protecting the development of the sport in this country by overseeing and continuing to develop safety standards.
- Membership is free for the first year as long as the correct forms and waivers are signed and returned.
- Membership offers a level of legal protection in the event of an accident - members can not sue other members unless gross negligence can be proved.
- The IHPA provides a recognised standard training scheme for both pilots and instructors that has been proven and refined over many years.
- The IHPA is the sole body in the Republic of Ireland authorised to issue internationally recognised Pilot Ratings.
- The IHPA registers and inspects schools (like this) for your safety, and checks that all instructors are qualified and competent.
- The IHPA negotiates and secures access to flying sites on privately owned land on the basis of its members being fully insured and having signed the IHPA waiver of Indemnity, which protects the landowner in the event of an accident.
- The IHPA maintains an excellent and informative website and forum, keeping members up to date.
Show and explain the Instructor's Student Training Record Sheet:
- It remains in the school as a record of progress. If the student moves to another school the CFI will need to make contact with the previous school to confirm where a student is up to!
- Explain about the need for signatures as each exercise is completed - that the instructor must sign both the Student's Training Record book and their own Instructor's Student Training Record sheet, which the student must also counter-sign.
- When signing off the previous exercise, get your students to read up on the next exercises as part of the preparation. If you simply push the record sheet under their nose for signing, then they will say so in court when you are trying to use the record sheet to prove that you were a good instructor, and it will have little or no value.
- Make sure they read the opening information and Phase Objective box - even read it to them to ensure this has been made clear!
It is YOUR RESPONSIBILITY to keep collecting the signatures on the Instructor's Student Training Record Sheets, but stress to the student that they should also be responsible for collecting your signature and making sure records are up to date throughout - including their own personal log which they must keep up to date. It may be useful at the end of the day to check both documents before the student leaves.
2. Site Assessment Briefing: The student must be taught the basic theory of airflow over the site and its accompanying turbulence; how the weather dictates the sport, and how important it is to be able to judge local conditions and assess the effects of change. They should understand the need to launch and land into wind and how this governs the choosing of a suitable site, launch point and landing area. Involve the students in wind speed and direction measurements, and general weather assessment. They should be able to identify hazards at take-off and around the landing area.
3. Introduction to Canopy and Equipment: The instructor will describe all parts of the wing and harness; explain their function and highlight the dangers of badly adjusted equipment. Point out the certification stickers and explaining them, as well as mentioning the weight range of the wing, explaining how wing loading effects the handling (in smooth and turbulent air) and performance. Ensure that everyone understands the Daily Inspection checks: Students must be taught the logical approach and, of course, what to check. The canopy is laid out, a given starting point selected, and as the instructor moves round the equipment the checks are defined in turn - ending back at the start point. Touching Cloudbase by Ian Currer details this procedure. Particular attention should be paid to those parts which may unscrew or disconnect (e.g. harness-to-riser connectors) and those where excessive wear or pressure may he expected (e.g. control lines/guides).
Any item that is fitted as a safety device (e.g. emergency parachute / speed-bar) must receive special attention. Include the basics of how an aerofoil creates lift. It may be useful to get out other canopies at this point for them to rig and check themselves.
Students must be able to demonstrate how to lay out a wing and harness ready for inspection and flight with due attention paid to the riser positions, suspension lines and steering controls.
4. Avoiding and Minimising Injury: "Safety techniques" includes collapsing the wing. Getting help / permission from the instructor to launch and practice PLFs. It is essential that each student understands the importance of the Parachute Landing Fall; how and when to use them, and feels that they have reached a fair degree of competence at PLFs. When teaching PLFs be aware that most people will not be attired for rolling in mud, so either use crash mats indoors or consider using some sort of tarpaulin outside.
When practicing PLFs, students must use helmets, ensure the removal of harmful objects from pockets. The purpose of the landing roll should be explained and a practical demonstration given prior to student practice. Special care must be given to the obviously less active or heavy student and those with spectacles. The instructor must be completely satisfied before further progress is allowed.
Special attention must be paid to landing training where modern integral-seat hamesses are used, and the student must be made aware of the need to adopt the appropriate positron prior to touch down. Any tendency to land in a sitting attitude must be corrected as it makes the usual staged shock absorption method impossible and radically increases the chance of injury. Students must be trained to slip off the seat just before landing and adopt the landing roll position.
Potential landing hazards must be dealt with before any student flies - with the emphasis on the principles of general obstacle avoidance. Explain the danger of object fixation and how to avoid it. More specific dangers can then be dealt with e.g. landing in, and extricating oneself from trees, water and overhead lines; landing on or close to buildings, walls and boulders; and, particularly on hill sites, slope landing.
The instructor will explain the definitions of an accident and incident, and the importance of filing proper reports with the IHPA Training and Flight Safety Officer; explain the need for all pilots to learn from others' mistakes and that no blame or disgrace is attached to submitting an accident report (which are always anonymised.)
The instructor will strongly recommend all students to enrol on a nationally recognised First Aid course (REC2 or REC3 minimum) for their own safety and the safety of other pilots. Course fees will be repaid to any IHPA member pilot upon presentation of a certificate of completion as issued by the course facilitator. Details of organisations offering First Aid courses are available on the IHPA website Flight Safety pages.
Phase 2: Ground Handling.
Objective: Through ground-based activity the student should achieve a reasonable and consistent level of competence at preparing the equipment for flight; inflating the canopy; running with it whilst looking ahead; maintaining direction; flaring and collapsing the canopy.
5. Briefing: Ensure that everyone understands the pre-flight checks (and the difference between Pre-Flight Checks and the Daily Inspection.) Use the "Will Geordie Have His Cat Aboard (Today)" mnemonic, unless your school uses a better one. The 'all clear' portion of the checks must include looking above and behind. Stress the importance of taking off into wind - airspeed control and the flare / stall.
6. Helmets: Ensure that each helmet is a good fit. A helmet must be put on before the harness. First item on and last item off regardless of how hot the pilot is! Explain why.
7. Inflation: Good demonstration is vital for this stage. This exercise may be carried out using a forward or reverse launch technique as dictated by conditions, on flat or near flat ground.
The instructor is free to train whatever method of reverse launching they are most comfortable with as long as it is safe. However the majority of schools have found that the "continuous control" method is the most appropriate for many modem wings and minimises the risk of launching with twisted risers or taking off without the controls in the students hands (both scenarios which have been implicated in accidents.) lf using continuous control (cross brakes) it is important that the students are made aware that prolonged ground handling with a brake line in contact with a riser can result in damage to both. This is a launch technique, not a ground handling technique.
Remaining in physical contact with the student as they run for the first couple of attempts is a good confidence builder. Training a good technique for bundling up the canopy will be helpful later in avoiding tangles, and will help stop the student stepping on it or dragging it. Students may leave the ground as they perfect their technique: this is helpful as the wing will respond much better, when actually flying, but leaving the ground is not the aim of this exercise. The exercise is about laying down solid ground-handling skill foundations.
By the end of this exercise the student must be able to demonstrate how to “build a wall”, inflate the wing, stabilise it overhead and perform a visual inspection of the canopy and lines before commencing their launch run.
8. Canopy and Directional Control: This development of exercise seven (Inflation) introduces deliberate minor slalom-Iike manoeuvres whilst running with the canopy overhead, so allowing the student to get some feel for the directional controls. lf windy the instructor may need to keep hold of the student's harness.
- Final Checks - With the wing overhead, students must check the position and state of the risers, toggles, karabiners, and cross bracing while maintaining correct body and arm posture. Students must make a final check of the wind condition and that the take-off area is clear before starting their launch run. It is a good aid to memory and practice to have students call out each of the checks as they perform them.
- Canopy Control - While on flat ground, the student must be able to demonstrate the proper techniques for steering the wing, re-inflating cells, finding the stall point and how to neatly collapse the canopy.
- Take-off Exercises - With the wing inflated and stabilised overhead, the student must demonstrate their ability to make a determined and energetic run, with smooth acceleration, to get the glider up to flying speed, while controlling the wing and correcting problems without aborting their run.
- Running with the Glider – On both flat ground and on a slope, the student must demonstrate the correct techniques for running with the glider overhead and controlling the wing’s angle of attack and roll.
- Stalling and Stopping a Run – On both flat ground and on a slope, the student must demonstrate the correct technique for flaring the wing and bringing it to a halt. Care should be taken not to flare too soon.
Phase 3: First hops.
Objective: The student should combine the skills practised on the ground in Phase 2 to make straight ground-skimming flights (typically less than 5m / 15ft) ground clearance.)
9. Getting Airborne: Introducing a "bat man" at the end of the field, or at very least a windsock as a target, can help prevent bad habits forming such as looking down (or up) and help ensure that the students are focussed on their target area. The purpose of the low hops is to familiarise the student with launch and landings. The range of the controls should he openly discussed with them.
- Flight Planning – The instructor will give the student a verbal flight plan before each flight detailing the current weather conditions, an evaluation of the launch and landing sites and their hazards, and any intended manoeuvres during the flight.
- Take-off – On a gentle slope, students must demonstrate their ability to inflate, stabilise, control, smoothly accelerate the wing and take off. Initial flights should be in a straight line, directly into wind and down the hill.
- Speed Control – While in flight, students must demonstrate good speed control with no tendency to slow flight or stalls.
- Directional Control – While in flight, students must demonstrate their ability to maintain a straight heading, with smooth course corrections without any tendency to oscillate.
- Shallow Turns – Once the student has mastered flight direction control, they must demonstrate their ability to initiate and control shallow, coordinated turns of no more than 45° either side of a heading directly out from the hill and be able to make small course corrections to maintain a heading.
- Landings – Students must demonstrate their ability to land directly into wind, close to their intended landing area.
- Post Flight Routines – Students must demonstrate how to neatly pack up their flying gear ready for transport, with attention paid to the proper stowing of lines and risers.
Phase 4: Flight Exercises.
Objective: The student must be capable of acting as pilot-in-command at the Elementary level.
These exercises MUST be completed in the order listed.
10. Eventualities Briefing: This consolidates the knowledge you have been giving them. Asking "What will you do if the glider drifts left?" type questions is an effective way of getting the student pilot into the habit of thinking ahead. The student should be able to give (and the importance of giving) a verbal flight plan before each and every flight. By giving a verbal flight plan the student gets into the habit of thinking ahead and seeing potential dangers before they encounter them. This briefing leads directly onto...
11. Communications Briefing: Whether by radio or by signal bat, communications must be clearly understood. By responding to commands students build the confidence to take positive control of their canopy. lf using a bat-man to signal actions on landing (strongly recommended on early flights) ensure that the student knows how to interpret the signals - check that they do!
If using radio, it must be stressed that it is only a "back up", not a "remote control" device. Radios MUST NOT be used as a replacement for a proper briefing! Students should be ready and briefed for the task, and warned to carry out the original briefed flight plan in the event of a loss of communications. There should be a radio check done before each launch, and instructors must beware of using poor commands such as "turn right round" that could be misinterpreted: Schools must use standardised commands. If using radios on a club site (or on a site shared with another school) then frequencies should be allocated for the exclusive training use of your students.
12. Responsibilities Briefing: Before any significant flight the "you are in charge" briefing is vital. All students should be in no doubt that if a command is not followed, then the instructor cannot take control. Stress the personal responsibility of the pilot once the launch has begun. Following the brief and all instructions to the letter is important - BUT this does not rule out taking the initiative and changing the planned action if an emergency or unforeseen circumstance occurs.
Under-confident or under-trained students should have been identified by now. Watch out for signs of nervousness such as excessive laughter, yawning, smoking etc. and do something about it! (Take student aside, buddy with a confident regular pilot, and agree procedure with fellow instructors.) Having decided to progress, compliments on the standard achieved so far and some positive l reinforcement will give confidence for the next stage.
13. Site Suitability: The flights are of course dependent upon the site you are using, but the key point here is that advancement should be progressive. If your sites do not allow the height increase to be exactly as progressive as the Student Training Record sets out, your CFI will use his judgement to define acceptable variation. lf your CFI authorises slightly bigger steps (maximum 25% increase) to be made at specific sites then obviously your students will need to make considerably more flights at the lower level first. (A majority of problems encountered during training are attributable to inappropriate speed of progression.)
The student should reach a reasonable and consistent level of competence and confidence flying at increased ground clearance (maximum 15m / 50ft) and in making the directional control corrections required to maintain a straight course. At least four successful flights must be achieved. Direct communication from the instructor must be available.
lt is important to record (on the Student Training Record Sheet) the approximate number off flights attempted as this is a key piece of information in assessing the student when you check their record, perhaps months later.
14. Introducing 90° Turns: The student should reach a reasonable and consistent level of competence and confidence flying with a greater ground clearance (maximum 30m / 100ft) maintaining good airspeed and making gentle turns. The student should be briefed on turns and the need to keep a good lookout before initiating the turn. The turns should be no more than 90° (i.e. less than 45° from directly into wind.) Direct communication from the instructor must be available. Again, at least four successful flights must be made and recorded.
15. Completing a Simple Flight Plan: As the flights become more demanding the student can be asked to make more of their own decisions, from the flare timing on quite early flights to flight planning into a defined area as their standard increases. By stating an aim for each flight (or asking the student to do so) the student should achieve confidence in unassisted launches and competent top to bottom flights in good conditions. "What will you do if you suddenly go up 100 feet?" type questions remain a very useful tool in developing the flying mindset that they will need in subsequent flights.
The student should reach a reasonable and consistent level of competence and confidence flying with at further increased ground clearance. Flights should involve the student delivering a clear flight plan, followed by unassisted launches, turns of 90° or more whilst keeping a good lookout, good airspeed control and controlled landings within a defined area.
Demonstration flights at each level may be tiring but they are a very useful tool in building the student's confidence and understanding. They also show a professional concern by the instructor in testing the conditions.
Phase 5: Theory and Exam.
Objective: Through lectures, lessons, talks and personal study the student should achieve the required knowledge level in these subject areas.
Exercises 16, 17 and 18 may be done at any point during a course, though a large dose of theory before any flying has been achieved may be discouraging for some students. Sessions should be conducted when the students are warm and dry and not too tired. Providing pencils and paper for notes is also a good way to help knowledge be absorbed. Question and answer, relevant anecdotes about personal experiences (not long war stones!) and visual aids all help to make these subjects easier to understand and digest. Avoid unstructured rambles. All schools should have set notes for you to use — stick to them, and that way nothing will be left out.
16. - Theory - Meteorology:
- Wind – Students must understand how wind is created, by the uneven heating of the Earth’s surface, and how it flows from areas of high pressure to areas of low pressure, much as water flows from high ground down to lower ground.
- Wind Measurement – Students must know how to measure the wind strength using a wind meter and how to gauge the wind using natural signs and indicators. Students must understand the distinction between wind speeds measured in knots, miles per hour, kilometres per hour and metres per second; headwind or upwind, tailwind or downwind and crosswind, and understand that winds are named for the compass direction they are blowing from and not the direction they are blowing towards.
- Wind Force – Students must understand that the force of the wind increases proportionally with the square of the wind velocity (a doubling in wind speed results in a wind that is four times as strong) and the danger that such an increase poses.
- Wind Gradient – Students must understand the concept of wind gradient near the ground; the dangers it poses and what action to take when, or before, encountering it.
- Gusts, Turbulence and Lift – Students must understand the causes of, recognise the signs and be aware of the dangers of gusting wind, turbulence and lift. They must understand the distinction between mechanical turbulence, found behind or in the lee of hills, buildings, trees and other obstructions; thermal turbulence, caused by instability and uneven surface heating; wind shifts and wind shear. Students must be aware of the danger of a gust front preceding an approaching rain shower or large cloud.
- Local Conditions – Students must understand the effect that terrain and valleys have on local conditions; how they can change throughout the day, and how wind flows around obstacles, changing the direction of the true wind and creating eddies and vortices.
- Weather – Students must understand the general principles governing the weather; how solar radiation (heat) creates pressure differences in the atmosphere; stability and instability, and the circulation of air in weather systems.
- Sea Breeze – Students must understand how a sea breeze is created, what effect it may have on the prevailing conditions, its dangers and how it may be recognised and exploited.
- Wave – Students must understand concept of wave formation; the dangers it represent, including rotor and strong winds aloft; how wave is formed, and how to recognise and exploit it.
- Ridge Effects – Students must understand the effects and dangers that different shaped ridges have on a prevailing wind; where and why a wind Venturi is formed; the effect of wind funnelling in a bowl or through a saddle, and what wind gradient might be expected on different parts of a ridge or slope. Students should understand the dangers a Venturi poses to pilots on launch and those already in the air who fly into the zone. Students should know what action to take if they find themselves caught in a Venturi zone and what manoeuvres are not safe or recommended in these situations.
- Thermals – Students must understand the principles behind the formation and life cycle of thermals, the instability and turbulence associated with them, how strong thermals can affect the conditions experienced at launch; how to recognise a thermal and how to judge the potential strength of a thermal by the size and shape of its cloud, and how to determine whether a thermal is actively growing or decaying by observing its cloud and shadow on the ground.Clouds – Students must understand the difference between, and the dangers associated with, cumulous, cumulonimbus, rotor and hill-forming orographic clouds.
- Air-masses and Fronts – Students must be able to distinguish between warm and cold fronts; recognise their signs and understand the conditions generally associated with each of them.
- Weather Reports and Evaluation – Students must be able to interpret weather forecasts given on television and radio, and have a fair idea of how it will affect conditions both on the ground and higher up. Students must be able to evaluate the conditions at launch, along the intended flight path, and in the landing area, and be able to recognise both safe and potentially dangerous conditions.
17 - Theory - Principles of Flight:
- Lift – Students must understand the principles behind airfoils (wing profile) and the importance of wing area, wing loading and aspect ratio. Students must understand the importance of air density and how it changes with altitude; the difference in pressure created by profile, airspeed and angle of attack; the internal pressure in a wing and how it is influenced by use of the brakes. Students must understand the definitions of relative wind and laminar airflow.
- Drag and Resistance – Students must understand the difference between parasitic drag and induced drag, their relationship with airspeed and angle of attack, and what effect they have on a wing.
- The Nature of Flying – Students must understand the dependence of continuous forward motion of a wing to keep it flying.
- Wing Loading – Students must understand the importance of correct wing loading in normal flight and how it changes when turning (G-force) or when in lift gradients, gusts or turbulence, and its effect on handling. Students must understand the difference between centre of gravity and centre of pressure.
- Reserve Parachute – Students must understand the importance of flying with an appropriately sized reserve parachute; the advantages and disadvantages of the different designs, and how canopy loading effects the rate of descent. Students must know what is considered a safe rate of descent and its equivalence to free-falling from a given height.
- Driving Forces – Students must understand that, on the ground, they are the driving force and must put as much energy as possible into the system by running hard at take-off, and that in the air, energy is provided by gravity and that they are always falling relative to the air-mass around them.
- Air Speed, Ground Speed and Wind Speed – Students must understand the difference between airspeed, ground speed and wind speed; why it is essential to take off and land directly into wind; the concepts of head wind and tail wind, wind drift, crabbing and how to compensate for them if a steady heading is to be maintained.
- Stalls – Students must understand the concept of a stall, how it disrupts the laminar flow of air over an aerofoil, and what affect it has on the flying wing. Students must be fully aware of the dangers of a stall, how to recognise the onset of a stall; when they are likely to occur, in turns, in gusting wind and lift gradients, flying downwind and in turbulence; how to avoid them and what action should be taken to recover from a stall.
- Frontal Collapses – Students must understand the causes of symmetrical and asymmetrical frontal collapses and the dangers they pose; how to recognise an imminent or actual collapse; how to avoid a collapse and how to recover from a collapse in turns, gusts and turbulence.
- Spins, Spirals and Slips – Students must understand the concepts dangers and difference between spins, spirals and slips; how to recognise, avoid and recover from them, and how spirals and slips may be usefully and safely applied in certain situations.
- Wing-Tip Vortices – Students must understand how all aircraft produce ting tip vortices in their wake, the danger of collapses they pose, where to expect them (in the wake of other wings both in the air and in the landing field) and how to avoid them.
- Control Movements – Students must understand the principles of controlling airspeed in level flight and when turning, and the use of brakes versus weight shift.
- Airspeeds and Speed Polars – Students must understand the difference between Minimum Sink and Best Glide speeds and their relationship with airspeeds in a head wind and a tail wind, and how they change with varied wing loadings.
18 - Theory - Rules of the Air and Air Law: Students should be aware that some sites around the country are within controlled airspace and that permission to fly them must be sought, from whichever Air Traffic Control has jurisdiction, before flying commences. Students should know the air law as it pertains to paragliding in this country.
Students should learn and know by heart the basic rules of the air (Rights of Way):
- A glider shall not take off until there is no apparent risk of collision with another glider.
- When two gliders are approaching head on in clear air, both shall diverge to the right.
- When two gliders are approaching head on along a ridge, the glider with the ridge to its right shall have the right of way.
- When one glider is overtaking another, the glider being overtaken shall have the right of way.
- A glider engaged in ridge soaring shall overtake by passing between the other glider and the ridge.
- Other than when ridge soaring, an overtaking glider shall alter course to the right.
- When two gliders are on a converging course, the glider on the right shall have the right of way.
- When joining a thermal, a glider must always turn in the same direction as gliders that are already circling in the thermal.
- When two gliders are approaching at different heights in a thermal, the lower glider has the right of way, as it cannot see the glider above it.
- When two or more gliders are sharing a thermal, the lower has the right of way. Pilots above the climbing glider must clear the thermal to let the lower glider with restricted vision climb through.
- ABOVE ALL – the number one rule of the air is SEE AND AVOID. Pilots should endeavour to fly in such a way that they never find themselves in a situation where they need to apply the other rules of the air. Pilots should always fly with consideration for other pilots and try to anticipate and avoid situations before they arise.
19. Para Pro 2 (Elementary) Exam: The exam can also be considered a check on the effectiveness of your instruction. (If everyone gets the same question wrong then something is clearly not being explained very well.) The primary benefit of the exam is so that the instructor can de-brief each incorrect answer and ensure that key areas are all understood before progressing.
Final Assessment.
- Physical factors – Students must understand the importance of keeping fit, strong and healthy, and remaining completely drug and alcohol free when flying. Students should understand the dangers of, and be able to recognise the onset of, fatigue and dehydration, which lead to nausea, vertigo, hyperventilation and loss of concentration.
- Psychological factors – All pilots (not just students) must be constantly vigilant against becoming over confident (Icarus Syndrome) and acknowledge the limitations of their ability. All pilots should guard against group or peer pressure to fly or perform when they would prefer not to. All pilots should have the self-confidence to make their own decisions and, when necessary, to say “No” and walk away from a situation.
- The Learning Process and Environment – Students should understand the importance of learning to paraglide using a structured training system like Para Pro, in the controlled environment of a recognised training school where individuals can progress at their own pace in safety and with the motivation of a qualified instructor. Students must understand the importance of studying their training text in detail and not relying on mastering the practical skill requirements alone. Knowledge is one of the pillars of safety.
- Conduct and Airmanship – At launch and in the air, pilots should be conscious of their actions and decision making. Pilots should continuously evaluate their performance and try to anticipate problems and situations before they happen.
Pilot Requirements
Para Pro 2 (Elementary) Pilot Rating Tasks & Experience Requirements
Para Pro 2 (Elementary) Pilot Rating Tasks
The student must progress through Exercises 1 to 9 of the Paragliding Training Programme and complete the following tasks to the satisfaction of the Instructor:
1. Demonstrate how to conduct a tgorough Daily Inspection of the canopy, harness, reserve parachute and helmet.
2. Demonstrate pre- and post-flight routines (e.g. inflation, launch and collapse drills.)
3. Safely carry out launch assistant duties for other pilots.
4. Demonstrate pre-flight checks.
5. Complete:
- for the tow student a minimum of 10 flights and attain self release from at least 300 feet AGL
- for the hill student a minimum of 3 low level flights, with a further 6 to at least 100 feet AGL.
6. Complete 4 appropriate controlled landings in a designated area.
7. Demonstrate safe airspeed control.
8. Demonstrate left and right turns.
9. Describe and evaluate a site and give a flight plan appropriate for the conditions.
10. Satisfy the Instructor as to attitude and airmanship.
11. Pass the Para Pro 2 (Elementary) written examination paper.
Para Pro 2 (Elementary) Experience Requirements
Students wishing to apply for a Para Pro 2 (Elementary) student pilot rating must have completed a minimum of six days instruction under the direct supervision of a licenced instructor, and successfully completed a minimum of thirty flights, at least ten of which must be altitude-gliding flights exceeding 15 feet or 5 metres above the ground.
Exam Study Guide
Para Pro 2 (Elementary) Exam Study Guide
Know the Rules of the Air:
Failure to answer any of these questions results in automatic failure of the entire exam.
Flight Theory:
- Be able to define the terms Lift, Drag and Angle of Attack.
- Understand the relationship between pressure and airflow above and beneath the wing or canopy.
- Understand what causes a wing to stall.
- Understand what happens to lift and drag when control inputs are applied.
Meteorology:
- Understand wind gradients and its effect.
- Understand how ground obstacles can affect local airflow.
- Understand what to look for when assessing take-off and landing areas.
- Understand the basic principles of wind and airflow over hills.
- Understand how turbulence is produced, and its hazards to the pilot.
Airmanship:
- Understand the relationship between airspeed, wind-speed and ground-speed.
- Know your responsibilities to other air users.
Operating Limitations
Para Pro 2 (Elementary) Operating Limitations
- Students must conduct all their training activities under the direct supervision of a licensed paragliding instructor. They are not permitted to attempt or practice any training activities outside of the training school environment.
- All flights must be conducted with the instructor in direct contact with the student by radio and / or signal bats at all times, so that instructions may be delivered to the student in a clear and calm manner. Reliance on pre-flight instructions or shouted instructions, once airborne, is not acceptable. The student’s radio should be mounted on or near the shoulder of the harness, with the volume adjusted to allow for easy hearing.
- Students must always fly with a broad red ribbon to their harness, such that it is visible when ground handling and in flight, to alert other pilots to the fact that they have limited control of their wing and to give the student plenty of space. The red ribbon may be removed once the student has been awarded a Para Pro 3 (Novice) rating and has accumulated an additional ten hours in the air.
- Students training towards Para Pro 2 (Elementary) must not attempt any soaring flights, as per Para Pro 3 (Novice). They are restricted to ground handling and flights directly away from the hill, but with high enough height and clearance to be able to manoeuvre safely.
- Students must not attempt to launch if there other gliders are in the air anywhere near their area of operations. Instructors will initially limit airborne training activities such that there is only ever one glider in the air at a time.
- Students are not permitted to attempt or engage in ridge soaring, thermal soaring or cross country (XC) flying.
- Students training towards Para Pro 2 (Elementary) are restricted to training in winds not exceeding 10mph (15Km/h) straight up the hill. Conditions must be smooth and stable at all times with no gusting or thermal influence.
- Students are restricted to training on either flat ground or a beginners' hill, where take-off, landing and the flight in between is considered by the instructor to be easy and with good margins of clearance from any obstacles or other safety hazards. The landing area should be large and easy to reach by normal manoeuvring with a good margin of height, and clearly visible from the take-off area. A wind-sock must be placed, clearly visible, in the landing area.
- All flights must be written up in the Student’s Training Record and Log Book.
- Students are not permitted to fly in competitions.
Para Pro 3
Syllabus
Training Programme
Para Pro 3 (Novice) Training Programme
This pilot training programme must be used in conjunction with the advice given in the IHPA Technical Manual - Operating Procedures (General) - Instruction in Schools.
Instructors should ensure that their tuition is informed by the following required texts:
- Touching Cloudbase by Ian Currer
- Understanding the Sky by Denis Pagen
- BHPA Pilot Handbook
Heights: Individual clubs may have particular sites where it is not always possible to safely conform to the heights indicated in the Student Training Record particularly in Phase 3 and perhaps in Phase 4. In such instances the CFI can authorise minor variation (maximum 25% increase); where this applies, instructors must ensure that the student has had sufficient additional training at the previous exercises in order to be well prepared and confident to undertake the higher flrghts.
Turns: Various exercises (14, 15, 22) introduce the student to turns and indicate the number of degrees to be turned. These should be interpreted as the change of track over the ground. (When completing soaring beats in a soarable breeze, track will change by 180° or so at the end of each beat, whilst the glider's heading may only change by say 90°. That is exactly what is intended: it would not be safe or desirable to have students change heading by 180° in such circumstances.)
Instructors should ensure that students are aware of the dangers and do not turn significantly away from into wind (absolute maximum 45°) when at or below normal final approach heights (say 100 Ieet.)
Interruptions in Training: It is not uncommon for students to have interruptions in their training. With gaps of just a week or two it is usual to have to take the student back a few stages to refresh. With gaps measured in months this refresher training needs to be much more comprehensive, and should include refreshing PLFs.
Oven-confident Students: Some students may wish to make high flights very quickly. Explaining that the flying is easy and that it is the launch and landing that needs practice can be a helpful tool to make sure they understand that it is for their benefit. Stick to the programme. (Watch out for students who are noisy and/or pushy, students advising others, students copying more advanced pilots nearby, and stop it happening.)
Under-confident Students: Look for quietness, hanging back, repeating simple tasks even when completed satisfactorily, constant chatter. Approach privately to check feelings.
Weather Limitations: The weather is either "Good" or "No good." Prevaricating about possibly “iffy" weather is poor for student confidence. Schools are recommended to use specific wind condition criteria: clearly there will be some variation depending on the site profile, but setting a specific limit and telling the students what it is beforehand is good practice.
Once it is clearly established that conditions are flyable, lnstructors may then explain that certain exercises or students may require smoother conditions (eg take-off) so that waiting for a smooth bit is not viewed as an instructor prepared to recklessly carry on in spite of clearly unsuitable weather. As it is vital that students learn to appreciate what is acceptable and what is not in terms of wind and weather, this wind checking should be a natural part of their training.
Para Pro 3 (Novice) Training Exercises:
Phase 6: Pre-soaring.
Objective: The student should be ready to attempt soaring flight.
21. Knowledge and Skills Review: Before progressing to work on Para Pro 3, instructors should review all of the Para Pro 2 knowledge requirements and theory to ensure that the novice pilot has a firm grasp and understanding of it. Refreshing and expanding on the student's knowledge is always useful and is vital if there has been any significant time gap or the student has come from another instructor or school. Don't forget to refresh PLF training. (Assumptions of competence or currency are a significant cause of incidents.) The new elements of soaring patterns and top-landing approaches can also be introduced.
As students are even more likely to come into contact with qualified club members during the Para Pro 3 (Novice) stage, remind them that they should not introduce anything new into their flying at this stage without consultation with, and the approval of their instructor. Local flyers and club members must also be on their guard to ensure that conversations do not unnerve students or encourage bad techniques!
22. 180° Turns: Students must be able to demonstrate their ability to turn their wing 90° and 180°, left and right, using gentle to medium bank angles, and be able to make their turns both linked and coordinated. Gradually increasing turns whilst keeping a good lookout should allow progress up to "soaring pattern" flights. Briefings MUST include warnings about the danger of turning downwind.
23. Planned Approaches: Students should be briefed that this exercise is to prepare them for situations where they may have to land in a confined area such as a small field. It is good for refining flight planning and control but care must be taken not to get "target fixation" - a good landing in the wrong place is better than a bad landing in the right place. Students must demonstrate their ability to approach and land in an area designated by their instructor using figure-8 turns to loose height without posing a hazard to other pilots wishing to land in the same area, before executing an accurate and controlled downwind, base and final (constant aspect) approach.
Phase 7: Soaring.
Objective: The student should demonstrate a reasonable and consistent level of competence at ridge soaring and top landing.
24. Soaring Flight: The student must demonstrate their ability to fly into ridge lift from take off, or by returning to the lift band after flying through it, showing full control of their wing while turning and manoeuvring in lift, making measured corrections for drift and lift gradient without any signs of stall.
Ideally the student should make several soaring flights on different hills, and amass a minimum of ten hours of airtime. Early soaring flights should be kept fairly short - say fifteen minutes maximum - as the student can very quickly become mentally drained by the sustained high concentration / excitement levels. It is important that the instructor considers the student competent and consistent, and therefore safe, to soar in future without an instructor present.
25. Top Landings: The student should be taught how to assess the wind direction and lift pattern, and how to use this information to plan and execute safe landings. Demonstration and explanation are key tools. The theory of top landing approaches and landing in stronger winds must be covered either in the airmanship theory session or on the hill in a detailed briefing before this exercise is undertaken. lf the wind is good and consistent several short flights with top landings will be more valuable than spending hours airborne.
26 Flying With Others: The student should have an idea of his "personal space" that he will not allow anyone to enter - or infringe on the personal space of another pilot. Helping him visualise this comfort zone, and be aware of all the other craft in the air is an important survival tool. Moving the head and scanning is something that many pilots are very poor at in the early stages. Most experienced safe prlots never have to use the anti-collision rules, as they never allow anyone to get close enough. That is the aim of this exercise.
This exercise must be strictly controlled, with new elements and aircraft introduced gradually. The briefing must include checking the student's level of understanding of the collision avoidance rules (Rules of the Air) and wake vortices.
Phase 8: Improving Skills.
Objective: The student should be competent and confident at using the paraglider’s normally used speed range. They should also understand the hazards associated with fast flight and slow flight, and be familiar with recognising the symptoms of a stall. The student should also have a basic understanding of the speed-to-fly concept. Approaching the stall point and deliberate stalls should be avoided (other than in ground handling.)
27. The Speed Range: The object of this exercise is for the student to explore the glider's useful speed range - not to find the stall point! The instructor should specify the minimum control position (say level with the karabiners for example) and let the student slow to that point, then let up.
- The student must demonstrate their ability to accurately control and maintain their glider at different speeds; co-ordinate their turns, both left and right, at minimum sink speed without any sign of stalling.
- Students should understand the hazards associated with fast and slow flight and be able to recognise the symptoms of a stall.
- The student should have a basic understanding of the 'speed-to-fly' concept.
28. The Speed Bar (Accellerator System): Foot operated accelerator systems should be explained and tried out, ensuring that the student keeps some control pressure to counter the low angle of attack and that the air is smooth enough (this is usefully done on top-to-bottom flights.) New pilots buy wings with accelerators and read the manufacturer's top speed figures. They do need to be informed of the limitations of these devices, the hazards of using them in turbulent air, and that they do not mean you can safely fly in stronger winds. The useful application of flying at min-sink or max-glide etc. should be explained.
29. Mastering Forward Launching: By the end of a Para Pro 3 (Novice) course the student should be able to self-launch in all the conditions he is likely to encounter in Ireland. This means having a good standard of both forward (alpine) and reverse launching. It is just possible (if certain weather systems predominate) that a student may have reached this stage of training without having mastered one or other of the launch methods. These exercises ensure that both are mastered. (Instructors should sign these tasks off immediately if the required competence level has already been proven.)
30. Mastering Reverse Launching: By the end of a Para Pro 3 (Novice) course the student should be able to self-launch in all the conditions he is likely to encounter in Ireland. This means having a good standard of both forward (alpine) and reverse launching. It is just possible (if certain weather systems predominate) that a student may have reached this stage of training without having mastered one or other of the launch methods. These exercises ensure that both are mastered. (Instructors should sign these tasks off immediately if the required competence level has already been proven.)
31. Harness Adjustment: This is a good point to discuss the effects of adjustments to the waist straps of the harness. The student should reach a reasonable and consistent level of competence at using weight-shift and pitch-roll coordination in turns.
32. Side Slope Landings: These are very common and are in fact required on some sites with restricted space. This is therefore an important skill. However if your sites are rock-strewn or too steep to allow this to be done safely, an understanding of the technique is sufficient.
32a. 360° Turns: Students must demonstrate their ability to control their glider in single and linked 360° turns, at normal trim speed and at minimum sink speed, without any sign of stalling. These manoeuvres must be carried out at a safe altitude, away from terrain.
Warning Note: Instructors are required to read the BHPA Safety Notice regarding 360° turns and entering nose-down spiral dives (available from the IHPA website Flight Safety - Safety Notices pages - SN031.112008) to their students and ensure that the dangers and methods of recovery are fully understood before this exercise is practised.
Phase 9: Instability and Emergencies.
Objective: The student should understand techniques to recover controlled flight and be aware of techniques and procedures used during emergencies.
33. Theory - Instability: An understanding of the basics of paraglider instability and what do in emergency situations should be well covered. Students tend to be very interested in this subject and it is a good opportunity to show videos to illustrate the "sticky bit of the flight envelope." The opportunity should be taken to instil the culture of having annual checks on their equipment. Alternative control methods (and their dangers) can be discussed, so that the student has a plan should a control ever get twisted or tangled.
34. Active and Non-Active Flying: Demonstrations of active and non-active flying by the instructor can be very useful (local club members with also often oblige!) Preventing a collapse is easier than curing one. Pitch control exercises are useful in practising active flying.
- This exercise must be carried out at an appropriate altitude in smooth conditions and with effective communication. The briefing must include clear methodology for the instructor to signal whether or not to attempt the task, depending on altitude, positioning and air conditions encountered.
35. Rapid Descent Techniques: This exercise is intended to address the "What if l cannot get down?" situation. Discuss all the options (some students do not realise that a stall is so unpredictable, or that a spiral means you are drifting downwind for example.) The conclusion that for most cases big-ears is the best option is, of course, accurate but the students should realise its limitations. (Harder to steer, higher speed stall, etc.) and that being in big-ears close to the ground can be hazardous. lt is not useful close to the ground and the ears should be released without pumps or symmetrical pumps which can cause a stall.
- The technique MUST be demonstrated and practised on the ground (getting someone to hold up the riser set is fine, as is practising with the canopy inflated if conditions allow) to ensure that the student knows exactly what line(s) to isolate and pull.
- Wings with split A risers are good for this as they minimise the chances of a mistake.
- The student should successfully close the ears and re-inflate them at least twice. On one occasion they should hold the ears in whilst performing gentle turns via weight-shift.
- This exercise must he carried out at an appropriate altitude in smooth conditions and with effective communication. The briefing must include clear methodology for the instructor to signal whether or not to attempt the task, depending on altitude, positioning and air conditions encountered.
36. Asymmetric Tuck: This is inherent to the big-ears exercise. lf you fly long enough you will suffer a deflation. This exercise is to get the feel of a very small one (one ear) and show that you can control and clear it and remain on course with no drama. The prime function of this exercise is to promote confidence and make the correct reaction instinctive to the student. Do not allow them to try any larger collapses - refer them to over-water SIV courses to learn more.
- This exercise must he carried out at an appropriate altitude in smooth conditions and with effective communication. The briefing must include clear methodology for the instructor to signal whether or not to attempt the task, depending on altitude, positioning and air conditions encountered.
Phase 10: Theory and Exam.
Objective: Through Lectures, lessons, talks and personal study the student should reach the Para Pro 3 (Novice) level of understanding in thee following subject areas.
37. Theory - Meteorology: Before completing the Para Pro 3 (Novice) course student pilots are expected to have read all of Understanding the Sky by Denis Pagen, and have a reasonable understanding of all of the topics covered.
- Wind Force – Students must understand that the force of the wind increases proportionally with the square of the wind velocity (a doubling in wind speed results in a wind that is four times as strong); the effects this can have and the danger that such an increase poses on the ground, at take-off, in the air and when landing. Novices must understand how wind is compressed, increasing its force, near the tops of hills and ridges.
- Ridge Lift – Students must understand how the shape and gradient of a slope determines the strength and shape of the lift band, and how it is affected by the wind’s velocity and horizontal angle to the slope. Novices must understand how ridges produce a lift gradient; where to find the strongest lift in good conditions and where to fly when there is a strong headwind. Novices must have a clear understanding of the dangers (strong gradients and winds on top, and turbulence and rotors behind the top) associated with flying off or around the end of a ridge or on the lee-side of a ridge or hill.
- Waves – Students must understand what wave lift is and what terrain, wind direction and velocity are needed for waves to form. Novices should be able to distinguish between wave in phase and out of phase, and how it is linked to, and why it often forms, lenticular clouds. Novices must have a clear understanding of the dangers associated with wave; in particular, how and where wave rotor forms, the difficulty of penetrating the strong winds usually encountered, the strong lift and equally strong sink, and where to expect them; the dangers of being swept up to high altitudes where hypoxia and cold become a factor, and how to escape from wave.
- Thermals – Students must understand the necessity for sunshine and surface heating for the production of thermals, and how atmospheric instability, lapse rate and the shape of the terrain determine where and how often thermals will form. Novices must be able to recognise the signs that indicate thermal conditions, and how thermals can cause lulls and gusts in the wind, and change the wind direction, often dramatically. Novices must have a clear understanding of dangers associated with flying in or near thermals; the boundary gusts and turbulence, the strong lift gradients, which can cause pitch ups and downs, the dangers and signs of cloud-suck, and how to escape it. Novices must recognise good and safe conditions for thermal flying, where thermals are large and smooth with moderate lift gradient, the winds are light to medium in strength, and the associated cumulous cloud is broader than it is tall.
- Frontal Lift – Students must understand how warm and cold air masses interact to form a cold front and cause atmospheric instability; what the visible signs of an advancing cold front are and be able to match them to changes in the weather. Novices must have a clear understanding of the dangers associated with a passing cold front (high winds, wind shifts, gusts, turbulence, squall showers, etc.) and understand when it is safe to fly.
- Clouds – Students must understand how cumulus, cumulonimbus, stratus, lenticular, orographic, cap and rotor clouds are formed; know their effects on local conditions and the associated dangers they may pose to paragliders.
- Weather Reports – Students must know where to obtain and how to interpret METAR weather reports, TAF forecasts and meteorological charts, and be able to give a general indication of what weather conditions can be expected for a given meteorological situation.
- Weather Signs – Students must know what signs to look out for, both on the ground and in the air, and how they may be used to deduce current weather conditions.
38. Theory - Principles of Flight:
- Stalls and Collapses – Novice pilots must have an understanding of how stalls and collapses, and secondary stalls can occur on takeoff, in gusts and turbulence, in lift gradients and when turning in lift gradients or wind gradients (downwind); the dangers involved and what corrective action to take when they do occur.
- Speed Polars – Novice pilots must understand how their glider’s speed polar will affect its performance; how to apply “Speed to Glide” theory in any given set of circumstances while flying into a headwind or with a tailwind, in lift or in sink, and how it is affected by wing loading, air density and in turns.
- Wind Effects – Novice pilots must understand how wind-drift can affect a pilot’s intended flight path when flying in a straight line; how to compensate for it by crabbing; how it alters a glider’s flight path and penetration when turning in a headwind or tailwind; the dangers it poses near terrain, and what corrective action must be taken to achieve a desired flight path.
- Wing Tip Vortices – Novice pilots must have a clear understanding of the danger of wing-tip vortices caused by other gliders, aeroplanes and helicopters and where they are likely to be encountered; how they affect a paraglider and what action should be taken to avoid them or minimise their effects.
39. Theory - Rules of the Air and Air Law:
- Airspace – Novice pilots must be familiar with the system by which airspace is organised around airports and aerodromes, and categorised into controlled and uncontrolled volumes; which categories may be used by paragliders with, and without permission from Air Traffic Control. Novices must know the Visual Flight Rules (VFR) for minimum visibility and distance from clouds as they pertain to paragliders. Novices must be able to give examples of restricted, dangerous or prohibited (military and National Parks) areas.
- Sources of Information - Novices pilots must know where to find accurate and up to date information on airspaces around the country; understand the information presented on an air-map; know the regional ATC jurisdictions and know how and where to obtain NOTAMS.
- Rules of the Air and Rights of Way – Novice pilots must know, by heart, the Rules of the Air and Rights of Way as they apply to paragliders and hang gliders, and be aware of the important differences with sail-plane Rights of Way.
- Code of Good Practice – Novice pilots must be familiar with and agree to abide by the IHPA Code of Good Practice.
40. General Airmanship Knowledge:
- The Human Factor: This section is important - the hazards of flying alone - lack of currency - alcohol - drugs and particularly tiredness have all been contributory in incidents. This in addition to our old favourites: flying for the benefit of relatives / mates; flying when cold, hungry, out of practice, or ill. Flying alone, and (top of the pops) flying when the weather is not suitable!
- The limitations of the Para Pro 3 (Novice) rating must be emphasised - it is a Novice rating that entitles new pilots to wobble around club sites under the supervision of a Club Coach or nominated senior pilot whilst they gain experience and progress to becoming a fully qualified Para Pro 4 (Intermediate) pilot. lt does not entitle them to fly XC or to fly unsupervised.
- Para Pro 4 (Intermediate) Pilot Rating: How to gain this next, very important pilot rating should be discussed, and the fact that they should aim to achieve this within the first or second season after achieving their Para Pro 3 (Novice) rating. Working through the tasks will give their flying activities direction, and will ensure that their skills and abilities increase. Para Pro 3 (Novice) pilots are required to continue their training (until they have achieved a Para Pro 4 (Intermediate) pilot rating) under the supervision of a Club Coach or a nominated senior pilot who can sign them off on the required tasks.
41. Para Pro 3 (Novice) Examination: Do not forget to conduct a thorough de-brief following the exams. All incorrect answers should be discussed.
Finial Assessment.
- Note that this requires the signature of the school's Chief Flying Instructor.
- The Para Pro 3 (Novice) pilot rating form should be completed immediately and returned to the IHPA Training & Flight Safety Officer (address available from the IHPA website.) These forms may be found in the centre of the Student's Training Record & Logbook or may be downloaded from the IHPA website.
- The Instructor's Student Training Record sheets must be kept in good condition and indexed for easy retrieval for six years after the student has left the school. Thereafter, or if the school closes down, they must be forwarded on to the IHPA Training & Flight Safety Officer for archival purposes.
Pilot Requirements
Para Pro 3 (Novice) Pilot Rating Tasks & Experience Requirements
Para Pro 3 (Novice) Pilot Rating Tasks
The pilot must successfully complete all the exercises in the Para Pro 3 (Novice) Training Programme and had them signed off by their instructor. As training progresses the student should demonstrate the following tasks to the satisfaction of the Instructor:
1. Complete:
- for the tow student a minimum of 15 since achieving Para Pro 2 (Elementary) rating, all self release from at least 500 feet AGL.
- for the hill student a minimum of 20 flights since attaining Para Pro 2 (Elementary) rating, to at least 200 feet AGL, with 2 flights of at least 5 minutes duration above take-off height.
2. Successfully complete take-offs in low level winds (below 5 mph) and high level winds (between 10 and 15 mph).
3. Demonstrate stable 90°, 180° and 360° turns.
4. Complete landings, as appropriate, in a designated area (not to exceed 20 metres radius).
- for the hill student the location as decided by the Instructor, but for 2 flights the designated area must be for top landing.
- for the tow student the location is to be within 50 metres of the launch point.
5. Complete the appropriate log book entries.
6. Display an ability to fly competently and safely in the company of others; maintaining a good look-out, complying with the Rules of the Air and exhibiting good airmanship.
7. Satisfy the Instructor as to the the correct attitude to continue a flying career both safely and competently.
8. Safely demonstrate slow flight awareness and discuss the relevant symptoms and dangers. (WARNING : Deliberate stalls must be avoided)
9. Demonstrate, where appropriate, safe and effective use of the 'Big-ears' rapid descent technique.
10. Maintain directional control whilst showing recovery from tucks of not less than 25%.
11. Discuss and show an awareness of techniques for avoiding and recovering from tucks, stalls and spins.
12. Pass the Para Pro 3 (Novice) written examination paper.
NOTE : This rating is roughly equivalent to the BHPA Club Pilot Rating.
The successful Para Pro 3 (Novice) pilot may now fly unsupervised, but should join a Coaching Club, where the Club Coach is available to supervise the next stage.
Para Pro 3 (Novice) pilots are expected to continue with their personal training and achieve the Para Pro 4 (Intermediate) pilot rating within one or two years of receiving their Para Pro 3 (Novice) pilot rating.
Para Pro 3 (Novice) Experience Requirements
The experience requirements for Para Pro 3 (Novice) are that the pilot must have completed a minimum of 60 flights totalling not less than 10 hours in the air as pilot-in-command. These flights must be spread over at least five different launch sites, of which at least three must be inland flying sites. The pilot must have spent a minimum of two hours in lift over any three flights.
Exam Study Guide
Para Pro 3 (Novice) Exam Study Guide
Air Law:
- Know the Rules of the Air - failure on any of these questions results in automatic failure of the whole exam.
- Know the Low-flying rules.
- Understand the way airspace in Ireland is divided.
- Understand the process for notifying ATC for flying sites inside controlled airspace.
- Know the legal definitions of sunset, night and sunrise, and the relevant restrictions relating to them.
Meteorology:
- Be able to link basic cloud types and their associated weather.
- Be able to recognise the key symbols on a synoptic weather chart and understand their meaning.
- Understand the basics of hill, thermal and wave lift.
- Know how to obtain a forecast and how to measure the wind on site.
- Be able to identify deteriorating weather conditions.
Airmanship and Navigation:
- Understand the need to keep a flight log book.
- Understand the purpose of a red ribbon on a HG and PG.
- Be familiar with the demands of flying in company with your fellow pilots, both on the ridge and thermaling.
- Be familiar with aeronautical charts (air maps.)
- Understand how a hang glider or paraglider is able to gain height.
- Be able to name the symptoms of an impending stall.
- PGs - Differentiate between symmetric and asymmetric canopy tucks - how they are caused and how to use the controls to effect a recovery.
- PGs - State what action to take in the event of a towline-release failure.
- PGs - Know how to deal with hazardous (tree / water / obstacle) landings.
Principles of Flight:
- Be able to define the terms - Stall, Lift, Centre of Pressure, Drag(in its various forms) Aspect Ratio, etc.
- Understand the relationship between airspeed, lift, drag; know how lift is created and proportioned between the top and bottom wing surfaces, and describe the forces acting on a glider in steady flight.
- Be able to work examples of air-speed, wind-speed, ground-speed and height loss/gain (given minimum-sink rates and airmass ascent rates.)
- Understand terms such as Angle of Attack, L/D Ratio, Glide Ratio and Wing Loading, and be able to assess the effect that pilot weight changes have on paraglider performance.
- Understand the purpose and effect of trim tabs and the factors affecting canopy stability.
Operating Limitations
Para Pro 3 (Novice) Operating Limitations
Having been awarded a Para Pro 3 (Novice) pilot rating, the pilot must observe the following operating limitations until such time as they have attained a Para Pro 4 (Intermediate) pilot rating:
- It is incumbent upon the Para Pro 3 (Novice) pilot to seek advice from a Club Coach or nominated senior pilot about the site, the prevailing conditions and their proposed activities before the start of each flight.
- Novice pilots are required to establish radio communications with a Club Coach or their nominated senior pilot before taking off, and to remain in radio contact with them throughout their flight so that the novice pilot may receive instructions or warnings of changing weather conditions. A helmet mounted speaker and microphone with a hand operated Push-To-Talk (PTT) switch is recommended. Pilots should restrict the operation of their 2m-band radios to the frequencies between 143.750MHz and 143.950MHz.
- Novice pilots must always fly with a broad red ribbon to their harness, such that it is visible when ground handling and in flight, to alert other pilots to the fact that they have limited control of their wing and to give the novice pilot plenty of space. The red ribbon may be removed once the novice pilot has logged a minimum of ten hours in the air as pilot-in-command after being awarded a Para Pro 3 (Novice) rating. Novice and intermediate pilots are encouraged to continue flying with a red ribbon until they feel confident in the air with other pilots. The red ribbon is for there for their own and other’s safety.
- All pilots must fly with, and know how to use, an appropriately sized reserve parachute on all flights.
- All pilots must fly with a properly adjusted “Speed Bar” system attached to their harness and wing on all flights.
- Novice pilots must not attempt any advanced soaring flights, as per Para Pro 4. They are restricted to flying in smooth ridge lift in stable conditions with little or no thermal activity so that they can practice and enjoy soaring flight within safe limitations.
- Novice pilots should be careful not to turn after launching before they are established in a comfortable flying position in their harness, with good speed and direction control.
- Novice pilots should not attempt to ridge soar in marginal lift, strong or gusting winds, or in turbulence.
- Novice pilots must not attempt to launch or fly if the air space is at all crowded by the activities of other gliders in the air.
- Novice pilots are not permitted to attempt or engage in thermal soaring or cross country (XC) flying.
- Novice pilots are restricted to flying in winds not exceeding 15mph (15Km/h) blowing within 15° of straight up the hill.
- Novice pilots training towards or applying for a Para Pro 4 (Intermediate) rating must be current members of the IHPA and have a current insurance policy.
- All flights must be written up in the Student’s Training Record and Log Book.
Para Pro 4
Tasks & Experience Requirements
Para Pro 4 (Intermediate) Pilot Rating Tasks & Experience Requirements
Para Pro 4 (Intermediate) Pilot Rating Tasks
The pilot must successfully complete all the exercises in the Para Pro 3 (Novice) Training Programme and had them signed off by their instructor. As training progresses the student should demonstrate the following tasks to the satisfaction of the Instructor:
1. Complete the appropriate log book entries.
2. Display an ability to fly competently and safely in the company of others; maintaining a good look-out, complying with the Rules of the Air and exhibiting good airmanship.
3. Pass the Para Pro 4 (Intermediate) written examination paper.
NOTE : This rating is roughly equivalent to the BHPA Pilot Rating.
Para Pro 4 (Intermediate) pilots are expected to continue with their personal training and achieve the Para Pro 5 (Advanced) pilot rating within one or two years of receiving their Para Pro 4 (Intermediate) pilot rating.
Para Pro 4 (Intermediate) Experience Requirements
The experience requirements for Para Pro 4 (Intermediate) are that the pilot must have logged a minimum of twenty hours airtime since being awarded Para Pro 3, of which a minimum of five hours must have been spent in thermal soaring conditions and another five hours in ridge soaring conditions.
Exam Study Guides
Flight Theory & Instruments
Intermediate Pilot Exam Notes - Flight Theory and Instruments
CONTENTS:
- HOW LIFT IS PRODUCED
- Bernoulli and Venturi
- The Airfoil
- Angle of Attack
- Vortices
- AERONAUTICAL TERMS
- AERODYNAMICS OF A STALL
- STABILITY
- HANG GLIDER
- Pitch Stability
- Roll stability
- Yaw stability
- PARAGLIDER
- Pendulum stability
- Washout
- HANG GLIDER
- GLIDE ANGLE
- BALLAST
- FORCES ON A GLIDER
- DRAG
- Induced
- Parasitic
- Form drag
- Profile drag
- Interference drag
- TOTAL DRAG
- POLAR CURVES
- INSTRUMENTS
- ALTIMETERS
- Aneriod
- Electronic
- VARIOMETERS
- Electronic
- Flask
- Total energy
- Airmass (Netto)
- Speed to fly
- MacReady ring
- ALTIMETERS
- REFERENCES AND ACKNOWLEDGEMENTS
HOW LIFT IS PRODUCED
Bernoulli and Venturi
Lift is the major force that keeps us up in the air. It is produced by the wing moving through the air. In simple terms, Bernoulli’s law explains the lift, or upward force that permits airfoils to generate lift. The upper surface of a wing is more curved than the lower; air, travelling across the wing is made to travel faster and thus its pressure on the upper surface is reduced. This effect is seen in such areas as car carburettors or atomisers and makes use of a thing called the venturi effect.
The structure of the wing best demonstrates the principle of airfoil lift. In the 19th century a scientist named Bernoulli discovered that the internal pressure of a fluid (liquid or gas) reduces the faster the fluid flows. If you take a tube, and make the tube smaller in diameter in the middle, this creates a "necked-down" section called a venturi. When air is forced through the pipe, as much air has to come out the exit as goes in the tube entrance. The air in the venturi section must travel faster to get through. Bernoulli found that the pressure at the venturi section was less than at the two ends of the pipe. This is because the speed of the air through the venturi section is travelling faster than at the ends of the tube.
The Airfoil
The shape of a wing is called an AIRFOIL. Usually the bottom of the wing is flat or nearly flat. The top of the wing is curved, with the wing being thicker at the front edge of the wing, and tapering to a thin surface at the trailing edge of the wing.
When a wing airfoil surface passes through the atmosphere, the atoms of the air on the top of the airfoil (shown as minus) must travel faster than their cousins (shown as plus) passing along the lower and flatter surface. This occurs because the distance the air must pass over the curved top of the wing is longer than the distance along the lower surface. According to the Bernoulli Principle, the pressure above the wing is less than the pressure of air below it. Consequently, a pressure difference between the lower and upper surfaces exist. This results in LIFT being produced. The amount of lift depends on the airfoil design and the speed of the air over its surfaces.
Lift is a force generated at 90’ to the angle of the undisturbed airflow or relative wind
About 2/3rds of the lift results from the reduced pressure above the wing and 1/3rd from the increased pressure below it. The majority of the lift being in the front top surface of the wing. The lift is proportional to the angle at which the airflow meets the wind, the angle of attack.
The chord of a wing is an imaginary line from the leading edge to the trailing edge of the wing. The term is used in the definition of "Angle of Incidence" and "Angle of Attack"
Angle Of Attack
As the aircraft passes through the air it traverses a particular line of flight. The air passing by the surfaces of the aircraft in the opposite direction of travel is called the Relative Wind. The angle which the wing 1chord makes with this Relative Wind is called Angle of Attack. An increase in angle of attack increases both lift and drag. If the angle becomes to great, it will pass the Critical Angle of Attack. This is a point where the airflow over the wing becomes so disturbed that the wing ceases to produce lift. The wing then enters into a Stalled condition.
The amount of lift generated is proportional to the speed at which the airflow meets the wing and sufficient lift can be generated by high airspeeds with low angle of attack or low airspeed with high angle of attack.
Vortices
When the wing is started flying it produces a starting vortex which is left spinning gently behind as you fly off. The standing tubular vortex your wing carries wherever it flies is created as the wing flies through the air molecules. At the wing tips, there is no wing to keep the vortex captive so it rolls of the tips in two spinning tubes which extend outwards and downwards. These vortices are a source of drag which will be described later. Keeping the standing vortex trapped at high angles of attack is the problem, because the molecules are accelerated more fiercely and the vortex becomes unstable. Finally at the stalling angle, the vortex leaves the wing and forms the end vortex which dies away. The following which is taken from a back issue of skywings may explain it a little better.
Unfortunately the process of generation of lift cannot be accomplished without the generation of drag and the measure of the efficiency of the wing can be expressed as the lift generated (good) against the drag generated (bad). Dividing the lift by the drag gives a number, the bigger the number for us, the better.
AERONAUTICAL TERMS
Some useful aeronautical terms.
Angle of attack - The measured angle between the airfoil chord and the direction of the undisturbed air in front of the airfoil.
Aspect ratio - This is the ratio of the span of the wing divided by the chord. The glider wings are usually high aspect ratio wings - the reason for this is that for a given amount of lift produced by a wing, the lower aspect ratio wing disturbs a shorter width of air, but it must deflect it more vigorously. As a result, the tip area experiences larger losses in the form of swirls at the tip.
SPAN SPAN2
ASPECT_ RATIO = --------- = --------
CHORD AREA
Centre of Pressure - Even though the lift of an airfoil is distributed along its surface, the resultant force of all the lift forces can be considered to be at single point along the wing known as the Centre of Pressure. Centre of pressure can move depending on the angle of attack.
Centre of gravity - The resultant forces of all the weight can be considered to be at the centre of gravity. Centre of gravity can move by the point weight shifting. The C of G is where the aircraft would balance. It can also be called the centre of mass.
Chord - The straight line drawn from the furthest forward point on the airfoil to the furthest rearward point on the airfoil.
Dihedral - When you stand in front of an aircraft, looking toward the tail, the wings are usually higher at the wing tips than at the wing root (where the wing attaches to the fuselage). This upward angle from wing root to tip is called DIHEDRAL. On an aircraft with dihedral, when one wing drops, it will produce slightly greater lift than the other wing. The aircraft tends to return to a level status providing lateral stability to the aircraft.
Washout - A lowering of the angle of attack of the wing as it progresses from root to tip. Hang gliders have washout and the tips are held up by tip rods or other means.
Washin - An increase in the angle of attack from root to tip.
AERODYNAMICS OF A STALL
A stall occurs because of the air’s inability to make sudden changes in velocity. The air has mass. Therefore it wants to continue in its initial direction due to inertia.
Figure 4 - Stall effects
The air can no longer make sudden changes to flow smoothly over the upper surface. It breaks away at the rear and creates turbulence. The further the nose is raised, the more the break away point moves forward.
At the stall the drag increases and the lift decreases.
STABILITY
Stability is a tendency for a glider to return to normal level of flight after disturbance.
- Neutral - A glider is given a nudge and it stays where it is.
- Stable - A glider is given a nudge and it returns to its trim point.
- Unstable - A glider is given a nudge and it gets even worse.
For a glider this means that it must return to level flight after disturbances to the pitch, roll or yaw axes.
A stable glider near stall will want to speed up, a stable glider flat out will want to slow down. An unstable glider near stall will want to slow up and an unstable glider flat out will want to go faster. (Not a very nice glider to fly).
The standard airfoil, if the angle of attack is increased (i.e. near the stall) then the centre of pressure moves forward with increasing angle of attack. The C of P also moves to the back of the airfoil as the A of A decreases. This is not a stable situation.
Unfortunately, all airfoils have the unwanted trait of instability so we have to do something to overcome the problem. Stability is a fine line for the designer between an overly unstable glider which would be a handful to say the least to fly and an overly stable glider which would not turn or be a real pig to fly.
Hang Glider
Hang glider stability is accomplished by several methods.
Pitch Stability
Pitch stability is the stability in the lateral axis.
Reflex
Reflex is the upward curving of the rear of the wing and is most often carried out by luff lines attached from the kingpost to the trailing edge of the sail. Topless gliders have some internal bracing to keep the reflex trailing edge in place.
What the luff lines do is destroy the lift at high speed so that the nose of the aircraft wants to pull up and slow down.
Luff lines are out of play during normal flight. With a VG system, the lines have to be loosened as the sail is tightened or they kick in too soon. Thus some gliders (Kiss for example) have VG compensators for the luff lines.
Sweepback
If the lifting surfaces are designed so that the lifting surface behind the C of G lose lift quicker than those areas ahead of the C of G, then more lift will be forward at high speeds to pull the nose up and more lift at the rear to force the nose down at low speeds. In other words, if we pull on speed, the tips unload more than the centre and thus the Centre of pressure moves forward to pull the nose up. If we push out, the tips lift more and tend to move the C of P back to pull the nose down . This is accomplished by a mixture of sweepback and washout. Sweepback is the V-shape given to the plan view of the wing and puts the tips behind the C of G.
Washout
Washout is the change in twist from the root to the tip. Washout is in one direction and washin is in the other direction. Moving from root to tip,, washout decreases the A of A. All hang gliders have washout. This combines with the sweepback and gives static pitch stability to hang gliders. Another advantage of washout combined with sweepback is the effect in a stall. As the glider stalls, the tips are at a lower angle of attack than the nose, and they tend to keep flying longer than the nose. In a shallow stall, if the nose is stalled and the tips flying, then the glider keeps on an even keel and the nose dips to pick up speed. This effect also helps during landing as the glider is flared, the tips stall last and help stop a wing dropping.
Roll stability
Stability along the longitudinal axis.
Dihedral/Anhedral
Dihedral is an upward tilting of the wings.
If a roll occurs, the lower wing will produce more lift and the higher wing will produce less lift. This will tend to counteract the roll effect and thus introduce stability.
Although dihedral assists roll stability, slight anhedral gives instability to assist turns. The amount of anhedral used is slight and since the leading edge is supported by the flying wires at about mid distance, during flight, the outboard sections would bend up and produce a small amount of dihedral. The original Kiss used an anhedral airframe but a relatively loose sail which when loaded assumes a dihedral shape, outboard of the flying wires. This mix of anhedral and dihedral is called a cathedral wing with the cathedral area being the part outboard of the flying wires.
Yaw stability
Stability in the vertical axis.
Sweepback
Yaw stability on a hang glider comes mainly from sweepback. As the glider yaws, one leading edge will present a larger frontal surface to the wind and therefore the amount of drag generated by this wing will be greater, similarly, the other wing will present a smaller frontal surface to the wind and the drag will be less. This effect will create a turning moment about the vertical axis which will tend to bring the glider back on course.
Yaw stability may also be helped by the addition of winglets on some gliders.
Paraglider
Stability for a paraglider is not such an issue since a paraglider is not a tail-less aircraft as a hang glider is.
Pendulum stability
Most of the stability comes from the pendulum effect. The weight of the pilot is great compared to the weight of the canopy. The lift comes from the canopy and the weight from the pilot. This effect means it is extremely difficult to dislodge the pendulum stability that a paraglider has.
Roll stability and pitch stability come mainly from the pendulum effect.
Pitch stability can be influenced by the aerodynamic section used, some are more pitch stable than others. The curve of the glider (viewed from the front) also affects the roll stability due to the direction the lift is acting in relation to the position of the pilot.
Washout
Paragliders can have a twist built in the wing as do hang gliders. Standard paragliders are built for stability and washin is often built in the tips. This has the effect of increasing the lift in this part of the wing and hence increase the tension in the sail across the span i.e. makes the wing feel more solid. It also tends to reduce the tendency for tip deflations. Advanced paragliders can have neutral or washout built in to increase the performance. This can also make the tips “loose” in turbulence.
GLIDE ANGLE
Glide angle is not actually an angle but expressed as a ratio i.e. 8 to 1 glide angle. This means for every 8 units of length travelled across the ground, then 1 unit of length is descended. Obviously the greater the number, the better the glide angle.
Glide angle also is the same is the LD ration (lift/drag). Glide angle is increased by increasing the lift (difficult) or reducing the drag (easier). Since as we will see on the section on drag, drag increases with airspeed, then at high speed, the reduction of drag is an important factor in glider performance. Sailplanes go to great lengths to reduce drag and have very smooth GRP surfaces and streamlining to reduce drag. For hang gliders, the reduction of drag has given rise to the topless glider. For paragliders, the number of lines has been reduced together with the introduction of microlines. The relationship between sink rate, glide ratio and flying speed is now explained. Some reference may be needed to the section titled “Forces on a glider”.
In the diagrams, L is the lift vector and is always at 90’ to the direction of flight vector V. D is drag and is always opposite to V. L and D combine to give the resultant R which is opposite and equal to the weight W.
V has been split into 2 vectors, Vh (horizontal speed) and Vv (vertical speed). For clarity the airfoil has been removed.
The diagram shows the forces acting on an airfoil. The wing is moving right to left in the direction of the arrow V. V is opposite in direction to the wind hitting the wing. The wing is flying with little drag.
The direction of travel is further down the wing is pointed in more of a dive.
The wing is travelling further in a dive. Note that the drag is always opposite to the travel and that the resultant R is the sum of the lift and the drag and counterbalances the weight.
The sink rate can be identified with the component of velocity Vv. Vv To minimise the sink rate we must minimise Vv. The glide ratio is equal to Vh/Vv. This is simple the distance travelled divided by the distance fallen.
To maximise glide ratio we need to maximise Vh and minimise Vv.
By applying geometry rules we can find that the triangle of sides R,L and D (when D is shifted) is similar to the triangle defined by V, Vh and Vv.
Therefore L/D equals Vh/Vv which is of course the glide ratio.
BALLAST
Ballast is another name for additional weight carried by the pilot. All gliders are certified to fly within a certain weight range. At the top of the weight range, the behaviour of a glider is different if weighted at the low end. As mentioned before, the design of a glider is a compromise, increase performance in 1 area such as glide angle and another area may suffer, such as sink rate.
Ballast can be used to increase the weight of the aircraft and thus increase the "wing loading” (total payload weight (pilot+harness etc) divided by the surface area of the wing) on the glider. This means that the aircraft will fly faster down the glide slope. The sink rate is increased slightly but the max glide ratio is not affected. The top speed of the glider is increased which may be helpful if flying on strong days in a paraglider. Performance and general handling of the glider may be better when flying at a certain weight. Performance paragliders seem to benefit from being well weighted.
Remember if you intend to take ballast that can be jettisoned in flight, then ballast is only allowed in the form of water or fine sand. Also, remember never to exceed the design weights of your glider.
FORCES ON A GLIDER
Already touched on in an earlier section. There a 4 forces on the glider wing.
One difference between a powered wind such as a light aircraft and a glider wing. All flying objects without power get their energy from gravity. A glider converts some of its downward falling motion to forward motion shown as “V”. Once airspeed is established, the lifting forces build up to couple with the downward pull of gravity and lift the nose until equilibrium is reached.
The force of gravity is shown by “W”.
This is always balanced in steady flight by the sum of forces of lift “L” and drag “D” called the resultant “R”. If W is not balanced by R the glider will accelerate until both the lift and drag increase to a point of reinstating the equilibrium. i.e. if a take off run is too slow, the lift generated will not support the weight. The nose will dip and the glider pick up airspeed until enough lift is produced for the two to equalise. Hopefully this happens above ground.
The resultant force R always acts through the centre of pressure
The weight always acts through the centre of gravity.
Both the C of P and the C of G can move. The centre of pressure by changing the angle of attack and the centre of gravity by weight shifting. That’s how we can control the glider.
If a pilot pulls the bar in to gain speed, the lift decreases. This means that R is reduced and there the wing picks up speed until the lift is increased (and the drag) to match the weight.
The flying speed varies only with angle of attack for a given glider and flying weight.
DRAG
Drag is result of us flying in a fluid (air) and cannot be totally removed. There are several types of drag. Refer to Figure 9 - Total drag.
Induced
Induced drag is a by product of lift. The majority of induced is formed at the wingtips where the wingtip vortices are shed, as the area of low pressure above the wing and the high pressure below the wing slide off the wingtip and mix in a swirling trailing tip vortex.
The important thing is that induced drag reduced with angle of attack and hence airspeed. High aspect ratio wings reduce induced drag. Winglets on 747’s reduce induced drag at slow speed. Condors have extended feathers at the tips that do funny things with tip vortices and they all help reduce induced drag.
Parasitic
Parasitic drag is a friction drag and varies with the square of the speed. i.e. doubling your speed quadruples your parasitic drag. There are a few types of parasitic drag
Form drag
Caused by solid non-lifting items in the airstream. i.e. You, wires, kingpost etc.
Profile drag
Caused by the lifting surfaces. It consists of skin friction drag and leading edge form drag. The more streamlined the airfoil shape, the less profile drag.
Interference drag
Interference drag is when the airflow around the aircraft interfere with each other. Not a big problem on hang gliders or paragliders.
Total drag
Add all the drag components up to get the total drag. Different parts of the drag are important at different speeds. We can plot a graph as below.
The best glide occurs at minimum drag.
POLAR CURVES
Polar curves are graphical representations of the performance of our wing. They can be used to determine what speed we should fly at for any given conditions to maximise our glide over the ground. They are drawn with airspeed along the x axis and sink rate along the y axis.
The curve is a series of plots taken for a particular aircraft and for a series of airspeeds. At each airspeed the sink rate is taken and then it is possible to plot the polar curve. The sharp increase in sink rate at slow speeds is the point just before the stall.
Min sink is the highest point on the graph.
Max glide in still air is obtained by drawing a tangent to the graph from the origin . The point of intersection can be read off in sink rate and airspeed. The graph can also be used in head winds and tailwinds and rising and sinking air for the same purpose.
If we want to find out the speed to fly at in say a head wind of say 10mph. Instead of taking our tangent line from the origin, we take it from the 10mph point on the headwind side of the line. The tangent touches the polar at a faster speed which can be read off at point A. Similarly if we are flying in a tailwind, the polar will tell us to fly slower.
Figure 11 - Polar curve with headwind
Figure 12 - Polar curve with thermal
The final example shows a combination of flying an a 8mph headwind and a 150fpm sink area. The fast speed is shown at A
Figure 13 - Polar curve with both a headwind and thermal
=========================================================
From the above we can deduce that we should speed up in sink and a headwind
and slow down in thermals and a tailwind.
=======================================================================
INSTRUMENTS
We all fly with instruments. The altimeter measures height above a reference. The variometer measures our rate of change of altitude. The Air speed indicator measures airspeed. The 2 or 3 are usually combined in 1 instrument.
Altimeters
Altimeters measure height against a reference. Most commonly they use the fact that air pressure reduces by 1mb for every 30ft we rise and the relationship is linear (at the levels we fly at). There are other means of measuring height (satellite navigation) but these are not as accurate for the amount of money we can afford.
Aneriod
The aneroid altimeter uses a small sealed capsule containing air. As the instrument goes up, the air pressure in the capsule increases and by the design of the capsule, it is allowed to expand in a certain direction. This expansion is coupled by mechanical linkages to a dial display. The dial can be adjusted by a knob to read say height above sea level (QNH) or height above the field (QFE). This altimeter is mechanical.
Electronic
The majority of altimeters are electronic. They use semiconductor materials to sense changes in air pressure. Once you have the sensor, then its relatively straightforward to design electronics around it to convert the signal to a display. Modern altimeters also have the ability to have temperature compensation and data links built in.
Variometers
Variometers also sense changes in air pressure, but in a different way. They display the rate of change of air pressure outside rather than the absolute air pressure. The faster the ascent, the faster the rate of change of air pressure.
Electronic
Once the pressure sensor is in the box of electronics, it can also be used to measure and display the rate of change of pressure.
Flask
A flask vario is more commonly found in sailplanes and is an early from of vario. It looks like below:
As the instrument rises, the air in the flask will try and rush out of the openings since it will be at a higher pressure than the surroundings. As it rushes past the pith balls, one is forced upwards in the draft. The same thing happens in descent but the other ball is forced upwards.
Total energy
False readings may be obtained by flying fast and converting this speed to height. This may be converted into an imaginary thermal as the vario senses the increase in height. This is called a “stick thermal” It is of course not a real thermal. Varios which take the airspeed into account when determining the air around are called total energy varios. Very important for sailplanes which have a lot of energy retention and can convert speed to a lot of height.
The solution to avoid false readings is to use a total energy vario. By total energy we mean the sum of the kinetic (moving) and potential (due to height) energy. They work since the dynamic pressure of the air increases with the square of the velocity. Our sink rate increases pretty much with the square of our flying speed. In we have some device to measure the airs dynamic pressure, and tie this into our varios detection circuits, we can compensate for the altitude change due to glider speed. The metal tube on LR3 varios is the total energy probe.
Airmass(Netto)
As we fly at different speeds, our glider has different sink rates. We have to mentally compensate for this when working out what the air is doing. Netto varios work this out for us and always indicate the airs “net” lift or sink.
Speed to fly
Speed to fly is a complicated area of theory, covered recently by Gordon Rigg in an excellent article in Skywings. Suffice to say for the exam, speed to fly is a theory that for every condition of lift/sink and headwind/tailwind, in order to achieve the greatest distance over the ground, then there is one specific airspeed to fly at. It can also be used to determine the speed to fly at to achieve the fasted speed to goal. It’s a lecture in itself.
MacReady ring
A MacReady ring is a scale which fits round the vario display (assume its an old type vario with analogue display). The ring rotates round the vario display and as you fly at a certain vario reading. The MacReady ring tells you to fly at a certain speed. As you fly at this speed, the vario needle will no doubt move to a new reading and you have to readjust your speed. Do this until the vario needle points to the speed you are flying at and that’s it. Modern varios have facilities to link to GPS’s to work out your ground speed compared with your air speed and work out headwind/ tailwind components. The vario readings are all fed into the electronics which displays the speed to fly.
REFERENCES AND ACKNOWLEDGEMENTS
- Performance Flying by Dennis Pagen
- Paragliding flight by Dennis Pagen
- BHGA Pilot handbook
- Touching cloudbase by Ian Currer
Meteorology
Intermediate Pilot Exam Notes - Meteorology
CONTENTS:
- BUYS BALLOTS’S LAW
- FRONTS
- WARM FRONT
- Cross section
- WARM SECTOR
- COLD FRONT
- Cross section
- OCCLUDED FRONT
- Cross section
- WARM FRONT
- CLOUDS
- HIGH
- MEDIUM
- LOW
- FORMATION OF CLOUDS
- Convection
- Orographic uplift
- Cloud formed by turbulence and mixing
- Cloud formed by widespread lifting
- CLOUDBASE
- CONVECTION
- THERMAL PRODUCTION
- THE “REAL ATMOSPHERE”
- Inversion
- STABILITY AND INSTABILITY
- CUMULUS CLOUD FORMATION
- METEOROLOGICAL TERMS
- PRESSURE SYSTEMS
- LOW PRESSURE
- Formation of a low
- Associated weather
- HIGH PRESSURE
- Associated weather
- LOW PRESSURE
- WINDS AND THINGS
- VALLEY WINDS
- SEA BREEZES
- SEA BREEZE FRONTS
- WAVE LIFT
- FOG
- Radiation fog
- Advection fog
- Sea fog
- Hill Fog
- SYNOPTIC CHART
- CLOUDS AND RAIN
- ACKNOWLEDGEMENTS
BUYS BALLOT'S LAW
Very Simply, this states that in the Northern Hemisphere, if you stand with your back to the wind, the area of low pressure is on your left hand side. In the Southern Hemisphere, it is on your right hand side.
FRONTS
A front is a boundary between 2 different air masses of different density. Air masses don’t like to mix and the boundary between the two (the front) is where active weather can take place. Fronts are very common in depressions. I recommend Derek Piggots book “Understanding Flying Weather” to see the birth and life of a depression. Although not in the syllabus, a depression starts along the jet stream. The jet stream is an area of very fast moving air circulating West to east (in the Northern Hemisphere). The jet stream is like the traffic on a motorway, it sometimes bunches and sometimes eases off. Where it bunches, the high altitude pressure increases causing a downward flow of air - the start of an anticyclone (high pressure system) where it eases, it speeds up and due to Bernoulli’s principle, it causes a reduction in pressure - the start of a low. More details later. As the low pressure “winds up”, it twists the air masses and causes the characteristic low with fronts. The formation of a low with its frontal systems will be explained in the section on Pressure systems.
For this section, the typical low with frontal zones is shown below:
Figure 1 Low pressure system
Since the vast majority of low pressure systems move from West to East, the first frontal system to make its effect on the UK will be the warm front.
A warm front is where warm air overrides cooler air. Shown on maps as:
Figure 2 Warm front symbol
A warm front is where an area of warm air catches up with an area of cold air and overrides it (due to the less density). The normal warm front has a shallow slope with the air rising gradually over many hundreds of miles. This lifting produces the gradually thickening layer of cloud which eventually results in the steady rain near the frontal zone.
Cross section
The cross section of a warm front is shown below:
Figure 3 Warm front cross-section
The normal warm front has a shallow slope as the warm airmass overrides the cooler air. The slope is typically 1:50 to 1:400 and the frontal zone effect may extend 500 miles ahead of the frontal transition on the ground. This means that the forthcoming warm front may be seen in advance. High cloud such as Cirrus and cirro stratus will shut off the solar activity usually cutting off thermals. Then the cloudbase will lower with Alto stratus and Nimbo stratus giving drizzle as the front approaches. Rain possibly beginning 5-10 hrs before the passage of the front. The winds may strengthen and back (winds change direction ANTI CLOCKWISE.) At the front, the rain eases off, the wind will veer 50 degrees or so and the temperature and humidity will rise. We are now in the warm sector.
Warm Sector
The warm sector is the area between the leading warm front and its following cold front. The air is warm and produces the right conditions for wave flights. Following the warm sector is the cold front.
Figure 3a - Warm Sector
A cold front is where colder denser air undercuts warmer air. It is shown on maps as below:
Figure 4 Cold front symbol
When a mass of cold air meets a mass of warm air, it tries to undercut it. The cold air pushes under the warm air acting as a wedge. The slope of the wedge is steep, about 1 in 30 to 1 in 100. They move quickly about 20mph. and strong updraughts can be produced about 100 miles ahead of a front.
Cross section
The cross section is shown below:
Figure 5 Cold front cross-section
The warm sector gets its name from the fact that the cold front usually follows a warm front. See the section on pressure systems later.
The cold front is often dramatic with heavy showers. At the front, the temperatures drop, the air is drier and the wind veers (winds change direction CLOCKWISE) often to the North West direction. Behind the cold front, there is often a complete clearance of cloud but this very quickly gives way to high Cumulus and shower clouds. Good days for soaring are found after cold fronts have gone through and the pressure starts to rise again. The rising pressure raises cloudbase, and the cooler air means a ready supply of thermals.
For information and probably not likely for the exam. Bradbury indicates the 2 types of cold front - the katafront and the anafront. You should know about katabatic winds (flow downslope and are KATASTROPHIC for taking off and Anabatic winds which flow upslope).
The same thing happens at fronts where the frontal zone approaches, the wind upstream of the front can flow down the slope (katafront) or up the front (anafront).
Figure 6 Anafront
Above shows an anafront. The air preceding the cold front is rising above the frontal zone and creating very active clouds such as Cunimb’s. The frontal zone is very steep. The Katafront is shown below:
Figure 7 Katafront
The air preceding the frontal zone is flowing down slope and dampens the activity.
Occluded Front
An occluded front is where a cold front has caught up with a warm front. It is shown on maps as below:
Figure 8 Occluded front symbol
As the depression deepens, the cold front with its weather systems catches up with the warm front and the 2 types of weather become mixed.
Cross section
Figure 9 Occluded front cross-section
The occlusions can have some of the characteristics of a warm front or a cold front but on a milder scale. The weather produced by a occlusion can range from that of the 2 frontal types to prolonged periods of rain.
CLOUDS
The amount of moisture that air can hold depends on its temperature, with warmer air holding more air than cold.
Cloud form whenever the air is cooled to a point where the temperature to which a particular mass of air must be cooled for saturation to occur is called the Dew Point.
Sometimes the amount of moisture in the air is measured as relative humidity. The Relative humidity (RH) is:
RH = amount of water vapour in the air / amount of water vapour required to saturate it (at that temperature). This is expressed as a percentage.
i.e. dry air has a RH of 0%. Air about to form cloud has a RH of nearly 100%.
Clouds are classified as high, medium or low according to the height of their base. There are 10 basic types. See the diagram below:
Figure 10 Cloud types
High
Altitude range is 15 to 40,000ft. These are composed mainly of ice crystals and are known as cirro types.
- 1. Cirrus (Ci) is the wispy high cloud
- 2. Cirrocumulus (Cc) is a high cloud with a cell pattern.
- 3. Cirro stratus (Cs) is the thin veil type cloud
Medium
Altitude range is 6,500 to 23,000ft. The are known as alto clouds.
- 4. Alto cumulus (Ac) is a medium layer with a cell pattern. In an unstable atmosphere, Ac may produce virga or precipitation which does not reach the ground.
- 5. Alto stratus (As) is an even layer of cloud at medium height
Low
Altitude range is 0 to 8,000ft.
- 6. Nimbostratus (Ns) is a deep layer of rain cloud.
- 7. Strato cumulus (Sc) is a greyish/whitish cloud consisting of rolls or cells. The weather is light rain, drizzle or snow.
- 8. Stratus (St) is a low lying layer of cloud. May give drizzle
- 9. Cumulus (Cu) these are individual heaped clouds with a cauliflower top. Large Cu may give showers.
- 10. Cumulonimbus (Cb) are heavy shower clouds or thunderstorm clouds. The tops of these can reach past 30,000ft. Weather is rain, hail and heavy showers.
There are other clouds which are not listed above:
- Castellanus such as Altocumulus castellanus are excellent indicators (especially in the Alps) or upper atmosphere instability. These in the morning may indicate Cbs later in the day.
- Lenticular - These lens shaped clouds indicate the presence of wave activity and may be stacked, one above the other in certain cases. They show the top of the wave.
Formation of clouds
Clouds may be formed in several ways but all rely on the fact that the air is cooled to a point where it cannot hold its moisture.
Convection
The action of the sun will heat the ground. This in turn heats the air layer closest to the ground which will become warmer and thus less dense. It may rise and is it does so, it will cool. Eventually it may reach a point where its temperature reaches the dew point and the water vapour condenses to form cloud. Cumulus cloud is formed in this way.
Orographic uplift
Air may be flowing along and be forced to rise upwards when it reaches an obstruction such as a mountain chain. As it rises it will cool and it may be cooled past its dewpoint temperature. It will condense and orographic cloud will form on the windward side of hills.
Cloud formed by turbulence and mixing
As air flows over the surface of the earth, frictional effects cause variations in local wind strengths. Eddies are set up which cause the lower level air to mix. The more friction and the stringer the wind, the more mixing. As the air mixes, it may rise and if it cools enough, layer cloud above the friction area may result.
Figure 11 Clouds formed by turbulence
Cloud formed by widespread lifting
When 2 air masses meet, such as in a warm front, then great areas of air may flow over the cooler air and rise as it does so. High stratus cloud will result. See the section on fronts for more details.
Cloudbase
Cloudbase is the term given to indicate the height that the base of the cloud is ASL. It can be calculated from the dew point and the ground temperature.
i.e. Temp of 23 deg with dew point of 12 give a cloudbase of 4,400ft.
CONVECTION
One of the main topics in the Met course is to describe thermal growth and activity. By understanding this and the reasons for thermals, we can also understand many other parts of the atmosphere and cover such things as, Inversions, Stability and instability, Cb’s and cloud base.
With increasing altitude, the following decrease
- Temperature
- Pressure
- Density
As altitude rises, temperature generally decreases. This change in temperature with height is called the Lapse Rate.
The standard atmospheric rate of change has been defined by Scientists as the standard atmosphere and it has the following conditions:
Environmental Lapse rate (ELR) = 2’C/1000ft
Pressure change = 1mb per 30ft
The ELR can be represented on a graph but it is important to know that this is only a “measuring stick”. the real ELR may be a lot different.
Figure 12 Standard ELR
Thermal production
As the sun heats the ground, the ground in turn heats up a layer of air close to the ground. A bubble of warm air starts to form and is less dense than the surrounds since it is warmer. It may unstick from the ground and start to rise through the atmosphere. As the density and the pressure of the surrounding air decreases with altitude, the thermal will expand adiabatically (a process where no heat is lost or gained from the surroundings) and hence it cools. As air expands it cools. The thermal will cool at a known rate and its rate of cooling or lapse rate is the Dry Adiabatic Lapse rate or DALR. The word dry refers to the moisture in the thermal being retained as vapour and not condensing.
Dry adiabatic lapse rate (DALR) = 3’C / 1000ft
If we plot the course of a thermal leaving the ground with a temperature of 25’C, after 5,000ft the thermal has cooled to 10’C and has reached equilibrium with the surroundings. i.e. it stops rising.
Figure 13 ELR and DALR
The “Real Atmosphere”
In real life, the atmospheric conditions do not look exactly like the above. Overlaying warm fronts could mean warm air aloft. High pressure systems could warm the upper air due to compression of the upper air. Air close to the ground may be chilled on a clear night. When the air temperature does not fall with height, but rises, then this condition is called an inversion.
Inversion
An inversion is a warming of the air at height increases and can be in 2 types.
- High level - caused by a high pressure system warming the upper air
- Low level - caused by air chilled in contact with a cold ground which has lost heat by convection
These may be shown on a lapse rate graph as before:
Figure 14 Inversions
Inversions may puts a lid on our max. altitude possible by thermals.
Stability and instability
We often hear the terms stability and instability with the latter being our preference. Using the lapse rate graphs we can understand the terms. Thermals will rise to a point where they are in equilibrium with the surrounding. If the ELR is such that the equilibrium is never reached, then the thermals will keep rising indefinitely. i.e. the 2 lines diverge. This is unstable.
If the 2 lines converge, then the day will be relatively stable.
Unstable ELR > DALR (3’C/1000ft)
Stable ELR < DALR (3’C/1000ft)
Cumulus cloud formation
A thermal rising will may contain moisture. As they rise, they cool and may rise to a point where they reach the dew point. At that, the water vapour condenses to form cloud. We have reached cloudbase.
As the water condenses, something else happens. Latent heat will be released. The latent heat is the extra energy required when a substance changes state, i.e. from water to water vapour, extra heat is required to effect the change of state. This extra heat is stored and released when the water vapour condenses back into a liquid. This in effect gives a “boost” to the thermal and acts as a source of heat, hence the lapse rate in clouds will be lower than in a dry thermal. The lapse rate in clouds is known as the Saturated (or moist) adiabatic lapse rate) SALR.
This has a range of values depending on the moisture content but is typically:
Saturated Adiabatic lapse rate (SALR) 1.1 - 2.8’C/1000ft
The thermal in a cloud will keep rising until an inversion is reached or the cloud runs out of moisture. This determines the cloud top height. If the airmass is very unstable and there is a constant supply of warm moist air and powerful thermal development, then the situation may turn be right for the formation of Cunimbs.
The trigger temp is the temperature on the ground at and beyond which thermals will rise past the inversion layer.
Different ground types absorb solar energy better than others as far as thermal production is caused. The thermal is caused by the sun heating the ground (not the air itself), then the ground will warm up the bottom layer of the air to warm a “warm bubble” which wants to rise up. Dark surfaces such as ploughed fields, areas of dark tarmac are better than lakes etc, for the production of a thermal. The exam will expect you to be able to plot the life of a thermal.
Lets look at a typical thermal growth on a lapse rate graph.
Figure 15 Convective cloud formation
On the day above, clouds have formed with the cloudbase at dew point and the cloud tops limited by a lack of moisture, or if there is an abundant supply of moisture, then the inversion above. Note that if the dew point had been lower, then the thermal would have risen as a blue thermal (no cloud) and could have possible been cut off lower. The SALR has a steeper gradient and thus is very unstable.
Knowledge of ELR, DALR and SALR and the effect on thermals together with dewpoint and the effect on clouds is required for the exam (hint). One other term to know is the Isothermal layer. This is an area of the atmosphere where the temperature does not change with height.
Lets take an example question.
A table showing air temperature against height is below. Dewpoint at ground is 14’C and decreases by 0.5’C per 1,000ft. SALR is 1.5’C per 1,000ft. Describe what happens.
Figure 16 Sample question ELR
If the air is very moist and the SALR is less than 1.5, then the possibility exists of the moist air rising at a steeper gradient and therefore escaping the effects of the inversion and high Cu’s or Cb’s may result.
METEOROLOGICAL TERMS
- Adiabatic - A thermodynamic process where no heat leaves or enters the system
- Advection - transfer of air mass properties by motion.
- Air mass - huge body of air in which horizontal changes in temp are small.
- Anabatic wind - Wind blowing upslope.
- Anafront - a front where warm air is ascending over cold air.
- Anticyclone - area of high pressure
- Backing - winds changes direction anti clockwise
- Convection - transfer of heat by motion of a substantial volume of air.
- Dew point - temperature at which air must be cooled to become saturated with water vapour.
- DALR - Dry Adiabatic lapse rate, about 3’C per 1000ft
- ELR - Environmental lapse rate. This is 2’C per 1000ft for the ISA.
- Inversion - a layer of air where the temperature increases with height.
- Iso - equal
- Iso therm - a line of constant temperature
- Katabatic wind - wind that flows downslope
- Katafront - a front where the warm air sinks down above the frontal surface which will eventually weaken and destroy the front.
- SALR - Saturated adiabatic lapse rate, about 1.5’C per 1000ft
- Stability - the tendency of the atmosphere to stay as it is. Unstable air, where the ELR is greater than the DALR means that a thermal will diverge from the atmospheric temperature lapse rate.
- Standard atmosphere (ISA) - has a ELR of 2’C per 1000ft
- Super adiabatic lapse rate - A lapse rate greater than 3’C per 1000ft
- Tephigram - a aerological diagram with the x.y co-ordinates Temperature and entropy. The diagram is used for plotting the values of temp and humidity at specific pressure levels obtained from upper air soundings.
- Veering - wind which changes direction clockwise.
PRESSURE SYSTEMS
As the earth is covered by atmosphere, this atmosphere exerts a pressure on us all. This pressure is measured in Bars and the pressure is about 1 bar. A bar is too large for any detail so it is divided into millibars and represented as 1000mb. The unit hectopascal may also be used and is the same as a millibar.
Low pressure
Low pressure systems are the source of a great deal of active weather in the UK. The majority of our weather systems form out in the Atlantic along the frontal boundary between the arctic airmass and the warmer tropical maritime air to the south.
Formation of a low
When 2 masses of air of different density lie side by side they induce a strong current of air to flow along the cold side of the front at very high altitudes. This jet is formed due the extreme pressure differences at altitude causing a close bunching if high altitude isobars. The jet is several miles deep and travels at speeds of about 100 to 200 mph. Disturbances cause the jet to snake around and results in areas of divergence and convergence.
Figure 19 Formation of low pressure
The area of convergence will cause downward flowing air. This results in an increase in pressure at ground level and a downward movement of air. Similarly, at the area of divergence, the surface pressure will fall and an area of low pressure will start to form.
1. The jet stream divergence will cause an area of low pressure to start to form along the frontal zone.
The low pressure will draw the 2 edges of the front together, effectively increasing the temperature and pressure differentials thus aiding the formation of the low.
Figure 20 Formation of low (1)
As the air rises it is given a twist by the Coriolis force. This coriolis force is exactly the same as the force which causes the water going down the plughole to spin. The force is zero at the equator and is the reason behind low pressure spinning anti-clockwise in the Northern hemisphere and the reverse in the southern hemisphere.
Figure 21 Formation of low (2)
Figure 22 Formation of low (3)
As the air in continually extracted at the top of the system, so the surface pressure drops increasing the circulation and the winds speeds. The anticlockwise circulation is gradually spread up to the upper levels and the upward movement of ward moist air will eventually cause condensation and the release of latent heat to further power the process.
The cold front moves faster than the warm front and catches it up. With an occlusion forming where the cold front has caught the warm front The spiralling air in the depression further twists the fronts round to give the classic “hook” shape of the depression.
Associated weather
The weather associated with a depression is usually poor. Associated frontal systems can bring rain and cloud. A depression may arrive at our shores at any stage of development and it may or may not have frontal systems. It may have a weak warm front and an active cold front or vice versa. A system with an active cold and an active warm front is very rare. It may have a decaying occlusion, but the general outlook is worsening weather.
High pressure
High pressure systems are formed in a similar way to lows, and areas of high pressure can mean areas where there aren’t any lows. In an anticyclone, the air is descending and being warmed by compression as it descends. Since warmer air can hold more moisture, then clouds are less willing to form.
This results in clear skies at night and little tendency for any over-development.
Associated weather
In summer, a high pressure system always means an improvement with lighter winds and less cloud. In winter a high pressure can mean persistent fog and low cloud or it may lead to clear skies, depending on the source and track of the airmass at low level.
High pressures move slowly and can lead to the production of inversions due to the warmed upper air. The atmosphere becomes stable (cooler air at the bottom) and leads to poor thermal production. Inversions can lead to poor air quality with pollen, dust etc. being trapped in the inversion layer. Highs can persist for days and then they become blocking highs which will often divert the path of a low pressure system around the UK.
WINDS AND THINGS
This section is concerned with the assorted bits and pieces which don’t fit anywhere else.
Valley winds
Mountains tend to form a barrier to winds at low level. The air tends to flow up and down the valley Imagine a valley with hills on both sides. In the morning, the effect of the sun is to heat up the mountains first since the valley will be cooler and still in shade:
Figure 23 Valley winds (morning)
As time reaches midday, both slopes are in sun and powerful anabatic winds are produced up both slopes
Figure 24 Valley winds (midday)
This causes the winds at low level to rush up the valley to replace the air flowing up the slopes. The valley wind flows into the valley in the afternoon and evening. As the sun goes down and the slopes start to cool off with the altitude, katabatic winds flow downslope.
Figure 25 Valley winds (evening)
In the evening, as the wind turns katabatic on the slopes, it can rush down the hill and force upwards, over the valley centre, great areas of lifting air. This is the evening restitution lift or magic lift and can give easy soaring for quite a while in huge areas of lifting air. As time goes on, the valley winds will slow down from travelling up the valley and then turn to the evening and night time valley winds where they flow down the valley.
Sea breezes
In summer, the land tends to warm up quickly, but the sea remains much at the same temperature. Thermal activity may result in a general lessening of the pressure over the land with the results that air flows in from the sea to replace the lifting air over the land. This is a sea breeze. It can kill convection and shut off any thermals near the coast so avoid sea breezes.
In winter, the sea temperatures are relatively stable and warmer than the cold land. The sea breeze is reversed and sometimes leads to Cumulus formation over the sea as cold land air is blown over the sea, to have its base warmed by the sea to produce unstable conditions over water.
Sea breeze fronts
When a sea breeze sets up, it could be in opposition to the normal wind. In this case, a sea breeze front may be formed. This front works its way inland and can penetrate as far inland as Sheffield. This is characterised by a hanging curtain of cloud and a stepped cloud base. This is due to the moist sea air having a lower cloudbase. It needs a fairly light wind, warm day and some instability to set up the sea breeze front. The evidence of a front may also be apparent even with no surface geostrophic wind (wind set up parallel to isobars. The “normal” wind.) The cool moist air flowing inland will meet the warm dry land airmass and this is also a cold front of sorts.
Figure 26 Sea breeze front
Sea breeze fronts rarely occur between October and April.
Wave lift
Another type of lift is the wave lift. The requirements for wave are:
- Wind to be in a fairly constant direction
- Wind to be increasing with height
- A shallow unstable layer with a stable layer above it works well
- An obstruction upwind such as a range of hills is needed to start the waves off
Fog
Fog is cloud on ground level and there are several types
Radiation fog
Conditions suitable for radiation fog are;
- A cloudless night, allowing the earth to cool and thereby causing the air in contact with it to become cool
- Moist air that requires little cooling to reach dew point
- Light winds to reduce mixing
Advection fog
A warm moist air mass flowing across a significant colder surface will be cooled from below. If its temperature is reduced to the dew point, then fog will form. Advection fog can persist in stronger winds than radiation fog.
Figure 27 Advection fog
Sea fog
Sea fog is advection fog and may be caused by:
- An air flow off a warm land moving over a cold sea.
- Warm tropical air moving over a cold ocean or meting a cold air mass
Hill Fog
Hill fog is caused when moist air is uplifted over a hill and cools as it is forced upwards. As it cools it condenses to form hill fog or orographic cloud.
SYNOPTIC CHART
The exam requires you to understand the symbols, isobars, pressure systems and associated weather that you could expect when checking a synoptic chart.
A typical chart is shown below.
Figure 28 Synoptic chart
Pick out features such as:
- Areas of high pressure and low pressure
- Isobars
- Frontal systems
Remember about the Coriolis force and its effect on both high and low pressure systems The Coriolis force means that in the Northern Hemisphere, the geostrophic wind circulates anticlockwise round a low and clockwise round a anticlyclone (high pressure). The winds rotate in the same direction as the isobars, but this is only true for winds at altitude (over about 1,000ft). The effect of the ground causes friction which slows down the surface winds.
Figure 29 Rotation around pressure systems
Figure 30 Surface wind around a low
The surface wind around a low pressure points to the low pressure by about 30’ over land due to the friction. This effect is less over the sea where the friction is less.
The surface wind around a high pressure points away from the high pressure area by again about 30’ due to the friction. The wind speed also decreases in both cases
Figure 31 Surface wind around a high
Think of the affects on the atmosphere such as wind speed and direction, temperature, precipitation, cloud cover and visibility.
By the way, the above chart was taken in Jan 96 when we were in the depths of the icy winter. Winds were from the East (Siberia) and as the base of the winds warmed up slightly over the North Sea, this resulted in instability with snow showers over the eastern coast and hills. The high pressure fended off any frontal system and allowed the temperatures to plummet during the evenings. Blocking highs like this can (and did) last for several days. The chart was taken as the cold weather was dying off. The frontal systems in the Atlantic did eventually make their way in and the winds switched direction to the West or South West raising the temperatures and bringing the normal weather of showers, winds etc.
CLOUDS AND RAIN
Rain or precipitation can consist of different types of precipitation. It may be rain, fine drizzle, snow or hail.
Continuous rain or snow is associated with Nimbo stratus and alto stratus clouds and intermittent rain or snow with altostratus or strato cumulus.
Rain and snow showers are associated with cumiliform clouds such as cumulonimbus, cumulus and alto cumulus, with the very heavy showers coming from the cumulonimbus’s
Fine drizzle and snow is associated with stratus and strato cumulus.
REFERENCES AND ACKNOWLEDGEMENTS
- Understanding flying weather - Derek Piggott.
- Air pilots manual volume 2.
- Meteorology and flight - Tom Bradbury.
- Instant weather forecasting - Alan Watts.
Air Law
Intermediate Pilot Exam Notes - Airlaw
[Yet to be updated to include the new Air Navigation Order]
CONTENTS:
- IRISH AVIATION LAW DOCUMENTS AND PROMULGATION METHODS
- THE POWER OF THE IRISH AVIATION AUTHORITY TO MAKE ORDERS
- THE RELATIONSHIP BETWEEN IAA REGULATORY REQUIREMENTS AND THE REQUIREMENTS OF OTHER BODIES
- GLIDER RADIOS
- Airband radio
- 2m Amateur radio
- The Phonetic Alphabet
- AIRSPACE CLASSIFICATIONS
- IRISH MILITARY AIRSPACE
- Restricted Airspace (EIR)
- Prohibited Airspace (EIP)
- Dangerous Airspace (EID)
- Military Operating Areas (MOA)
- Military Frequencies
- SUMMARY OF UTILISED AIRSPACE IN IRELAND
- AERONAUTICAL CHARTS
- AERODROME TRAFFIC ZONES (ATZ)
- ALTIMETER SETTINGS
- QNH - Questionable Nautical Height
- QFE - Questionable Field Elevation
- QNE
- FLIGHT LEVEL
- RULES OF THE AIR AND COLLISION AVOIDANCE
- VMC and VFR
- COMMON AERONAUTICAL ABBREVIATIONS AND INITIALS
Irish aviation law documents and promulgation methods
The Irish Aviation Authority Act, 1993, as amended, provides for the establishment of the Irish Aviation Authority, to provide certain services in relation to civil aviation, to define its functions and to provide for the conferral on it of certain functions of the Minister for Transport under the Air Navigation and Transport Acts, 1936 to 1988, and the Air Navigation (EUROCONTROL) Acts, 1963 to 1983. The IAA, through their website www.iaa.ie, publish the following information for aviators:
- The Integrated Aeronautical Information Package (IAIP) comprises:
- The current Aeronautical Information Publication (AIP)
- AIP Supplements
- Aeronautical Information Circulars (AIC).
- Notices to Airmen (NOTAM) - These contain information on any aeronautical facility, hazard etc. which might be of use to pilots. They are available to be read on-line at www.iaa.ie.
The Power of Irish Aviation Authority to make Orders
The Irish Aviation Authority (IAA) is a commercial state-sponsored company which was established on 1 January 1994 to provide air navigation services in Irish-controlled airspace, and to regulate safety standards within the Irish civil aviation industry. Under Section 58 (1) of the Irish Aviation Authority Act 1993 the Authority has the power to make orders and regulations as necessary or expedient for the purpose of giving effect to the Annexes to the Chicago Convention.
The Relationship between IAA Regulatory Requirements and the Requirements of Other Bodies
The Irish Aviation Authority specifies its requirements for licences, certificates, approvals, permits and matters of that nature. These equirements must be met in order to obtain and/or continue to exercise the privileges of the licence or other form of approval issued by the Authority. In many cases other legislation, including legislation which is not specifically directed at aviation, also applies to the activity and Government departments or other statutory bodies have responsibilities in the area. It is the duty of the regulated party to ensure that it acquaints itself with all requirements affecting its activities and to ensure that it complies with those requirements. The Authority wishes to stress that any licence or other decision of the Irish Aviation Authority does not remove the obligation on regulated persons to comply with other legal requirements relating to the activity.
Glider radios
There are 2 types commonly in use in hang gliding and paragliding:
- Airband radio - The airband radio is AM and has 720 channels, of which gliders are allocated 5. The airband radio must be type approved. This means that the maker must have submitted a radio of the same type to the IAA who have then taken it to bits and said its OK to use. Without taking a RT test, glider pilots are limited to 5 frequencies (129.9, 129.975, 130.1, 130.125, 130.4 and the International Distress frequency of 121.5). The British Gliding Association recommend that certain frequencies be allocated certain tasks such as ground to air etc. Radios used by glider pilots in this way must be type approved and lockable to those frequencies only. Recently the UK's CAA approved the allocation of 118.675 for exclusively our use. This is Ok for our use anywhere in the UK FIR up to 5,000ft asl. Approval for the radio type must be sought and a licence held for the radio.
- 2m Amateur radio - In Ireland Radio Amateurs have use of many frequency bands including 144 to 146 MHz on FM. All of this band is in use. A lot of pilots use the frequencies just below this range for flying use - 143.750MHz to 143.950MHz. It is illegal to use a 2m set from the air, whether you are a licensed amateur or not.
- The Phonetic Alphabet - The commonly used radio-code for letter abbreviations:
|
|
|
|
|
|
|
|
|
|
|
|
|
|
|
|
|
|
|
|
|
|
|
|
|
|
|
Airspace Classifications
- Class A - IFR flights only are permitted. All flights are subject to air traffic control and are separated from each other
Airspace Classification A comprises:- Shannon Oceanic Transition Area (SOTA) and Northern Oceanic Transition Area (NOTA) at and above FL55 to Unlimited
- Class B - Not utilised in Ireland
- Class C - IFR and VFR flights are permitted. All flights are subjest to air traffic control service and IFR flights are separated from other IFR flights and from VFR flights. VFR flights are separated from IFR flights and receive traffic information in respect of other VFR flights
Airspace Classification C comprises:- Shannon UTA FL245 - FL660
- Shannon CTA at and below FL245
- Dublin CTA at and below FL245
- CTRs Cork, Dublin and Shannon
- CTRs Connaught, Donegal, Galway, Kerry, Sligo and Waterford during the promulgated hours of activation
- Class D - Not utilised in Ireland
- Class E - Not utilised in Ireland
- Class F - Not utilised in Ireland
- Class G - IFR and VFR flights are permitted, and receive flight information if requested
Airspace Classification G comprises:- all airspace within Shannon FIR, excluding airspace classified C as described above
Irish Military Airspace
A restricted area is defined airspace in which flight is restricted according to certain conditions. Penetration possible by civil aircraft provided prior permission has been obtained from, and subject to compliance with any conditions and instructions issued by Military ATS, Casement Aerodrome. Aircraft must be operational Mode C transponder equipped.
- EIR15 - Within Dublin CTR Class C airspace
- Winter Period - Mon-Fri 0900-1700UTC
- Summer Period - Mon-Fri 0800-1600UTC
- At other times as notified to Dublin and Shannon ATC
- See AIP ENR 5.1-1
- EIR16 - Within Dublin CTR Class C airspace
- Winter Period - Mon-Fri 0900-1700UTC
- Summer Period - Mon-Fri 0800-1600UTC
- At other times as notified to Dublin and Shannon ATC
- See AIP ENR 5.1-1
- EIR22 - Circle 1NM radius 542932N 0081440W
- Operational 24hrs/day
- See AIP ENR 5.1-2
- EIR23 - Within Dublin CTR Class C airspace
- Circle 1NM radius 531800N 0062652W
- Operational 24hrs/day
- See AIP ENR 5.1-2
A prohibited area is defined airspace in which flight is prohibited. These include military camps, prisons and certain other facilities. In Ireland they usually extend from the ground up to 5000ft AMSL. EIPs are deliniated by a solid red boundary filled with thin red hatch lines.
These include military weapons ranges for guns, missiles and rockets. Entry into some danger areas is prohibited by military bye-law. A crossing service may be available but will involve the use of radio. A danger area is defined airspace in which activities dangerous to flight may occur. They are shown as a dashed red outline filled with thin red hatch lines.
- MOA3
- Winter Period - Mon-Fri 0900-1700UTC
- Summer Period - Mon-Fri 0800-1600UTC
- At other times as notified to Dublin and Shannon ATC
-
See AIP ENR 5.2-1
- MOA4 - as above.
- MOA5 - as above.
- Baldonnell Tower - 123.5MHz
Summary of Utilised Airspace in Ireland
| Class |
Type |
Separation Provided |
Service provided |
VMC visibility and distance from cloud minima |
Speed Limitations |
Radio
Communication
requirement
|
Subject to ATC clearance |
| A | IFR only |
All aircraft |
Air traffic control service |
Not applicable | N/A |
Continuous two-way |
YES |
| C | IFR |
All |
Air traffic control service |
Not applicable |
N/A |
Continuous two-way |
YES |
| VFR | VFR from IFR |
Air traffic control service for separation from IFR. Traffic information and traffic avoidance advice on request. |
At and above FL100: 8km visibility, 1500m horozontal and 1000ft vertical from cloud. Below FL100: 5km visibility, 1500m horozontal and 1000ft vertical from cloud. |
250kts IAS below FL100 |
Continuous two-way |
YES | |
| G | IFR | Not provided |
Flight information service if requested | Not applicable |
N/A |
Not Required |
Not Required |
| VFR | Not provided |
Flight information service if requested. |
At and above FL100: 8km visibility, 1500m horozontal and 1000ft vertical from cloud. Below FL100: 5km visibility, 1500m horozontal and 1000ft vertical from cloud. OR At and below 3000ft AMSL or 1000ft above terrain (whichever is greater): 5km (3km for flight at IAS 140kts or less) visibility. Clear of cloud, in sight of surface. Helicopters may be flown below 300m (1000ft) above terrain in flight visibility not less than 1000m if manoeuvred at a speed which would give the pilot in command adequate opportunity to observe other traffic or obstacles in good time to avoid collision. |
250kts IAS below FL100 |
Not Required |
Not required |
Aeronautical Charts
- 1:500,000 VFR Chart - The Irish Aviation Authority visual flight rules (VFR) aeronautical chart has been produced in both laminate and paper versions. The chart is intended for VFR navigation within the boundaries of the Shannon FIR. This chart is most suitable for planning hang gliding and paragliding flights in Ireland.
- 1:250,000 VFR Chart - The Irish Aviation Authority visual flight rules (VFR) aeronautical charts have been produced in both laminate and paper versions. The purchaser can buy either version but will get four charts on two sheets of paper covering the Shannon FIR in one plastic wallet. The chart is intended for VFR navigation within the boundaries of the Shannon FIR
Make sure you know the symbols and the airspace markings on this map
Aerodrome Traffic Zones (ATZ)
The airspace surrounding most aerodromes listed in Ireland is designated an ATZ. The dimensions are:
- from ground level to 2,000ft above aerodrome level
- within the area bounded by a circle of radius:
- 2nm, where the length of the longest runway is 1850m or less
- 2.5nm where the length of the longest runway is 1850m or longer
Figure 1 - ATZ Dimensions
The number alongside the symbol on the chart shows the aerodrome height above sea level.
Flying inside the ATZ requires radio contact with the responsible party and so in the main we cannot go there, unless we have our RT pass and a radio and know what to do.
Altimeter settings
Vertical distance (altitude) is hard to measure accurately. Most altimeters work by measuring the change in air pressure as you gain height. Pressure reduces about 1 millibar (1mb) per 30ft of height gained. At higher levels this relationship is not linear but good enough for us. Note that millibar is the same as hectopascal. Hectopascal might be used in more metricated countries - it means the same - but in Ireland, the millibar is used for the moment.
There are 3 ways of height representation.
- QNH - Questionable Nautical Height - QNH is given by Air traffic control as a pressure reading that the pilot sets on his expensive altimeter. The altimeter then displays his height above Sea level. The ATC will broadcast the regional QNH to aircraft to take account of pressure changes caused by atmospheric conditions to make sure the pilot does not crash into a hill unexpectedly.
- Imagine a deep low over the UK and the pilot is flying from the outside of the low (where the pressure is higher) to the inside of the low (where the pressure is lowest), If the pilot keeps to the same displayed altitude on his altimeter as he flies into the low what happens. As the pressure outside the aircraft falls, the altimeter will show a higher altitude (lower pressure = higher altitude) and so the pilot will descend the keep the displayed altitude the same. The pilot does not know he is descending since he is watching his altimeter and its reading the same. Unfortunately for him, he is descending!!
- So QNH is a pressure setting given by ATC and is the current pressure reading at Mean Sea Level.
- QFE - Questionable Field Elevation - If our pilot is landing at a small airfield with not many facilities, then QNH might not be accurate enough for him to land without hitting some houses maybe. The pilot needs the pressure setting for the airfield. ATC might say "QNH is 1015mb, QFE is 1000mb". I.e. the air pressure at this airfield is 1000mb. So by setting the altimeter to this, we get the height above the airfield.
- So QFE is a pressure setting by ATC and is the current pressure reading at the airfield now.
- In general hang gliding and paragliding, when we say QNH it is the height above sea level, and when we say QFE is it the height above "the field", maybe takeoff or landing - its up to you
- QNE - This one is the strange one. QNE refers to the height indicated on a pressure altimeter when the aircraft is on the ground at an aerodrome and the pressure setting of 1013.2mb (remember this) is set on the sub scale. i.e. it is the height of the 1013.2mb pressure level. Note that this is the only reference which is a height, the others are pressure settings.
Flight level
Shown on charts as FL something. FL65 is flight level 65 which is 6,500ft... but what is it for?
Airlines flying everywhere would have to keep adjusting their altimeter every 10 minutes to make sure that the height they should be at is the height that are indeed at and not at the height displayed by their altimeter which has drifted out of alignment in the last 5 minutes due to rapidly changing air pressure outside the cabin. Since all aircraft, once they are high enough can forget about the ground - its more important to keep away from each other so they all use the same pressure setting on their altimeters. The International Standard Atmosphere (ISA) sea level pressure of 1013.2mb is used and then vertical position is called flight level.
As an aircraft climbs away from the airport, once past the transition altitude, he retunes his altimeter to 1013.2mb and so everyone else who does the same can keep accurate relative distances apart. In the UK the transition altitude is 3,000ft.
It is worth remembering that flight levels go up in regions of high pressure and the reverse in regions of low pressure. Thus in a deep depression, Buxton (first stop after Shining Tor) which is in Daventry Control Area, Class A airspace starts at flight level 45, could have its airspace lower limit reduced to 3,500 ft - worth knowing.
Rules of the Aid and Collision Avoidance
The rules of the air as they pertain to hang gliding and paragliding in Ireland are set out in detail on the IHPA website Flight Safety page:
All pilots are required to know these collision avoidance rules by heart and to always fly with consideration for other pilots in the air.
VMC and VFR
VMC = Visual Meteorological flying conditions. This refers to the amount of visual observance it is possible to keep. In these conditions we fly under VFR or Visual Flight Rules.
A quick note on these. In Ireland an aircraft shall always be flown in accordance with either VFR or IFR. When you are in VMC you are flying under VFR (Commercial pilots may elect to still fly IFR even if there is sufficient VMC) and responsible for avoiding collisions with other aircraft using the principle of see and avoid. You are flying in IMC when you cannot comply with any of the VMC cases.
Note the different types of visibility that are in different types of airspace. Refer to the Summary of Utilised Airspace in Ireland above. You have to know what conditions are like when you enter a specific type of airspace, usually the nearer to "A" the airspace, the more stringent the visual conditions become. The most stringent is full VMC which is 8km flight visibility, 1500m horizontal/1000ft vertical clearance from cloud. This is in class A airspace that we might be allowed to enter (i.e. crossing airways). The least VMC or VFR minima is 1500m flight visibility, clear of cloud and in sight of the surface, which is at under 3,000ft in class F and G airspace.
Common abbreviations and initials
ACAS - Airborne Collision Avoidance System
AGL - Above ground Level
AIAA - Area of Intense Aerial Activity
AIP - Aeronautical Information Publication
AIS -Aeronautical Information Service
AMSL - Above mean Sea Level
ASR - Altimeter setting Region
ATC - Air traffic Control
ATM - Air Traffic Management
ATS - Air Traffic Services
ATZ - Aerodrome Traffic Zone
CTA - Control Area
CTR - Control Zone
DME - Distance Measuring Equipment
EATMP - European Air Traffic Management Programme
FIR - Flight Information Region
FL - Flight Level
FUA - Flexible Use of Airspace
GA - General Aviation
GAT - General Air Traffic
GBAS - Ground Based Augmentation System
GNSS - Global Navigation Satellite System
HF - High Frequency
HIRTA - High Intensity Radio Transmission Area
IAA - Irish Aviation Authority
IAC - Irish Air Corps
ICAO - International Civil Aviation Organisation
IFR - Instrument Flight Rules
ILS - Instrument Landing System
IMC - Instrument Meteorological conditions
ITU - International Telecommunications Union
LFS - Low Flying Services including SAR
MATZ - Military Air traffic Zone
NDB - Non-Directional Beacon
OAT - Operational Air Traffic
QFE - Query Field Elevation
QNH - Query Nautical Height
SAR - Search and Rescue
SRA - Special Rules Area
SRZ - Special Rules Zone
TMA - Terminal Manoeuvring Area
TRA - Temporary Restriction Area
UHF - Ultra High Frequency
UIR - Upper Information Region
VHF - Very High Frequency
VFR - Visual Flight Rules
VMC - Visual meteorological Conditions
Operating Limitations
Para Pro 4 (Intermediate) Pilot Operating Limitations
Having been awarded a Para Pro 4 (Intermediate) pilot rating, the pilot is advised to observe the following operating limitations until such time as they have attained a Para Pro 5 (Advanced) pilot rating:
- An Intermediate Pilot with a Para Pro 4 rating is no longer dependent on having an Instructor or Coach on the hill to advise them each time they wish to fly. It is incumbent on the Intermediate Pilot to seek the advice of other, more senior, pilots who are flying a site.
- Responsible pilots never fly alone. If they are not flying with other pilots, then they stay in contact, by two way radio, with someone on the ground who can look out for them and retrieve them should they fly cross country or get into difficulties.
- Pilots progressing towards Para Pro 5 must fly with a 2m-band two-way radio.
- Pilots progressing towards Para Pro 5 must fly with, and know how to use, an appropriately sized reserve parachute on all flights.
- Pilots progressing towards Para Pro 5 must fly with a properly adjusted “Speed Bar” system attached to their harness and wing on all flights.
- Pilots progressing towards or applying for a Para Pro 5 rating must be current members of the IHPA and have a current insurance policy.
- Pilots progressing towards Para Pro 5 are advised not to fly in winds exceeding 15mph (25Km/h) blowing within 30° of straight up the hill.
- All flights must be written up in the Pilot’s Log Book.
Para Pro 5
Tasks & Experience Requirements
Para Pro 5 (Advanced) Pilot Rating Tasks & Experience Requirements
Para Pro 5 (Advanced) Pilot Rating Tasks
The pilot must:
1. Complete the appropriate log book entries.
2. Display an ability to fly competently and safely in the company of others; maintaining a good look-out, complying with the Rules of the Air and exhibiting good airmanship.
3. Pass the Para Pro 5 (Advanced) written examination paper.
NOTE : This rating is roughly equivalent to the BHPA Advanced Pilot Rating.
Para Pro 5 (Advanced) pilots are encouraged to work towards and apply for the FAI Eagle Award badges.
Experience Requirements: Intermediate Pilots wishing to apply for a Para Pro 5 (Advanced) Pilot Rating must:
- Log a minimum of one hundred hours airtime
- Successfully complete at least five cross country flights, in various lift, of no less than five miles, or seven kilometres, each. Ridge soaring flights or flying along the same ridge, only, is not acceptable. (i.e. A run down the Blackstairs Mts. does not count!)
Exam Study Guides
Flight Theory & Instruments
Intermediate Pilot Exam Notes - Flight Theory and Instruments
CONTENTS:
- HOW LIFT IS PRODUCED
- Bernoulli and Venturi
- The Airfoil
- Angle of Attack
- Vortices
- AERONAUTICAL TERMS
- AERODYNAMICS OF A STALL
- STABILITY
- HANG GLIDER
- Pitch Stability
- Roll stability
- Yaw stability
- PARAGLIDER
- Pendulum stability
- Washout
- HANG GLIDER
- GLIDE ANGLE
- BALLAST
- FORCES ON A GLIDER
- DRAG
- Induced
- Parasitic
- Form drag
- Profile drag
- Interference drag
- TOTAL DRAG
- POLAR CURVES
- INSTRUMENTS
- ALTIMETERS
- Aneriod
- Electronic
- VARIOMETERS
- Electronic
- Flask
- Total energy
- Airmass (Netto)
- Speed to fly
- MacReady ring
- ALTIMETERS
- REFERENCES AND ACKNOWLEDGEMENTS
HOW LIFT IS PRODUCED
Bernoulli and Venturi
Lift is the major force that keeps us up in the air. It is produced by the wing moving through the air. In simple terms, Bernoulli’s law explains the lift, or upward force that permits airfoils to generate lift. The upper surface of a wing is more curved than the lower; air, travelling across the wing is made to travel faster and thus its pressure on the upper surface is reduced. This effect is seen in such areas as car carburettors or atomisers and makes use of a thing called the venturi effect.
The structure of the wing best demonstrates the principle of airfoil lift. In the 19th century a scientist named Bernoulli discovered that the internal pressure of a fluid (liquid or gas) reduces the faster the fluid flows. If you take a tube, and make the tube smaller in diameter in the middle, this creates a "necked-down" section called a venturi. When air is forced through the pipe, as much air has to come out the exit as goes in the tube entrance. The air in the venturi section must travel faster to get through. Bernoulli found that the pressure at the venturi section was less than at the two ends of the pipe. This is because the speed of the air through the venturi section is travelling faster than at the ends of the tube.
The Airfoil
The shape of a wing is called an AIRFOIL. Usually the bottom of the wing is flat or nearly flat. The top of the wing is curved, with the wing being thicker at the front edge of the wing, and tapering to a thin surface at the trailing edge of the wing.
When a wing airfoil surface passes through the atmosphere, the atoms of the air on the top of the airfoil (shown as minus) must travel faster than their cousins (shown as plus) passing along the lower and flatter surface. This occurs because the distance the air must pass over the curved top of the wing is longer than the distance along the lower surface. According to the Bernoulli Principle, the pressure above the wing is less than the pressure of air below it. Consequently, a pressure difference between the lower and upper surfaces exist. This results in LIFT being produced. The amount of lift depends on the airfoil design and the speed of the air over its surfaces.
Lift is a force generated at 90’ to the angle of the undisturbed airflow or relative wind
About 2/3rds of the lift results from the reduced pressure above the wing and 1/3rd from the increased pressure below it. The majority of the lift being in the front top surface of the wing. The lift is proportional to the angle at which the airflow meets the wind, the angle of attack.
The chord of a wing is an imaginary line from the leading edge to the trailing edge of the wing. The term is used in the definition of "Angle of Incidence" and "Angle of Attack"
Angle Of Attack
As the aircraft passes through the air it traverses a particular line of flight. The air passing by the surfaces of the aircraft in the opposite direction of travel is called the Relative Wind. The angle which the wing 1chord makes with this Relative Wind is called Angle of Attack. An increase in angle of attack increases both lift and drag. If the angle becomes to great, it will pass the Critical Angle of Attack. This is a point where the airflow over the wing becomes so disturbed that the wing ceases to produce lift. The wing then enters into a Stalled condition.
The amount of lift generated is proportional to the speed at which the airflow meets the wing and sufficient lift can be generated by high airspeeds with low angle of attack or low airspeed with high angle of attack.
Vortices
When the wing is started flying it produces a starting vortex which is left spinning gently behind as you fly off. The standing tubular vortex your wing carries wherever it flies is created as the wing flies through the air molecules. At the wing tips, there is no wing to keep the vortex captive so it rolls of the tips in two spinning tubes which extend outwards and downwards. These vortices are a source of drag which will be described later. Keeping the standing vortex trapped at high angles of attack is the problem, because the molecules are accelerated more fiercely and the vortex becomes unstable. Finally at the stalling angle, the vortex leaves the wing and forms the end vortex which dies away. The following which is taken from a back issue of skywings may explain it a little better.
Unfortunately the process of generation of lift cannot be accomplished without the generation of drag and the measure of the efficiency of the wing can be expressed as the lift generated (good) against the drag generated (bad). Dividing the lift by the drag gives a number, the bigger the number for us, the better.
AERONAUTICAL TERMS
Some useful aeronautical terms.
Angle of attack - The measured angle between the airfoil chord and the direction of the undisturbed air in front of the airfoil.
Aspect ratio - This is the ratio of the span of the wing divided by the chord. The glider wings are usually high aspect ratio wings - the reason for this is that for a given amount of lift produced by a wing, the lower aspect ratio wing disturbs a shorter width of air, but it must deflect it more vigorously. As a result, the tip area experiences larger losses in the form of swirls at the tip.
SPAN SPAN2
ASPECT_ RATIO = --------- = --------
CHORD AREA
Centre of Pressure - Even though the lift of an airfoil is distributed along its surface, the resultant force of all the lift forces can be considered to be at single point along the wing known as the Centre of Pressure. Centre of pressure can move depending on the angle of attack.
Centre of gravity - The resultant forces of all the weight can be considered to be at the centre of gravity. Centre of gravity can move by the point weight shifting. The C of G is where the aircraft would balance. It can also be called the centre of mass.
Chord - The straight line drawn from the furthest forward point on the airfoil to the furthest rearward point on the airfoil.
Dihedral - When you stand in front of an aircraft, looking toward the tail, the wings are usually higher at the wing tips than at the wing root (where the wing attaches to the fuselage). This upward angle from wing root to tip is called DIHEDRAL. On an aircraft with dihedral, when one wing drops, it will produce slightly greater lift than the other wing. The aircraft tends to return to a level status providing lateral stability to the aircraft.
Washout - A lowering of the angle of attack of the wing as it progresses from root to tip. Hang gliders have washout and the tips are held up by tip rods or other means.
Washin - An increase in the angle of attack from root to tip.
AERODYNAMICS OF A STALL
A stall occurs because of the air’s inability to make sudden changes in velocity. The air has mass. Therefore it wants to continue in its initial direction due to inertia.
Figure 4 - Stall effects
The air can no longer make sudden changes to flow smoothly over the upper surface. It breaks away at the rear and creates turbulence. The further the nose is raised, the more the break away point moves forward.
At the stall the drag increases and the lift decreases.
STABILITY
Stability is a tendency for a glider to return to normal level of flight after disturbance.
- Neutral - A glider is given a nudge and it stays where it is.
- Stable - A glider is given a nudge and it returns to its trim point.
- Unstable - A glider is given a nudge and it gets even worse.
For a glider this means that it must return to level flight after disturbances to the pitch, roll or yaw axes.
A stable glider near stall will want to speed up, a stable glider flat out will want to slow down. An unstable glider near stall will want to slow up and an unstable glider flat out will want to go faster. (Not a very nice glider to fly).
The standard airfoil, if the angle of attack is increased (i.e. near the stall) then the centre of pressure moves forward with increasing angle of attack. The C of P also moves to the back of the airfoil as the A of A decreases. This is not a stable situation.
Unfortunately, all airfoils have the unwanted trait of instability so we have to do something to overcome the problem. Stability is a fine line for the designer between an overly unstable glider which would be a handful to say the least to fly and an overly stable glider which would not turn or be a real pig to fly.
Hang Glider
Hang glider stability is accomplished by several methods.
Pitch Stability
Pitch stability is the stability in the lateral axis.
Reflex
Reflex is the upward curving of the rear of the wing and is most often carried out by luff lines attached from the kingpost to the trailing edge of the sail. Topless gliders have some internal bracing to keep the reflex trailing edge in place.
What the luff lines do is destroy the lift at high speed so that the nose of the aircraft wants to pull up and slow down.
Luff lines are out of play during normal flight. With a VG system, the lines have to be loosened as the sail is tightened or they kick in too soon. Thus some gliders (Kiss for example) have VG compensators for the luff lines.
Sweepback
If the lifting surfaces are designed so that the lifting surface behind the C of G lose lift quicker than those areas ahead of the C of G, then more lift will be forward at high speeds to pull the nose up and more lift at the rear to force the nose down at low speeds. In other words, if we pull on speed, the tips unload more than the centre and thus the Centre of pressure moves forward to pull the nose up. If we push out, the tips lift more and tend to move the C of P back to pull the nose down . This is accomplished by a mixture of sweepback and washout. Sweepback is the V-shape given to the plan view of the wing and puts the tips behind the C of G.
Washout
Washout is the change in twist from the root to the tip. Washout is in one direction and washin is in the other direction. Moving from root to tip,, washout decreases the A of A. All hang gliders have washout. This combines with the sweepback and gives static pitch stability to hang gliders. Another advantage of washout combined with sweepback is the effect in a stall. As the glider stalls, the tips are at a lower angle of attack than the nose, and they tend to keep flying longer than the nose. In a shallow stall, if the nose is stalled and the tips flying, then the glider keeps on an even keel and the nose dips to pick up speed. This effect also helps during landing as the glider is flared, the tips stall last and help stop a wing dropping.
Roll stability
Stability along the longitudinal axis.
Dihedral/Anhedral
Dihedral is an upward tilting of the wings.
If a roll occurs, the lower wing will produce more lift and the higher wing will produce less lift. This will tend to counteract the roll effect and thus introduce stability.
Although dihedral assists roll stability, slight anhedral gives instability to assist turns. The amount of anhedral used is slight and since the leading edge is supported by the flying wires at about mid distance, during flight, the outboard sections would bend up and produce a small amount of dihedral. The original Kiss used an anhedral airframe but a relatively loose sail which when loaded assumes a dihedral shape, outboard of the flying wires. This mix of anhedral and dihedral is called a cathedral wing with the cathedral area being the part outboard of the flying wires.
Yaw stability
Stability in the vertical axis.
Sweepback
Yaw stability on a hang glider comes mainly from sweepback. As the glider yaws, one leading edge will present a larger frontal surface to the wind and therefore the amount of drag generated by this wing will be greater, similarly, the other wing will present a smaller frontal surface to the wind and the drag will be less. This effect will create a turning moment about the vertical axis which will tend to bring the glider back on course.
Yaw stability may also be helped by the addition of winglets on some gliders.
Paraglider
Stability for a paraglider is not such an issue since a paraglider is not a tail-less aircraft as a hang glider is.
Pendulum stability
Most of the stability comes from the pendulum effect. The weight of the pilot is great compared to the weight of the canopy. The lift comes from the canopy and the weight from the pilot. This effect means it is extremely difficult to dislodge the pendulum stability that a paraglider has.
Roll stability and pitch stability come mainly from the pendulum effect.
Pitch stability can be influenced by the aerodynamic section used, some are more pitch stable than others. The curve of the glider (viewed from the front) also affects the roll stability due to the direction the lift is acting in relation to the position of the pilot.
Washout
Paragliders can have a twist built in the wing as do hang gliders. Standard paragliders are built for stability and washin is often built in the tips. This has the effect of increasing the lift in this part of the wing and hence increase the tension in the sail across the span i.e. makes the wing feel more solid. It also tends to reduce the tendency for tip deflations. Advanced paragliders can have neutral or washout built in to increase the performance. This can also make the tips “loose” in turbulence.
GLIDE ANGLE
Glide angle is not actually an angle but expressed as a ratio i.e. 8 to 1 glide angle. This means for every 8 units of length travelled across the ground, then 1 unit of length is descended. Obviously the greater the number, the better the glide angle.
Glide angle also is the same is the LD ration (lift/drag). Glide angle is increased by increasing the lift (difficult) or reducing the drag (easier). Since as we will see on the section on drag, drag increases with airspeed, then at high speed, the reduction of drag is an important factor in glider performance. Sailplanes go to great lengths to reduce drag and have very smooth GRP surfaces and streamlining to reduce drag. For hang gliders, the reduction of drag has given rise to the topless glider. For paragliders, the number of lines has been reduced together with the introduction of microlines. The relationship between sink rate, glide ratio and flying speed is now explained. Some reference may be needed to the section titled “Forces on a glider”.
In the diagrams, L is the lift vector and is always at 90’ to the direction of flight vector V. D is drag and is always opposite to V. L and D combine to give the resultant R which is opposite and equal to the weight W.
V has been split into 2 vectors, Vh (horizontal speed) and Vv (vertical speed). For clarity the airfoil has been removed.
The diagram shows the forces acting on an airfoil. The wing is moving right to left in the direction of the arrow V. V is opposite in direction to the wind hitting the wing. The wing is flying with little drag.
The direction of travel is further down the wing is pointed in more of a dive.
The wing is travelling further in a dive. Note that the drag is always opposite to the travel and that the resultant R is the sum of the lift and the drag and counterbalances the weight.
The sink rate can be identified with the component of velocity Vv. Vv To minimise the sink rate we must minimise Vv. The glide ratio is equal to Vh/Vv. This is simple the distance travelled divided by the distance fallen.
To maximise glide ratio we need to maximise Vh and minimise Vv.
By applying geometry rules we can find that the triangle of sides R,L and D (when D is shifted) is similar to the triangle defined by V, Vh and Vv.
Therefore L/D equals Vh/Vv which is of course the glide ratio.
BALLAST
Ballast is another name for additional weight carried by the pilot. All gliders are certified to fly within a certain weight range. At the top of the weight range, the behaviour of a glider is different if weighted at the low end. As mentioned before, the design of a glider is a compromise, increase performance in 1 area such as glide angle and another area may suffer, such as sink rate.
Ballast can be used to increase the weight of the aircraft and thus increase the "wing loading” (total payload weight (pilot+harness etc) divided by the surface area of the wing) on the glider. This means that the aircraft will fly faster down the glide slope. The sink rate is increased slightly but the max glide ratio is not affected. The top speed of the glider is increased which may be helpful if flying on strong days in a paraglider. Performance and general handling of the glider may be better when flying at a certain weight. Performance paragliders seem to benefit from being well weighted.
Remember if you intend to take ballast that can be jettisoned in flight, then ballast is only allowed in the form of water or fine sand. Also, remember never to exceed the design weights of your glider.
FORCES ON A GLIDER
Already touched on in an earlier section. There a 4 forces on the glider wing.
One difference between a powered wind such as a light aircraft and a glider wing. All flying objects without power get their energy from gravity. A glider converts some of its downward falling motion to forward motion shown as “V”. Once airspeed is established, the lifting forces build up to couple with the downward pull of gravity and lift the nose until equilibrium is reached.
The force of gravity is shown by “W”.
This is always balanced in steady flight by the sum of forces of lift “L” and drag “D” called the resultant “R”. If W is not balanced by R the glider will accelerate until both the lift and drag increase to a point of reinstating the equilibrium. i.e. if a take off run is too slow, the lift generated will not support the weight. The nose will dip and the glider pick up airspeed until enough lift is produced for the two to equalise. Hopefully this happens above ground.
The resultant force R always acts through the centre of pressure
The weight always acts through the centre of gravity.
Both the C of P and the C of G can move. The centre of pressure by changing the angle of attack and the centre of gravity by weight shifting. That’s how we can control the glider.
If a pilot pulls the bar in to gain speed, the lift decreases. This means that R is reduced and there the wing picks up speed until the lift is increased (and the drag) to match the weight.
The flying speed varies only with angle of attack for a given glider and flying weight.
DRAG
Drag is result of us flying in a fluid (air) and cannot be totally removed. There are several types of drag. Refer to Figure 9 - Total drag.
Induced
Induced drag is a by product of lift. The majority of induced is formed at the wingtips where the wingtip vortices are shed, as the area of low pressure above the wing and the high pressure below the wing slide off the wingtip and mix in a swirling trailing tip vortex.
The important thing is that induced drag reduced with angle of attack and hence airspeed. High aspect ratio wings reduce induced drag. Winglets on 747’s reduce induced drag at slow speed. Condors have extended feathers at the tips that do funny things with tip vortices and they all help reduce induced drag.
Parasitic
Parasitic drag is a friction drag and varies with the square of the speed. i.e. doubling your speed quadruples your parasitic drag. There are a few types of parasitic drag
Form drag
Caused by solid non-lifting items in the airstream. i.e. You, wires, kingpost etc.
Profile drag
Caused by the lifting surfaces. It consists of skin friction drag and leading edge form drag. The more streamlined the airfoil shape, the less profile drag.
Interference drag
Interference drag is when the airflow around the aircraft interfere with each other. Not a big problem on hang gliders or paragliders.
Total drag
Add all the drag components up to get the total drag. Different parts of the drag are important at different speeds. We can plot a graph as below.
The best glide occurs at minimum drag.
POLAR CURVES
Polar curves are graphical representations of the performance of our wing. They can be used to determine what speed we should fly at for any given conditions to maximise our glide over the ground. They are drawn with airspeed along the x axis and sink rate along the y axis.
The curve is a series of plots taken for a particular aircraft and for a series of airspeeds. At each airspeed the sink rate is taken and then it is possible to plot the polar curve. The sharp increase in sink rate at slow speeds is the point just before the stall.
Min sink is the highest point on the graph.
Max glide in still air is obtained by drawing a tangent to the graph from the origin . The point of intersection can be read off in sink rate and airspeed. The graph can also be used in head winds and tailwinds and rising and sinking air for the same purpose.
If we want to find out the speed to fly at in say a head wind of say 10mph. Instead of taking our tangent line from the origin, we take it from the 10mph point on the headwind side of the line. The tangent touches the polar at a faster speed which can be read off at point A. Similarly if we are flying in a tailwind, the polar will tell us to fly slower.
Figure 11 - Polar curve with headwind
Figure 12 - Polar curve with thermal
The final example shows a combination of flying an a 8mph headwind and a 150fpm sink area. The fast speed is shown at A
Figure 13 - Polar curve with both a headwind and thermal
=========================================================
From the above we can deduce that we should speed up in sink and a headwind
and slow down in thermals and a tailwind.
=======================================================================
INSTRUMENTS
We all fly with instruments. The altimeter measures height above a reference. The variometer measures our rate of change of altitude. The Air speed indicator measures airspeed. The 2 or 3 are usually combined in 1 instrument.
Altimeters
Altimeters measure height against a reference. Most commonly they use the fact that air pressure reduces by 1mb for every 30ft we rise and the relationship is linear (at the levels we fly at). There are other means of measuring height (satellite navigation) but these are not as accurate for the amount of money we can afford.
Aneriod
The aneroid altimeter uses a small sealed capsule containing air. As the instrument goes up, the air pressure in the capsule increases and by the design of the capsule, it is allowed to expand in a certain direction. This expansion is coupled by mechanical linkages to a dial display. The dial can be adjusted by a knob to read say height above sea level (QNH) or height above the field (QFE). This altimeter is mechanical.
Electronic
The majority of altimeters are electronic. They use semiconductor materials to sense changes in air pressure. Once you have the sensor, then its relatively straightforward to design electronics around it to convert the signal to a display. Modern altimeters also have the ability to have temperature compensation and data links built in.
Variometers
Variometers also sense changes in air pressure, but in a different way. They display the rate of change of air pressure outside rather than the absolute air pressure. The faster the ascent, the faster the rate of change of air pressure.
Electronic
Once the pressure sensor is in the box of electronics, it can also be used to measure and display the rate of change of pressure.
Flask
A flask vario is more commonly found in sailplanes and is an early from of vario. It looks like below:
As the instrument rises, the air in the flask will try and rush out of the openings since it will be at a higher pressure than the surroundings. As it rushes past the pith balls, one is forced upwards in the draft. The same thing happens in descent but the other ball is forced upwards.
Total energy
False readings may be obtained by flying fast and converting this speed to height. This may be converted into an imaginary thermal as the vario senses the increase in height. This is called a “stick thermal” It is of course not a real thermal. Varios which take the airspeed into account when determining the air around are called total energy varios. Very important for sailplanes which have a lot of energy retention and can convert speed to a lot of height.
The solution to avoid false readings is to use a total energy vario. By total energy we mean the sum of the kinetic (moving) and potential (due to height) energy. They work since the dynamic pressure of the air increases with the square of the velocity. Our sink rate increases pretty much with the square of our flying speed. In we have some device to measure the airs dynamic pressure, and tie this into our varios detection circuits, we can compensate for the altitude change due to glider speed. The metal tube on LR3 varios is the total energy probe.
Airmass(Netto)
As we fly at different speeds, our glider has different sink rates. We have to mentally compensate for this when working out what the air is doing. Netto varios work this out for us and always indicate the airs “net” lift or sink.
Speed to fly
Speed to fly is a complicated area of theory, covered recently by Gordon Rigg in an excellent article in Skywings. Suffice to say for the exam, speed to fly is a theory that for every condition of lift/sink and headwind/tailwind, in order to achieve the greatest distance over the ground, then there is one specific airspeed to fly at. It can also be used to determine the speed to fly at to achieve the fasted speed to goal. It’s a lecture in itself.
MacReady ring
A MacReady ring is a scale which fits round the vario display (assume its an old type vario with analogue display). The ring rotates round the vario display and as you fly at a certain vario reading. The MacReady ring tells you to fly at a certain speed. As you fly at this speed, the vario needle will no doubt move to a new reading and you have to readjust your speed. Do this until the vario needle points to the speed you are flying at and that’s it. Modern varios have facilities to link to GPS’s to work out your ground speed compared with your air speed and work out headwind/ tailwind components. The vario readings are all fed into the electronics which displays the speed to fly.
REFERENCES AND ACKNOWLEDGEMENTS
- Performance Flying by Dennis Pagen
- Paragliding flight by Dennis Pagen
- BHGA Pilot handbook
- Touching cloudbase by Ian Currer
Meteorology
Intermediate Pilot Exam Notes - Meteorology
CONTENTS:
- BUYS BALLOTS’S LAW
- FRONTS
- WARM FRONT
- Cross section
- WARM SECTOR
- COLD FRONT
- Cross section
- OCCLUDED FRONT
- Cross section
- WARM FRONT
- CLOUDS
- HIGH
- MEDIUM
- LOW
- FORMATION OF CLOUDS
- Convection
- Orographic uplift
- Cloud formed by turbulence and mixing
- Cloud formed by widespread lifting
- CLOUDBASE
- CONVECTION
- THERMAL PRODUCTION
- THE “REAL ATMOSPHERE”
- Inversion
- STABILITY AND INSTABILITY
- CUMULUS CLOUD FORMATION
- METEOROLOGICAL TERMS
- PRESSURE SYSTEMS
- LOW PRESSURE
- Formation of a low
- Associated weather
- HIGH PRESSURE
- Associated weather
- LOW PRESSURE
- WINDS AND THINGS
- VALLEY WINDS
- SEA BREEZES
- SEA BREEZE FRONTS
- WAVE LIFT
- FOG
- Radiation fog
- Advection fog
- Sea fog
- Hill Fog
- SYNOPTIC CHART
- CLOUDS AND RAIN
- ACKNOWLEDGEMENTS
BUYS BALLOT'S LAW
Very Simply, this states that in the Northern Hemisphere, if you stand with your back to the wind, the area of low pressure is on your left hand side. In the Southern Hemisphere, it is on your right hand side.
FRONTS
A front is a boundary between 2 different air masses of different density. Air masses don’t like to mix and the boundary between the two (the front) is where active weather can take place. Fronts are very common in depressions. I recommend Derek Piggots book “Understanding Flying Weather” to see the birth and life of a depression. Although not in the syllabus, a depression starts along the jet stream. The jet stream is an area of very fast moving air circulating West to east (in the Northern Hemisphere). The jet stream is like the traffic on a motorway, it sometimes bunches and sometimes eases off. Where it bunches, the high altitude pressure increases causing a downward flow of air - the start of an anticyclone (high pressure system) where it eases, it speeds up and due to Bernoulli’s principle, it causes a reduction in pressure - the start of a low. More details later. As the low pressure “winds up”, it twists the air masses and causes the characteristic low with fronts. The formation of a low with its frontal systems will be explained in the section on Pressure systems.
For this section, the typical low with frontal zones is shown below:
Figure 1 Low pressure system
Since the vast majority of low pressure systems move from West to East, the first frontal system to make its effect on the UK will be the warm front.
A warm front is where warm air overrides cooler air. Shown on maps as:
Figure 2 Warm front symbol
A warm front is where an area of warm air catches up with an area of cold air and overrides it (due to the less density). The normal warm front has a shallow slope with the air rising gradually over many hundreds of miles. This lifting produces the gradually thickening layer of cloud which eventually results in the steady rain near the frontal zone.
Cross section
The cross section of a warm front is shown below:
Figure 3 Warm front cross-section
The normal warm front has a shallow slope as the warm airmass overrides the cooler air. The slope is typically 1:50 to 1:400 and the frontal zone effect may extend 500 miles ahead of the frontal transition on the ground. This means that the forthcoming warm front may be seen in advance. High cloud such as Cirrus and cirro stratus will shut off the solar activity usually cutting off thermals. Then the cloudbase will lower with Alto stratus and Nimbo stratus giving drizzle as the front approaches. Rain possibly beginning 5-10 hrs before the passage of the front. The winds may strengthen and back (winds change direction ANTI CLOCKWISE.) At the front, the rain eases off, the wind will veer 50 degrees or so and the temperature and humidity will rise. We are now in the warm sector.
Warm Sector
The warm sector is the area between the leading warm front and its following cold front. The air is warm and produces the right conditions for wave flights. Following the warm sector is the cold front.
Figure 3a - Warm Sector
A cold front is where colder denser air undercuts warmer air. It is shown on maps as below:
Figure 4 Cold front symbol
When a mass of cold air meets a mass of warm air, it tries to undercut it. The cold air pushes under the warm air acting as a wedge. The slope of the wedge is steep, about 1 in 30 to 1 in 100. They move quickly about 20mph. and strong updraughts can be produced about 100 miles ahead of a front.
Cross section
The cross section is shown below:
Figure 5 Cold front cross-section
The warm sector gets its name from the fact that the cold front usually follows a warm front. See the section on pressure systems later.
The cold front is often dramatic with heavy showers. At the front, the temperatures drop, the air is drier and the wind veers (winds change direction CLOCKWISE) often to the North West direction. Behind the cold front, there is often a complete clearance of cloud but this very quickly gives way to high Cumulus and shower clouds. Good days for soaring are found after cold fronts have gone through and the pressure starts to rise again. The rising pressure raises cloudbase, and the cooler air means a ready supply of thermals.
For information and probably not likely for the exam. Bradbury indicates the 2 types of cold front - the katafront and the anafront. You should know about katabatic winds (flow downslope and are KATASTROPHIC for taking off and Anabatic winds which flow upslope).
The same thing happens at fronts where the frontal zone approaches, the wind upstream of the front can flow down the slope (katafront) or up the front (anafront).
Figure 6 Anafront
Above shows an anafront. The air preceding the cold front is rising above the frontal zone and creating very active clouds such as Cunimb’s. The frontal zone is very steep. The Katafront is shown below:
Figure 7 Katafront
The air preceding the frontal zone is flowing down slope and dampens the activity.
Occluded Front
An occluded front is where a cold front has caught up with a warm front. It is shown on maps as below:
Figure 8 Occluded front symbol
As the depression deepens, the cold front with its weather systems catches up with the warm front and the 2 types of weather become mixed.
Cross section
Figure 9 Occluded front cross-section
The occlusions can have some of the characteristics of a warm front or a cold front but on a milder scale. The weather produced by a occlusion can range from that of the 2 frontal types to prolonged periods of rain.
CLOUDS
The amount of moisture that air can hold depends on its temperature, with warmer air holding more air than cold.
Cloud form whenever the air is cooled to a point where the temperature to which a particular mass of air must be cooled for saturation to occur is called the Dew Point.
Sometimes the amount of moisture in the air is measured as relative humidity. The Relative humidity (RH) is:
RH = amount of water vapour in the air / amount of water vapour required to saturate it (at that temperature). This is expressed as a percentage.
i.e. dry air has a RH of 0%. Air about to form cloud has a RH of nearly 100%.
Clouds are classified as high, medium or low according to the height of their base. There are 10 basic types. See the diagram below:
Figure 10 Cloud types
High
Altitude range is 15 to 40,000ft. These are composed mainly of ice crystals and are known as cirro types.
- 1. Cirrus (Ci) is the wispy high cloud
- 2. Cirrocumulus (Cc) is a high cloud with a cell pattern.
- 3. Cirro stratus (Cs) is the thin veil type cloud
Medium
Altitude range is 6,500 to 23,000ft. The are known as alto clouds.
- 4. Alto cumulus (Ac) is a medium layer with a cell pattern. In an unstable atmosphere, Ac may produce virga or precipitation which does not reach the ground.
- 5. Alto stratus (As) is an even layer of cloud at medium height
Low
Altitude range is 0 to 8,000ft.
- 6. Nimbostratus (Ns) is a deep layer of rain cloud.
- 7. Strato cumulus (Sc) is a greyish/whitish cloud consisting of rolls or cells. The weather is light rain, drizzle or snow.
- 8. Stratus (St) is a low lying layer of cloud. May give drizzle
- 9. Cumulus (Cu) these are individual heaped clouds with a cauliflower top. Large Cu may give showers.
- 10. Cumulonimbus (Cb) are heavy shower clouds or thunderstorm clouds. The tops of these can reach past 30,000ft. Weather is rain, hail and heavy showers.
There are other clouds which are not listed above:
- Castellanus such as Altocumulus castellanus are excellent indicators (especially in the Alps) or upper atmosphere instability. These in the morning may indicate Cbs later in the day.
- Lenticular - These lens shaped clouds indicate the presence of wave activity and may be stacked, one above the other in certain cases. They show the top of the wave.
Formation of clouds
Clouds may be formed in several ways but all rely on the fact that the air is cooled to a point where it cannot hold its moisture.
Convection
The action of the sun will heat the ground. This in turn heats the air layer closest to the ground which will become warmer and thus less dense. It may rise and is it does so, it will cool. Eventually it may reach a point where its temperature reaches the dew point and the water vapour condenses to form cloud. Cumulus cloud is formed in this way.
Orographic uplift
Air may be flowing along and be forced to rise upwards when it reaches an obstruction such as a mountain chain. As it rises it will cool and it may be cooled past its dewpoint temperature. It will condense and orographic cloud will form on the windward side of hills.
Cloud formed by turbulence and mixing
As air flows over the surface of the earth, frictional effects cause variations in local wind strengths. Eddies are set up which cause the lower level air to mix. The more friction and the stringer the wind, the more mixing. As the air mixes, it may rise and if it cools enough, layer cloud above the friction area may result.
Figure 11 Clouds formed by turbulence
Cloud formed by widespread lifting
When 2 air masses meet, such as in a warm front, then great areas of air may flow over the cooler air and rise as it does so. High stratus cloud will result. See the section on fronts for more details.
Cloudbase
Cloudbase is the term given to indicate the height that the base of the cloud is ASL. It can be calculated from the dew point and the ground temperature.
i.e. Temp of 23 deg with dew point of 12 give a cloudbase of 4,400ft.
CONVECTION
One of the main topics in the Met course is to describe thermal growth and activity. By understanding this and the reasons for thermals, we can also understand many other parts of the atmosphere and cover such things as, Inversions, Stability and instability, Cb’s and cloud base.
With increasing altitude, the following decrease
- Temperature
- Pressure
- Density
As altitude rises, temperature generally decreases. This change in temperature with height is called the Lapse Rate.
The standard atmospheric rate of change has been defined by Scientists as the standard atmosphere and it has the following conditions:
Environmental Lapse rate (ELR) = 2’C/1000ft
Pressure change = 1mb per 30ft
The ELR can be represented on a graph but it is important to know that this is only a “measuring stick”. the real ELR may be a lot different.
Figure 12 Standard ELR
Thermal production
As the sun heats the ground, the ground in turn heats up a layer of air close to the ground. A bubble of warm air starts to form and is less dense than the surrounds since it is warmer. It may unstick from the ground and start to rise through the atmosphere. As the density and the pressure of the surrounding air decreases with altitude, the thermal will expand adiabatically (a process where no heat is lost or gained from the surroundings) and hence it cools. As air expands it cools. The thermal will cool at a known rate and its rate of cooling or lapse rate is the Dry Adiabatic Lapse rate or DALR. The word dry refers to the moisture in the thermal being retained as vapour and not condensing.
Dry adiabatic lapse rate (DALR) = 3’C / 1000ft
If we plot the course of a thermal leaving the ground with a temperature of 25’C, after 5,000ft the thermal has cooled to 10’C and has reached equilibrium with the surroundings. i.e. it stops rising.
Figure 13 ELR and DALR
The “Real Atmosphere”
In real life, the atmospheric conditions do not look exactly like the above. Overlaying warm fronts could mean warm air aloft. High pressure systems could warm the upper air due to compression of the upper air. Air close to the ground may be chilled on a clear night. When the air temperature does not fall with height, but rises, then this condition is called an inversion.
Inversion
An inversion is a warming of the air at height increases and can be in 2 types.
- High level - caused by a high pressure system warming the upper air
- Low level - caused by air chilled in contact with a cold ground which has lost heat by convection
These may be shown on a lapse rate graph as before:
Figure 14 Inversions
Inversions may puts a lid on our max. altitude possible by thermals.
Stability and instability
We often hear the terms stability and instability with the latter being our preference. Using the lapse rate graphs we can understand the terms. Thermals will rise to a point where they are in equilibrium with the surrounding. If the ELR is such that the equilibrium is never reached, then the thermals will keep rising indefinitely. i.e. the 2 lines diverge. This is unstable.
If the 2 lines converge, then the day will be relatively stable.
Unstable ELR > DALR (3’C/1000ft)
Stable ELR < DALR (3’C/1000ft)
Cumulus cloud formation
A thermal rising will may contain moisture. As they rise, they cool and may rise to a point where they reach the dew point. At that, the water vapour condenses to form cloud. We have reached cloudbase.
As the water condenses, something else happens. Latent heat will be released. The latent heat is the extra energy required when a substance changes state, i.e. from water to water vapour, extra heat is required to effect the change of state. This extra heat is stored and released when the water vapour condenses back into a liquid. This in effect gives a “boost” to the thermal and acts as a source of heat, hence the lapse rate in clouds will be lower than in a dry thermal. The lapse rate in clouds is known as the Saturated (or moist) adiabatic lapse rate) SALR.
This has a range of values depending on the moisture content but is typically:
Saturated Adiabatic lapse rate (SALR) 1.1 - 2.8’C/1000ft
The thermal in a cloud will keep rising until an inversion is reached or the cloud runs out of moisture. This determines the cloud top height. If the airmass is very unstable and there is a constant supply of warm moist air and powerful thermal development, then the situation may turn be right for the formation of Cunimbs.
The trigger temp is the temperature on the ground at and beyond which thermals will rise past the inversion layer.
Different ground types absorb solar energy better than others as far as thermal production is caused. The thermal is caused by the sun heating the ground (not the air itself), then the ground will warm up the bottom layer of the air to warm a “warm bubble” which wants to rise up. Dark surfaces such as ploughed fields, areas of dark tarmac are better than lakes etc, for the production of a thermal. The exam will expect you to be able to plot the life of a thermal.
Lets look at a typical thermal growth on a lapse rate graph.
Figure 15 Convective cloud formation
On the day above, clouds have formed with the cloudbase at dew point and the cloud tops limited by a lack of moisture, or if there is an abundant supply of moisture, then the inversion above. Note that if the dew point had been lower, then the thermal would have risen as a blue thermal (no cloud) and could have possible been cut off lower. The SALR has a steeper gradient and thus is very unstable.
Knowledge of ELR, DALR and SALR and the effect on thermals together with dewpoint and the effect on clouds is required for the exam (hint). One other term to know is the Isothermal layer. This is an area of the atmosphere where the temperature does not change with height.
Lets take an example question.
A table showing air temperature against height is below. Dewpoint at ground is 14’C and decreases by 0.5’C per 1,000ft. SALR is 1.5’C per 1,000ft. Describe what happens.
Figure 16 Sample question ELR
If the air is very moist and the SALR is less than 1.5, then the possibility exists of the moist air rising at a steeper gradient and therefore escaping the effects of the inversion and high Cu’s or Cb’s may result.
METEOROLOGICAL TERMS
- Adiabatic - A thermodynamic process where no heat leaves or enters the system
- Advection - transfer of air mass properties by motion.
- Air mass - huge body of air in which horizontal changes in temp are small.
- Anabatic wind - Wind blowing upslope.
- Anafront - a front where warm air is ascending over cold air.
- Anticyclone - area of high pressure
- Backing - winds changes direction anti clockwise
- Convection - transfer of heat by motion of a substantial volume of air.
- Dew point - temperature at which air must be cooled to become saturated with water vapour.
- DALR - Dry Adiabatic lapse rate, about 3’C per 1000ft
- ELR - Environmental lapse rate. This is 2’C per 1000ft for the ISA.
- Inversion - a layer of air where the temperature increases with height.
- Iso - equal
- Iso therm - a line of constant temperature
- Katabatic wind - wind that flows downslope
- Katafront - a front where the warm air sinks down above the frontal surface which will eventually weaken and destroy the front.
- SALR - Saturated adiabatic lapse rate, about 1.5’C per 1000ft
- Stability - the tendency of the atmosphere to stay as it is. Unstable air, where the ELR is greater than the DALR means that a thermal will diverge from the atmospheric temperature lapse rate.
- Standard atmosphere (ISA) - has a ELR of 2’C per 1000ft
- Super adiabatic lapse rate - A lapse rate greater than 3’C per 1000ft
- Tephigram - a aerological diagram with the x.y co-ordinates Temperature and entropy. The diagram is used for plotting the values of temp and humidity at specific pressure levels obtained from upper air soundings.
- Veering - wind which changes direction clockwise.
PRESSURE SYSTEMS
As the earth is covered by atmosphere, this atmosphere exerts a pressure on us all. This pressure is measured in Bars and the pressure is about 1 bar. A bar is too large for any detail so it is divided into millibars and represented as 1000mb. The unit hectopascal may also be used and is the same as a millibar.
Low pressure
Low pressure systems are the source of a great deal of active weather in the UK. The majority of our weather systems form out in the Atlantic along the frontal boundary between the arctic airmass and the warmer tropical maritime air to the south.
Formation of a low
When 2 masses of air of different density lie side by side they induce a strong current of air to flow along the cold side of the front at very high altitudes. This jet is formed due the extreme pressure differences at altitude causing a close bunching if high altitude isobars. The jet is several miles deep and travels at speeds of about 100 to 200 mph. Disturbances cause the jet to snake around and results in areas of divergence and convergence.
Figure 19 Formation of low pressure
The area of convergence will cause downward flowing air. This results in an increase in pressure at ground level and a downward movement of air. Similarly, at the area of divergence, the surface pressure will fall and an area of low pressure will start to form.
1. The jet stream divergence will cause an area of low pressure to start to form along the frontal zone.
The low pressure will draw the 2 edges of the front together, effectively increasing the temperature and pressure differentials thus aiding the formation of the low.
Figure 20 Formation of low (1)
As the air rises it is given a twist by the Coriolis force. This coriolis force is exactly the same as the force which causes the water going down the plughole to spin. The force is zero at the equator and is the reason behind low pressure spinning anti-clockwise in the Northern hemisphere and the reverse in the southern hemisphere.
Figure 21 Formation of low (2)
Figure 22 Formation of low (3)
As the air in continually extracted at the top of the system, so the surface pressure drops increasing the circulation and the winds speeds. The anticlockwise circulation is gradually spread up to the upper levels and the upward movement of ward moist air will eventually cause condensation and the release of latent heat to further power the process.
The cold front moves faster than the warm front and catches it up. With an occlusion forming where the cold front has caught the warm front The spiralling air in the depression further twists the fronts round to give the classic “hook” shape of the depression.
Associated weather
The weather associated with a depression is usually poor. Associated frontal systems can bring rain and cloud. A depression may arrive at our shores at any stage of development and it may or may not have frontal systems. It may have a weak warm front and an active cold front or vice versa. A system with an active cold and an active warm front is very rare. It may have a decaying occlusion, but the general outlook is worsening weather.
High pressure
High pressure systems are formed in a similar way to lows, and areas of high pressure can mean areas where there aren’t any lows. In an anticyclone, the air is descending and being warmed by compression as it descends. Since warmer air can hold more moisture, then clouds are less willing to form.
This results in clear skies at night and little tendency for any over-development.
Associated weather
In summer, a high pressure system always means an improvement with lighter winds and less cloud. In winter a high pressure can mean persistent fog and low cloud or it may lead to clear skies, depending on the source and track of the airmass at low level.
High pressures move slowly and can lead to the production of inversions due to the warmed upper air. The atmosphere becomes stable (cooler air at the bottom) and leads to poor thermal production. Inversions can lead to poor air quality with pollen, dust etc. being trapped in the inversion layer. Highs can persist for days and then they become blocking highs which will often divert the path of a low pressure system around the UK.
WINDS AND THINGS
This section is concerned with the assorted bits and pieces which don’t fit anywhere else.
Valley winds
Mountains tend to form a barrier to winds at low level. The air tends to flow up and down the valley Imagine a valley with hills on both sides. In the morning, the effect of the sun is to heat up the mountains first since the valley will be cooler and still in shade:
Figure 23 Valley winds (morning)
As time reaches midday, both slopes are in sun and powerful anabatic winds are produced up both slopes
Figure 24 Valley winds (midday)
This causes the winds at low level to rush up the valley to replace the air flowing up the slopes. The valley wind flows into the valley in the afternoon and evening. As the sun goes down and the slopes start to cool off with the altitude, katabatic winds flow downslope.
Figure 25 Valley winds (evening)
In the evening, as the wind turns katabatic on the slopes, it can rush down the hill and force upwards, over the valley centre, great areas of lifting air. This is the evening restitution lift or magic lift and can give easy soaring for quite a while in huge areas of lifting air. As time goes on, the valley winds will slow down from travelling up the valley and then turn to the evening and night time valley winds where they flow down the valley.
Sea breezes
In summer, the land tends to warm up quickly, but the sea remains much at the same temperature. Thermal activity may result in a general lessening of the pressure over the land with the results that air flows in from the sea to replace the lifting air over the land. This is a sea breeze. It can kill convection and shut off any thermals near the coast so avoid sea breezes.
In winter, the sea temperatures are relatively stable and warmer than the cold land. The sea breeze is reversed and sometimes leads to Cumulus formation over the sea as cold land air is blown over the sea, to have its base warmed by the sea to produce unstable conditions over water.
Sea breeze fronts
When a sea breeze sets up, it could be in opposition to the normal wind. In this case, a sea breeze front may be formed. This front works its way inland and can penetrate as far inland as Sheffield. This is characterised by a hanging curtain of cloud and a stepped cloud base. This is due to the moist sea air having a lower cloudbase. It needs a fairly light wind, warm day and some instability to set up the sea breeze front. The evidence of a front may also be apparent even with no surface geostrophic wind (wind set up parallel to isobars. The “normal” wind.) The cool moist air flowing inland will meet the warm dry land airmass and this is also a cold front of sorts.
Figure 26 Sea breeze front
Sea breeze fronts rarely occur between October and April.
Wave lift
Another type of lift is the wave lift. The requirements for wave are:
- Wind to be in a fairly constant direction
- Wind to be increasing with height
- A shallow unstable layer with a stable layer above it works well
- An obstruction upwind such as a range of hills is needed to start the waves off
Fog
Fog is cloud on ground level and there are several types
Radiation fog
Conditions suitable for radiation fog are;
- A cloudless night, allowing the earth to cool and thereby causing the air in contact with it to become cool
- Moist air that requires little cooling to reach dew point
- Light winds to reduce mixing
Advection fog
A warm moist air mass flowing across a significant colder surface will be cooled from below. If its temperature is reduced to the dew point, then fog will form. Advection fog can persist in stronger winds than radiation fog.
Figure 27 Advection fog
Sea fog
Sea fog is advection fog and may be caused by:
- An air flow off a warm land moving over a cold sea.
- Warm tropical air moving over a cold ocean or meting a cold air mass
Hill Fog
Hill fog is caused when moist air is uplifted over a hill and cools as it is forced upwards. As it cools it condenses to form hill fog or orographic cloud.
SYNOPTIC CHART
The exam requires you to understand the symbols, isobars, pressure systems and associated weather that you could expect when checking a synoptic chart.
A typical chart is shown below.
Figure 28 Synoptic chart
Pick out features such as:
- Areas of high pressure and low pressure
- Isobars
- Frontal systems
Remember about the Coriolis force and its effect on both high and low pressure systems The Coriolis force means that in the Northern Hemisphere, the geostrophic wind circulates anticlockwise round a low and clockwise round a anticlyclone (high pressure). The winds rotate in the same direction as the isobars, but this is only true for winds at altitude (over about 1,000ft). The effect of the ground causes friction which slows down the surface winds.
Figure 29 Rotation around pressure systems
Figure 30 Surface wind around a low
The surface wind around a low pressure points to the low pressure by about 30’ over land due to the friction. This effect is less over the sea where the friction is less.
The surface wind around a high pressure points away from the high pressure area by again about 30’ due to the friction. The wind speed also decreases in both cases
Figure 31 Surface wind around a high
Think of the affects on the atmosphere such as wind speed and direction, temperature, precipitation, cloud cover and visibility.
By the way, the above chart was taken in Jan 96 when we were in the depths of the icy winter. Winds were from the East (Siberia) and as the base of the winds warmed up slightly over the North Sea, this resulted in instability with snow showers over the eastern coast and hills. The high pressure fended off any frontal system and allowed the temperatures to plummet during the evenings. Blocking highs like this can (and did) last for several days. The chart was taken as the cold weather was dying off. The frontal systems in the Atlantic did eventually make their way in and the winds switched direction to the West or South West raising the temperatures and bringing the normal weather of showers, winds etc.
CLOUDS AND RAIN
Rain or precipitation can consist of different types of precipitation. It may be rain, fine drizzle, snow or hail.
Continuous rain or snow is associated with Nimbo stratus and alto stratus clouds and intermittent rain or snow with altostratus or strato cumulus.
Rain and snow showers are associated with cumiliform clouds such as cumulonimbus, cumulus and alto cumulus, with the very heavy showers coming from the cumulonimbus’s
Fine drizzle and snow is associated with stratus and strato cumulus.
REFERENCES AND ACKNOWLEDGEMENTS
- Understanding flying weather - Derek Piggott.
- Air pilots manual volume 2.
- Meteorology and flight - Tom Bradbury.
- Instant weather forecasting - Alan Watts.
Air Law
Intermediate Pilot Exam Notes - Airlaw
[Yet to be updated to include the new Air Navigation Order]
CONTENTS:
- IRISH AVIATION LAW DOCUMENTS AND PROMULGATION METHODS
- THE POWER OF THE IRISH AVIATION AUTHORITY TO MAKE ORDERS
- THE RELATIONSHIP BETWEEN IAA REGULATORY REQUIREMENTS AND THE REQUIREMENTS OF OTHER BODIES
- GLIDER RADIOS
- Airband radio
- 2m Amateur radio
- The Phonetic Alphabet
- AIRSPACE CLASSIFICATIONS
- IRISH MILITARY AIRSPACE
- Restricted Airspace (EIR)
- Prohibited Airspace (EIP)
- Dangerous Airspace (EID)
- Military Operating Areas (MOA)
- Military Frequencies
- SUMMARY OF UTILISED AIRSPACE IN IRELAND
- AERONAUTICAL CHARTS
- AERODROME TRAFFIC ZONES (ATZ)
- ALTIMETER SETTINGS
- QNH - Questionable Nautical Height
- QFE - Questionable Field Elevation
- QNE
- FLIGHT LEVEL
- RULES OF THE AIR AND COLLISION AVOIDANCE
- VMC and VFR
- COMMON AERONAUTICAL ABBREVIATIONS AND INITIALS
Irish aviation law documents and promulgation methods
The Irish Aviation Authority Act, 1993, as amended, provides for the establishment of the Irish Aviation Authority, to provide certain services in relation to civil aviation, to define its functions and to provide for the conferral on it of certain functions of the Minister for Transport under the Air Navigation and Transport Acts, 1936 to 1988, and the Air Navigation (EUROCONTROL) Acts, 1963 to 1983. The IAA, through their website www.iaa.ie, publish the following information for aviators:
- The Integrated Aeronautical Information Package (IAIP) comprises:
- The current Aeronautical Information Publication (AIP)
- AIP Supplements
- Aeronautical Information Circulars (AIC).
- Notices to Airmen (NOTAM) - These contain information on any aeronautical facility, hazard etc. which might be of use to pilots. They are available to be read on-line at www.iaa.ie.
The Power of Irish Aviation Authority to make Orders
The Irish Aviation Authority (IAA) is a commercial state-sponsored company which was established on 1 January 1994 to provide air navigation services in Irish-controlled airspace, and to regulate safety standards within the Irish civil aviation industry. Under Section 58 (1) of the Irish Aviation Authority Act 1993 the Authority has the power to make orders and regulations as necessary or expedient for the purpose of giving effect to the Annexes to the Chicago Convention.
The Relationship between IAA Regulatory Requirements and the Requirements of Other Bodies
The Irish Aviation Authority specifies its requirements for licences, certificates, approvals, permits and matters of that nature. These equirements must be met in order to obtain and/or continue to exercise the privileges of the licence or other form of approval issued by the Authority. In many cases other legislation, including legislation which is not specifically directed at aviation, also applies to the activity and Government departments or other statutory bodies have responsibilities in the area. It is the duty of the regulated party to ensure that it acquaints itself with all requirements affecting its activities and to ensure that it complies with those requirements. The Authority wishes to stress that any licence or other decision of the Irish Aviation Authority does not remove the obligation on regulated persons to comply with other legal requirements relating to the activity.
Glider radios
There are 2 types commonly in use in hang gliding and paragliding:
- Airband radio - The airband radio is AM and has 720 channels, of which gliders are allocated 5. The airband radio must be type approved. This means that the maker must have submitted a radio of the same type to the IAA who have then taken it to bits and said its OK to use. Without taking a RT test, glider pilots are limited to 5 frequencies (129.9, 129.975, 130.1, 130.125, 130.4 and the International Distress frequency of 121.5). The British Gliding Association recommend that certain frequencies be allocated certain tasks such as ground to air etc. Radios used by glider pilots in this way must be type approved and lockable to those frequencies only. Recently the UK's CAA approved the allocation of 118.675 for exclusively our use. This is Ok for our use anywhere in the UK FIR up to 5,000ft asl. Approval for the radio type must be sought and a licence held for the radio.
- 2m Amateur radio - In Ireland Radio Amateurs have use of many frequency bands including 144 to 146 MHz on FM. All of this band is in use. A lot of pilots use the frequencies just below this range for flying use - 143.750MHz to 143.950MHz. It is illegal to use a 2m set from the air, whether you are a licensed amateur or not.
- The Phonetic Alphabet - The commonly used radio-code for letter abbreviations:
|
|
|
|
|
|
|
|
|
|
|
|
|
|
|
|
|
|
|
|
|
|
|
|
|
|
|
Airspace Classifications
- Class A - IFR flights only are permitted. All flights are subject to air traffic control and are separated from each other
Airspace Classification A comprises:- Shannon Oceanic Transition Area (SOTA) and Northern Oceanic Transition Area (NOTA) at and above FL55 to Unlimited
- Class B - Not utilised in Ireland
- Class C - IFR and VFR flights are permitted. All flights are subjest to air traffic control service and IFR flights are separated from other IFR flights and from VFR flights. VFR flights are separated from IFR flights and receive traffic information in respect of other VFR flights
Airspace Classification C comprises:- Shannon UTA FL245 - FL660
- Shannon CTA at and below FL245
- Dublin CTA at and below FL245
- CTRs Cork, Dublin and Shannon
- CTRs Connaught, Donegal, Galway, Kerry, Sligo and Waterford during the promulgated hours of activation
- Class D - Not utilised in Ireland
- Class E - Not utilised in Ireland
- Class F - Not utilised in Ireland
- Class G - IFR and VFR flights are permitted, and receive flight information if requested
Airspace Classification G comprises:- all airspace within Shannon FIR, excluding airspace classified C as described above
Irish Military Airspace
A restricted area is defined airspace in which flight is restricted according to certain conditions. Penetration possible by civil aircraft provided prior permission has been obtained from, and subject to compliance with any conditions and instructions issued by Military ATS, Casement Aerodrome. Aircraft must be operational Mode C transponder equipped.
- EIR15 - Within Dublin CTR Class C airspace
- Winter Period - Mon-Fri 0900-1700UTC
- Summer Period - Mon-Fri 0800-1600UTC
- At other times as notified to Dublin and Shannon ATC
- See AIP ENR 5.1-1
- EIR16 - Within Dublin CTR Class C airspace
- Winter Period - Mon-Fri 0900-1700UTC
- Summer Period - Mon-Fri 0800-1600UTC
- At other times as notified to Dublin and Shannon ATC
- See AIP ENR 5.1-1
- EIR22 - Circle 1NM radius 542932N 0081440W
- Operational 24hrs/day
- See AIP ENR 5.1-2
- EIR23 - Within Dublin CTR Class C airspace
- Circle 1NM radius 531800N 0062652W
- Operational 24hrs/day
- See AIP ENR 5.1-2
A prohibited area is defined airspace in which flight is prohibited. These include military camps, prisons and certain other facilities. In Ireland they usually extend from the ground up to 5000ft AMSL. EIPs are deliniated by a solid red boundary filled with thin red hatch lines.
These include military weapons ranges for guns, missiles and rockets. Entry into some danger areas is prohibited by military bye-law. A crossing service may be available but will involve the use of radio. A danger area is defined airspace in which activities dangerous to flight may occur. They are shown as a dashed red outline filled with thin red hatch lines.
- MOA3
- Winter Period - Mon-Fri 0900-1700UTC
- Summer Period - Mon-Fri 0800-1600UTC
- At other times as notified to Dublin and Shannon ATC
-
See AIP ENR 5.2-1
- MOA4 - as above.
- MOA5 - as above.
- Baldonnell Tower - 123.5MHz
Summary of Utilised Airspace in Ireland
| Class |
Type |
Separation Provided |
Service provided |
VMC visibility and distance from cloud minima |
Speed Limitations |
Radio
Communication
requirement
|
Subject to ATC clearance |
| A | IFR only |
All aircraft |
Air traffic control service |
Not applicable | N/A |
Continuous two-way |
YES |
| C | IFR |
All |
Air traffic control service |
Not applicable |
N/A |
Continuous two-way |
YES |
| VFR | VFR from IFR |
Air traffic control service for separation from IFR. Traffic information and traffic avoidance advice on request. |
At and above FL100: 8km visibility, 1500m horozontal and 1000ft vertical from cloud. Below FL100: 5km visibility, 1500m horozontal and 1000ft vertical from cloud. |
250kts IAS below FL100 |
Continuous two-way |
YES | |
| G | IFR | Not provided |
Flight information service if requested | Not applicable |
N/A |
Not Required |
Not Required |
| VFR | Not provided |
Flight information service if requested. |
At and above FL100: 8km visibility, 1500m horozontal and 1000ft vertical from cloud. Below FL100: 5km visibility, 1500m horozontal and 1000ft vertical from cloud. OR At and below 3000ft AMSL or 1000ft above terrain (whichever is greater): 5km (3km for flight at IAS 140kts or less) visibility. Clear of cloud, in sight of surface. Helicopters may be flown below 300m (1000ft) above terrain in flight visibility not less than 1000m if manoeuvred at a speed which would give the pilot in command adequate opportunity to observe other traffic or obstacles in good time to avoid collision. |
250kts IAS below FL100 |
Not Required |
Not required |
Aeronautical Charts
- 1:500,000 VFR Chart - The Irish Aviation Authority visual flight rules (VFR) aeronautical chart has been produced in both laminate and paper versions. The chart is intended for VFR navigation within the boundaries of the Shannon FIR. This chart is most suitable for planning hang gliding and paragliding flights in Ireland.
- 1:250,000 VFR Chart - The Irish Aviation Authority visual flight rules (VFR) aeronautical charts have been produced in both laminate and paper versions. The purchaser can buy either version but will get four charts on two sheets of paper covering the Shannon FIR in one plastic wallet. The chart is intended for VFR navigation within the boundaries of the Shannon FIR
Make sure you know the symbols and the airspace markings on this map
Aerodrome Traffic Zones (ATZ)
The airspace surrounding most aerodromes listed in Ireland is designated an ATZ. The dimensions are:
- from ground level to 2,000ft above aerodrome level
- within the area bounded by a circle of radius:
- 2nm, where the length of the longest runway is 1850m or less
- 2.5nm where the length of the longest runway is 1850m or longer
Figure 1 - ATZ Dimensions
The number alongside the symbol on the chart shows the aerodrome height above sea level.
Flying inside the ATZ requires radio contact with the responsible party and so in the main we cannot go there, unless we have our RT pass and a radio and know what to do.
Altimeter settings
Vertical distance (altitude) is hard to measure accurately. Most altimeters work by measuring the change in air pressure as you gain height. Pressure reduces about 1 millibar (1mb) per 30ft of height gained. At higher levels this relationship is not linear but good enough for us. Note that millibar is the same as hectopascal. Hectopascal might be used in more metricated countries - it means the same - but in Ireland, the millibar is used for the moment.
There are 3 ways of height representation.
- QNH - Questionable Nautical Height - QNH is given by Air traffic control as a pressure reading that the pilot sets on his expensive altimeter. The altimeter then displays his height above Sea level. The ATC will broadcast the regional QNH to aircraft to take account of pressure changes caused by atmospheric conditions to make sure the pilot does not crash into a hill unexpectedly.
- Imagine a deep low over the UK and the pilot is flying from the outside of the low (where the pressure is higher) to the inside of the low (where the pressure is lowest), If the pilot keeps to the same displayed altitude on his altimeter as he flies into the low what happens. As the pressure outside the aircraft falls, the altimeter will show a higher altitude (lower pressure = higher altitude) and so the pilot will descend the keep the displayed altitude the same. The pilot does not know he is descending since he is watching his altimeter and its reading the same. Unfortunately for him, he is descending!!
- So QNH is a pressure setting given by ATC and is the current pressure reading at Mean Sea Level.
- QFE - Questionable Field Elevation - If our pilot is landing at a small airfield with not many facilities, then QNH might not be accurate enough for him to land without hitting some houses maybe. The pilot needs the pressure setting for the airfield. ATC might say "QNH is 1015mb, QFE is 1000mb". I.e. the air pressure at this airfield is 1000mb. So by setting the altimeter to this, we get the height above the airfield.
- So QFE is a pressure setting by ATC and is the current pressure reading at the airfield now.
- In general hang gliding and paragliding, when we say QNH it is the height above sea level, and when we say QFE is it the height above "the field", maybe takeoff or landing - its up to you
- QNE - This one is the strange one. QNE refers to the height indicated on a pressure altimeter when the aircraft is on the ground at an aerodrome and the pressure setting of 1013.2mb (remember this) is set on the sub scale. i.e. it is the height of the 1013.2mb pressure level. Note that this is the only reference which is a height, the others are pressure settings.
Flight level
Shown on charts as FL something. FL65 is flight level 65 which is 6,500ft... but what is it for?
Airlines flying everywhere would have to keep adjusting their altimeter every 10 minutes to make sure that the height they should be at is the height that are indeed at and not at the height displayed by their altimeter which has drifted out of alignment in the last 5 minutes due to rapidly changing air pressure outside the cabin. Since all aircraft, once they are high enough can forget about the ground - its more important to keep away from each other so they all use the same pressure setting on their altimeters. The International Standard Atmosphere (ISA) sea level pressure of 1013.2mb is used and then vertical position is called flight level.
As an aircraft climbs away from the airport, once past the transition altitude, he retunes his altimeter to 1013.2mb and so everyone else who does the same can keep accurate relative distances apart. In the UK the transition altitude is 3,000ft.
It is worth remembering that flight levels go up in regions of high pressure and the reverse in regions of low pressure. Thus in a deep depression, Buxton (first stop after Shining Tor) which is in Daventry Control Area, Class A airspace starts at flight level 45, could have its airspace lower limit reduced to 3,500 ft - worth knowing.
Rules of the Aid and Collision Avoidance
The rules of the air as they pertain to hang gliding and paragliding in Ireland are set out in detail on the IHPA website Flight Safety page:
All pilots are required to know these collision avoidance rules by heart and to always fly with consideration for other pilots in the air.
VMC and VFR
VMC = Visual Meteorological flying conditions. This refers to the amount of visual observance it is possible to keep. In these conditions we fly under VFR or Visual Flight Rules.
A quick note on these. In Ireland an aircraft shall always be flown in accordance with either VFR or IFR. When you are in VMC you are flying under VFR (Commercial pilots may elect to still fly IFR even if there is sufficient VMC) and responsible for avoiding collisions with other aircraft using the principle of see and avoid. You are flying in IMC when you cannot comply with any of the VMC cases.
Note the different types of visibility that are in different types of airspace. Refer to the Summary of Utilised Airspace in Ireland above. You have to know what conditions are like when you enter a specific type of airspace, usually the nearer to "A" the airspace, the more stringent the visual conditions become. The most stringent is full VMC which is 8km flight visibility, 1500m horizontal/1000ft vertical clearance from cloud. This is in class A airspace that we might be allowed to enter (i.e. crossing airways). The least VMC or VFR minima is 1500m flight visibility, clear of cloud and in sight of the surface, which is at under 3,000ft in class F and G airspace.
Common abbreviations and initials
ACAS - Airborne Collision Avoidance System
AGL - Above ground Level
AIAA - Area of Intense Aerial Activity
AIP - Aeronautical Information Publication
AIS -Aeronautical Information Service
AMSL - Above mean Sea Level
ASR - Altimeter setting Region
ATC - Air traffic Control
ATM - Air Traffic Management
ATS - Air Traffic Services
ATZ - Aerodrome Traffic Zone
CTA - Control Area
CTR - Control Zone
DME - Distance Measuring Equipment
EATMP - European Air Traffic Management Programme
FIR - Flight Information Region
FL - Flight Level
FUA - Flexible Use of Airspace
GA - General Aviation
GAT - General Air Traffic
GBAS - Ground Based Augmentation System
GNSS - Global Navigation Satellite System
HF - High Frequency
HIRTA - High Intensity Radio Transmission Area
IAA - Irish Aviation Authority
IAC - Irish Air Corps
ICAO - International Civil Aviation Organisation
IFR - Instrument Flight Rules
ILS - Instrument Landing System
IMC - Instrument Meteorological conditions
ITU - International Telecommunications Union
LFS - Low Flying Services including SAR
MATZ - Military Air traffic Zone
NDB - Non-Directional Beacon
OAT - Operational Air Traffic
QFE - Query Field Elevation
QNH - Query Nautical Height
SAR - Search and Rescue
SRA - Special Rules Area
SRZ - Special Rules Zone
TMA - Terminal Manoeuvring Area
TRA - Temporary Restriction Area
UHF - Ultra High Frequency
UIR - Upper Information Region
VHF - Very High Frequency
VFR - Visual Flight Rules
VMC - Visual meteorological Conditions
Operating Limitations
Para Pro 5 (Advanced) Pilot Operating Limitations
Having been awarded a Para Pro 5 (Advanced) pilot rating, the pilot is advised to observe the following operating limitations until such time as they have gained many more hours of flying experience in diverse conditions. It can not be over emphasised that every pilot must remain mindful of their personal skill and experience limitations and that they should set and not be tempted to fly in stronger conditions than they (and their equipment) can safely handle.
- Responsible pilots never fly alone. If they are not flying with other pilots, then they stay in contact with someone on the ground who can look out for them and retrieve them should they fly cross country or get into difficulties.
- Pilots training towards Para Pro 5 must fly with a 2m-band two-way radio.
- Pilots training towards Para Pro 5 must fly with a properly adjusted “Speed Bar” system attached to their harness and wing on all flights.
- Pilots training towards Para Pro 5 must fly with, and know how to use, an appropriately sized reserve parachute on all flights.
- Pilots training towards or applying for a Para Pro 5 rating must be current members of the IHPA and have a current insurance policy.
- Pilots training towards Para Pro 5 are advised not to fly in winds exceeding 15mph (25Km/h) blowing within 45° of straight up the hill.
- All flights must be written up in the Pilot’s Log Book.
Skill Endorsements
Introduction
Paragliding Skill Endorsements - Introduction
Note: There are no endorsement courses for converting between main disciplines (HG<>PG). The following conversion information relates only to alternative launch method courses.
Where a candidate has less than the required entry qualification the endorsement course cannot be attempted. A suitably qualified instructor always has the option of putting the candidate through the training programme leading to a ‘rating’ in the desired launch method.
Skill Endorsements
Pilot rating endorsements are available to those pilots who gain additional skills by attending relevant conversion courses in their particular flight discipline. Pilot rating endorsements are available for the following disciplines:
- Hill: All pilots are required to be able to hill-launch in Ireland. Pilots who trained using a winch or aerotow system are required to complete a Hill Conversion Course before they may fly in Ireland.
- Winch: This endorsement is available to all pilots.
- Tow: This endorsement is available to Hill and Aerotow pilots.
- Tandem: This endorsement is available to all pilots.
- Power (PPG): This endorsement is available to all pilots holding a Para Pro 3 (Novice) pilot rating or above.
- Note: PPG is a skill endorsement to a pre-existing pilot rating and is separate to the Paramotoring licence, which assumes no prior training or skill with a paraglider or paramotor canopy.
For details of Conversion Courses see the 'Training & Endorsements' section of the IHPA Operations Manual.
Hill Launch
Paragliding Skill Endorsements - Hill
Paraglider (Tow) to Paraglider (Hill) - The ‘Hill Endorsement’
- Course run by: Instructor (Hill).
- Pilot Entry Qualification: Para Pro 3 (Tow)
Course Syllabus:
- At training slope master ground handling, take-off techniques.
- Ridge soaring theory. To include site assessment (including hazards, turbulence and rotor), weather assessment (including wind gradient on slope face, the effects of the wind being slightly off the hill, venturi effect), flight planning (including the importance of making all turns away from the hill, building in options). Rules of the Air / ridge protocols and the need to keep a good look out.
- At large easy ridge site master higher launches, ridge soaring practical, top landings, flying with others.
Pass an assessment by the supervising Instructor (Hill).
Endorsement Issue Procedure
On successful completion of the endorsement course the pilot must send a completed Endorsement Registration Form to the IHPA Training & Flight Safety Officer.
Providing the procedure above has been followed, the pilot may act in the role of Endorsed pilot whilst awaiting an updated membership card from the IHPA.
Tow Launch
Paragliding Skill Endorsements - Tow
Paraglider (Hill) to Paraglider (Tow) - The ‘Tow Endorsement’
- Course run by: A Senior Tow Coach or Instructor (Tow).
- Pilot entry qualification: Para Pro 3 (Hill) and have logged a minimum of 10 flying hours.
Course Syllabus:
- Basic training in the differences in environment, techniques, equipment and signals
- Practical training covering inflation and launch methods whilst attached to the tow line.
- Sufficient towed flights to gain an appreciation of the control-under-tow, and subsequent self release skills.
- A total of 10 flights minimum.
- Emergency procedures.
Pass an assessment by the supervising Instructor or Senior Tow Coach.
Endorsement Issue Procedure
On successful completion of the endorsement course the pilot must send a completed Endorsement Registration Form to the IHPA Training & Flight Safety Officer.
Providing the procedure above has been followed, the pilot may act in the role of Endorsed pilot whilst awaiting an updated membership card from the IHPA.
Tandem Pilot
Powered Pilot (PPG)
Paragliding Skill Endorsements - PPG
FLPA Licence
This page needs to be updated to reflect the IAA's new Paramotoring Licence
There are two entry routes to flying a paraglider under power in Ireland:
- Paraglider pilots holding a Para Pro 3 (Novice) pilot rating (or above) may complete supplementary training and apply for a PPG Skill Endorsement, or
- People with no prior training in paragliding may enroll in a Paramotoring School and train specifically to qualify as a Paramotor Pilot, which is a different skill set to pure, free-flight paragliding.
Powered Hang Gliding (PHG) is only available as a Skill Endorsement to an existing Safe Pro 3 (Novice) pilot rating.
The IAA is in the process of developing a licencing system for the operation of Paramotors and Powered Hang Gliders but, until this has been finalised, the IAA require all FLPA pilots to apply for an Exemption (to the licencing system). The current rules for applying for an Exemption are summarised below. However, until the details of the FLPA Licence is finalised, pilots wishing to fly with a power unit should contact the IAA directly to confirm the requirements of the Exemption and their obligations.
The main rules governing Paramotoring in Ireland are summarised here:
1. Pilots must hold a valid Class 2 medical at the time of any flight.
2. All Flights must be conducted in daylight Visual Meteorological Conditions (VMC) under Visual Flight Rules (VFR) and in Class “G” airspace below 5,000ft above Mean Sea Level (AMSL).
3. No flight may be made at any height over:
a. Any town, City or built-up area.
b. Any area of commercial, residential or recreational use.
c. Any open air assembly of persons, whether gathered in connection with an event of public entertainment or otherwise.
4. No passenger may be carried on any flight. (unless instructor)
5. No flight shall be made for hire or reward or for any valuable consideration.
6. The pilot shall maintain a record of all flights made under this exemption in a suitable log book.
7. The pilots log book and Exemption shall be made available within a reasonable period to:
a. An authorised Officer of the Authority.
b. A member of the Garda Siochana.
c. An officer of the Customs and Excise.
8. Any accident involving substantial injury or death of any person or substantial damage to the equipment being used for flying shall be reported in writing to the Authority, irrespective of any liability to report the same information to the Air Accident Unit of the Department of Transport.
9. Any flight made under the exemption shall be in compliance with the requirements of the airworthiness Standards Department of the Authority.
10. The exemption shall only be valid while the insurance cover is active.
11. The current exemptions are valid for one year only.
These rules may soon be amended when a license system is put in place.